This series follows my attempt to develop a product that I dream of getting into the elite levels of hockey. Previously on the Quest: Part 1, 2, 3, 4, 5, 6, 7, 8, 9, 10, 11, 12, 13, 14, 15, 16, 17, 18, 19, 20, 21, Concept Launch, 22, 23, 24, 25, 26, 27, 28, 29, 30, 31, 32, 33, 34, 35, 36, 37
October 1st was my deadline for building a prototype (which I did) that was ready to see the ice (which it’s not).
I’m sure you’re wondering what happens now, so I’ll just get that out of the way first. For me, it means that I am back in the market for a job. (If you’re interested in hiring me, please get in touch at surjan [at] fastmail.com!) As for the Uncage, I’ll be taking a little pause.
I’ll delve deeper into my thoughts about my and the Uncage’s future in the next post. But for this post, I want to focus on my last prototype.
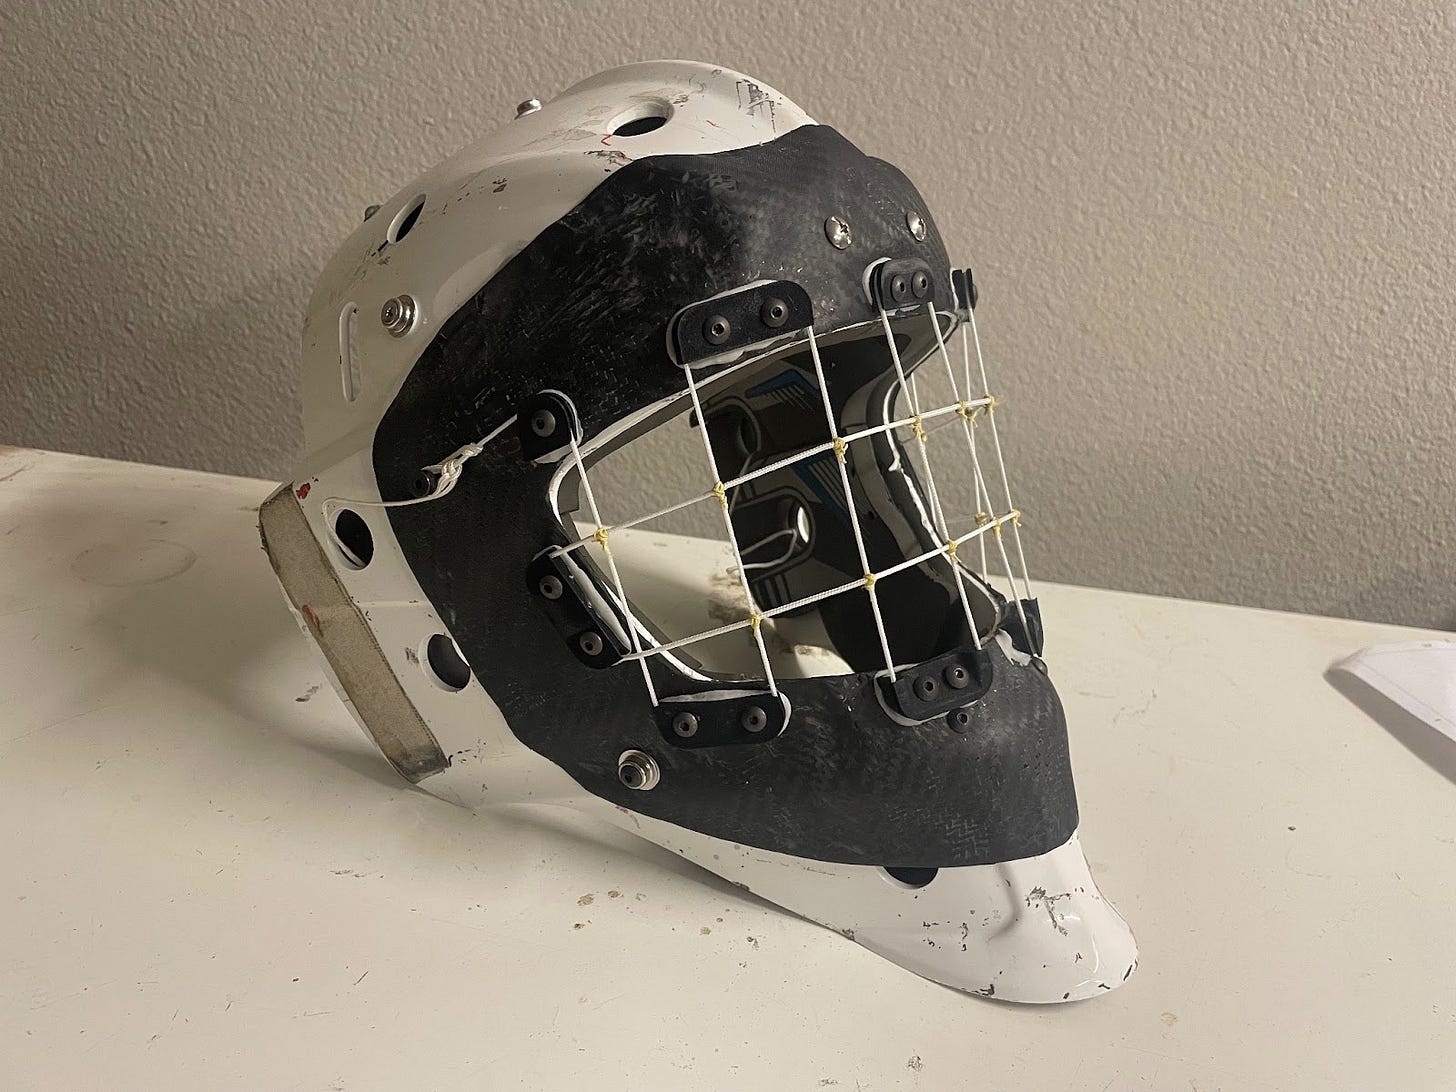
The goal of this version was to connect the rope that makes up the cage as directly as possible to the helmet. My plan to achieve that goal was to glue and fasten guide blocks (shown above) directly to the helmet.
The only issue with that plan was the flexibility of the helmet. In previous prototypes, when the puck hit the cage, the chin and forehead of the helmet would pinch together from the tension in the rope. That pinching would create slack in the rope, allowing pucks to get uncomfortably close to my test dummy’s head.
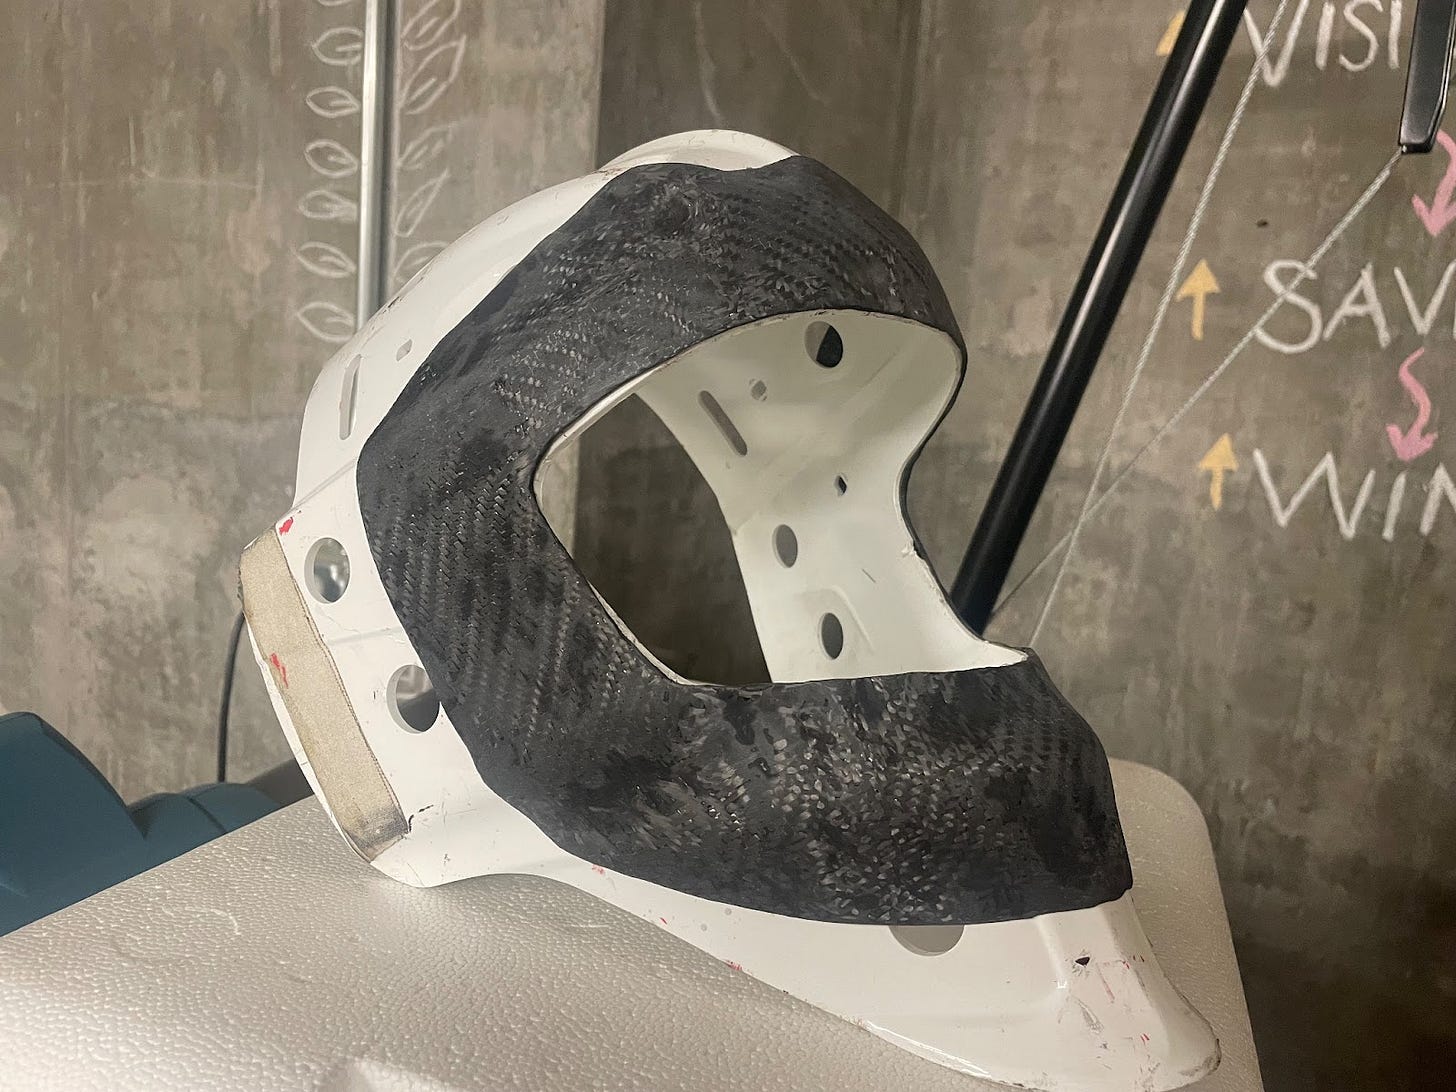
My solution, like any engineer with an aerospace background, was to throw carbon fiber at it.
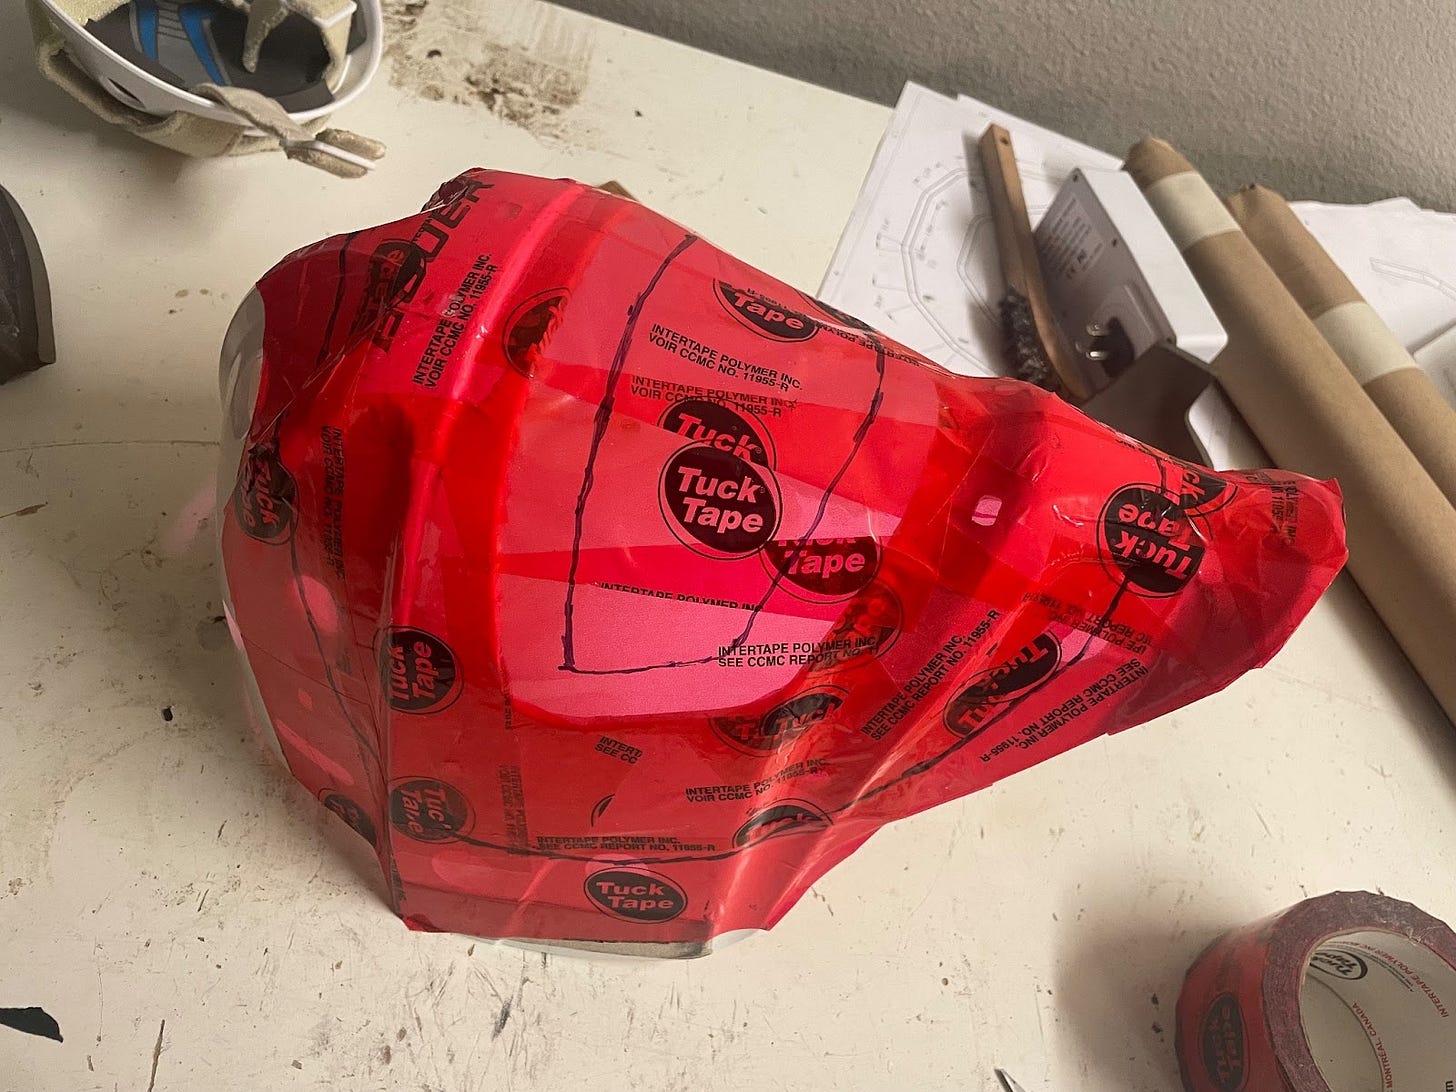
Step one was to tape over the mask, creating a mold surface to which the carbon fiber wouldn’t stick.
Step two was to finish the rest of the part.
And trim.
If, for some reason, you need more detail between steps 1 and 2, I’d direct you to your friendly neighborhood Google. My carbon fiber skills aren’t good enough to pass on, other than two tips for fellow budget-conscious builders. 1. Use vacuum storage bags like this one to bag your part. 2. Use this Dremel bit to trim your part.
But back to the build: I began to attach the guide blocks (which I had 3D printed out of nylon) to the helmet with increasing permanence. First with clamps to dial in the position,
followed by hot glue to hold the blocks in place while I drilled holes,
through which I threaded fasteners, which held the blocks in place as I applied epoxy.
The result was a sandwich of guide block, epoxy, carbon fiber stiffener, and helmet – secured with a nut and screw.
This created a very stable platform on top of which I could tension a rope and strum a little song.
The end result came out surprisingly clean (if you ignore all the screws poking into the helmet).
As always, I let my cage enjoy its existence for a night before I began testing. It never felt right going straight from creation to destruction without at least a pause in between.
By now you’re familiar with my testing setup – I shoot balls from a pitching machine at the cage until something breaks.
Usually something goes catastrophically wrong within the first ten shots. At best, I think I’ve gone around 50. Not this time. This time, failure was at shot 133.
133!
In the end, it was a flange that broke off, causing the rope to slip off its guide.
At least I can rest easy in the knowledge that I couldn’t have foretold this failure or done anything about it beforehand.
It’s certainly not a difficult failure to fix. But it wasn’t just this failure that stood between me and a rink-ready prototype.
I also needed to sort out a better connection between the horizontal and vertical ropes; the Kevlar thread I’ve used has consistently come undone. And I needed to add in something to lift the cage away from the goaltender’s nose; I’d intentionally simplified this version to evaluate the guide block idea on its own. Lastly but not leastly, I needed to evaluate how the stiffening of the helmet affected the rest of its functionality; I wouldn’t want to make taking a shot to the helmet more dangerous.
Looking at that list, I don’t feel like I’m just a few weeks away from being done, so I’m very much at peace with my decision to take a break and jump back into the job force. I’m also really happy with how this prototype turned out — it seems like a solid stepping stone for future explorations. Again, I’ll talk more about those future plans in the next post.
Until then, as always, thank you for reading and for your support.
Surjan


![[cut output image] [cut output image]](https://substackcdn.com/image/fetch/$s_!2F-9!,w_1456,c_limit,f_auto,q_auto:good,fl_lossy/https%3A%2F%2Fsubstack-post-media.s3.amazonaws.com%2Fpublic%2Fimages%2Fb3ce2a07-7f93-4640-9a91-0e3dd2b8237f_600x338.gif)


I know next to nothing about ice hockey and any type of protocols that may be followed if a keeper’s helmet is impacted during a match. As a cricket fan I can say that whenever a helmet is hit there is an inspection of any damage as more than likely the helmet will be changed.
Does your solution really need to withstand 100+ hits or is it more like a motorcycle or cycle helmet where any impact renders it unsuitable for further use?
"Lastly but not leastly, I needed to evaluate how the stiffening of the helmet affected the rest of its functionality; I wouldn’t want to make taking a shot to the helmet more dangerous."
As a goalie I can tell you that a stiffer helmet than the one you are using is a lot better (in fact the nme 30 you are using and similar low price helmets are usually referred to as "widow-makers" because they do not offer nearly enough protection for any level of play.
Any decent mask will have a shell that is a lot stiffer than the polycarbonate one you are using now. They will at least be made out of a fiberglass composite while the pro level models are always made out of carbon fiber.
It might actually be advantageous for your current design to use a stiffer, more high level mask, since you are relying on the mask as the support for the ropes, although the price point might be problematic (maybe you can find a goalie in your area who is willing to sacrifice a retired mask).