An Inventor's Quest for the NHL Pt. 24
Failure! Embarrassment!
This series follows my attempt to develop a product that I dream of getting into the elite levels of hockey. Previously on the Quest: Part 1, Part 2, Part 3, Part 4, Part 5, Part 6, Part 7, Part 8, Part 9, Part 10, Part 11, Part 12, Part 13, Part 14, Part 15, Part 16, Part 17, Part 18, Part 19, Part 20, Part 21, Concept Launch, Part 22, Part 23
I just had a couple of pretty embarrassing failures. But before I tell you about them, let me soften you up with tales about my hard work so that your reaction is suitably sympathetic.
A few weeks back, I reached out to my college buddies to see if they would be interested in doing a weekly engineering review with me. They’re (mostly) pretty smart guys and, from experience, I knew they wouldn’t pull any punches.
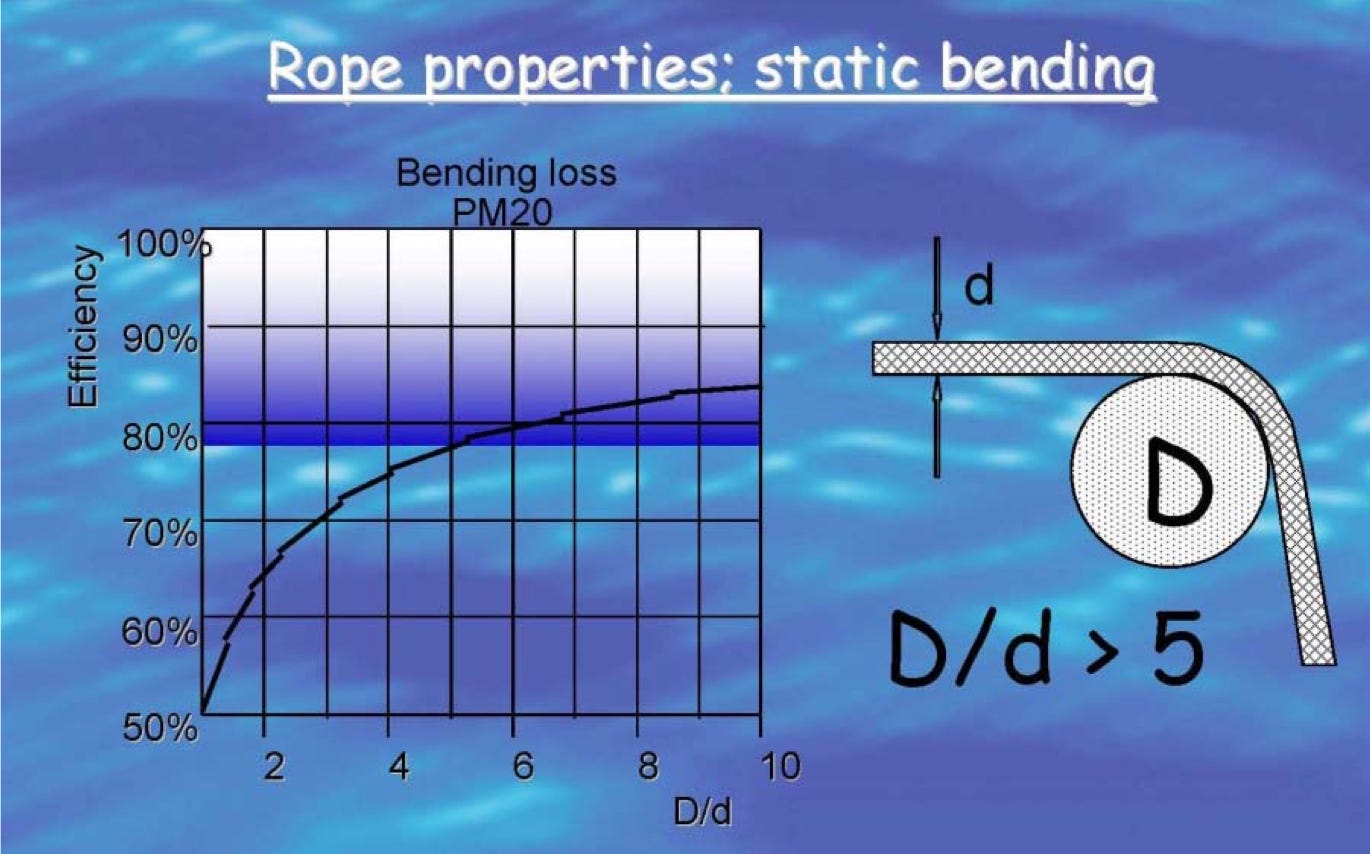
In the first review, my friend Jimmy asked about the manufacturer-suggested minimum bend radius for the rope that forms the bars of the Uncage. From his experience in rock climbing, he knew that was a big point of emphasis from rope manufacturers. I did not know that.
After a bit of research I found the graphic below, which suggested a bend radius of five times the diameter of the rope.
The good news was that the review worked exactly as I’d hoped by showing me a viewpoint I hadn’t considered before. The bad news was that I had to rethink my design.
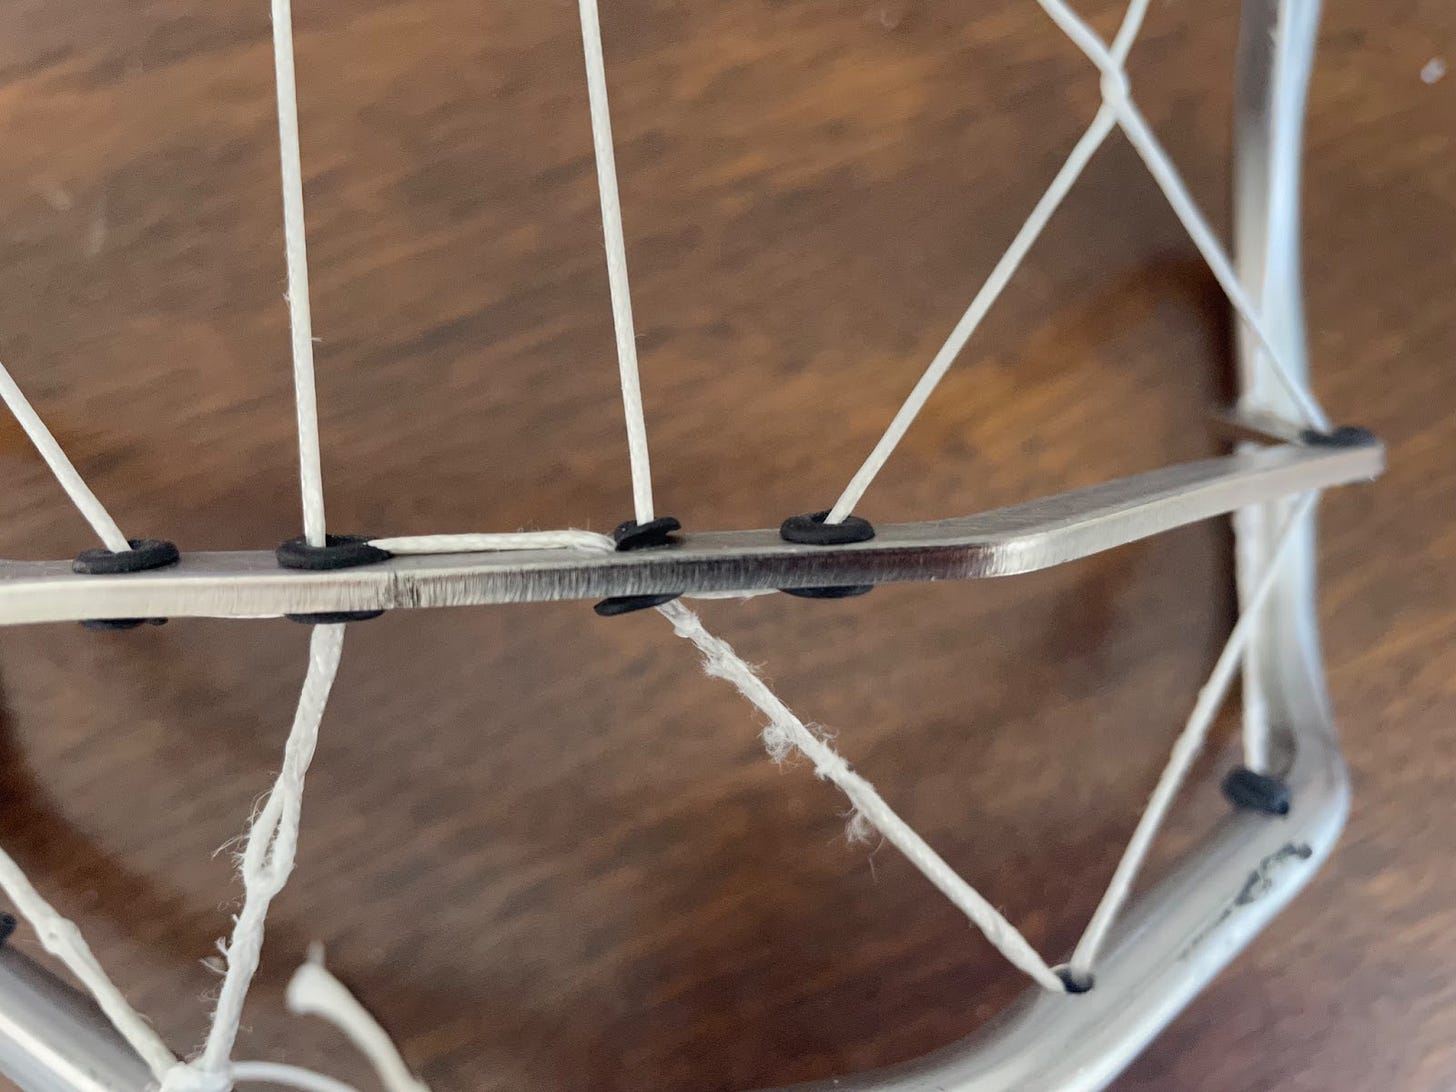
In the “concept launch” version of the Uncage, the rope took a very sharp turn over a hard metal edge every time it passed through the frame or the crossbar. (Probably less than 1x the diameter of the rope.) The rubber grommets were an attempt to keep the rope from chafing, but didn’t do anything to make that radius bigger. And actually, they didn’t do so great at stopping the chafing either, because they just squished out of the way.
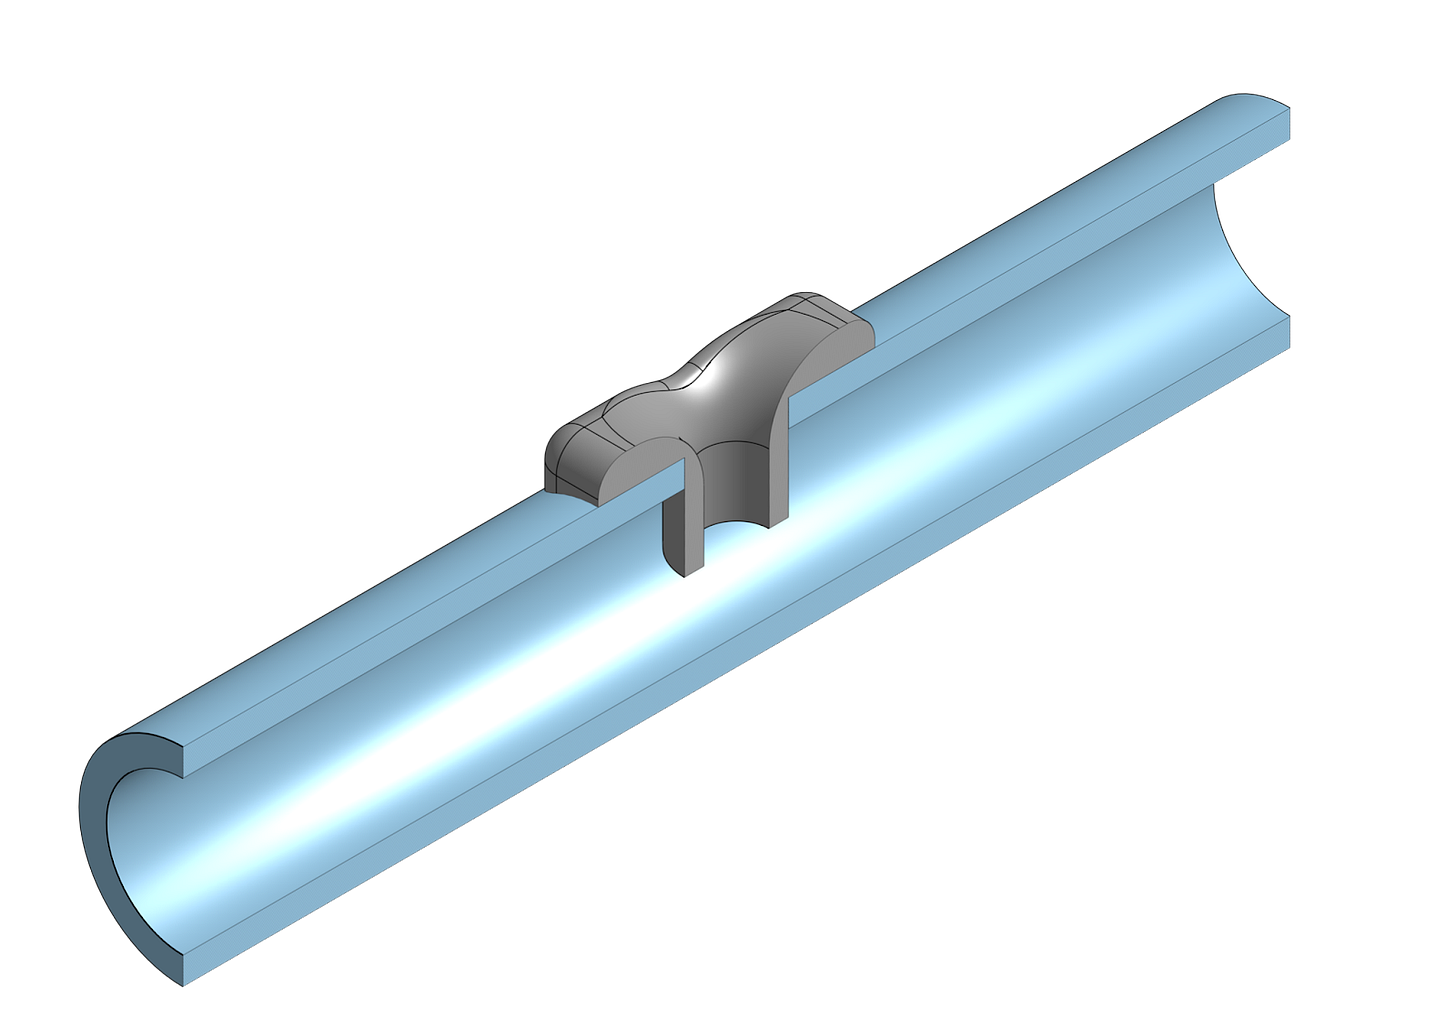
My first thought was to make some 3D printed inserts, but after some time in CAD, I wasn’t very happy with the result.
This insert would only give me a 3x bend radius, but already it was sticking out .060” or 1.5mm above the bar. If I had to use these on the crossbar, they would really impact the visibility. Just an ugly solution that I didn’t want to pursue.
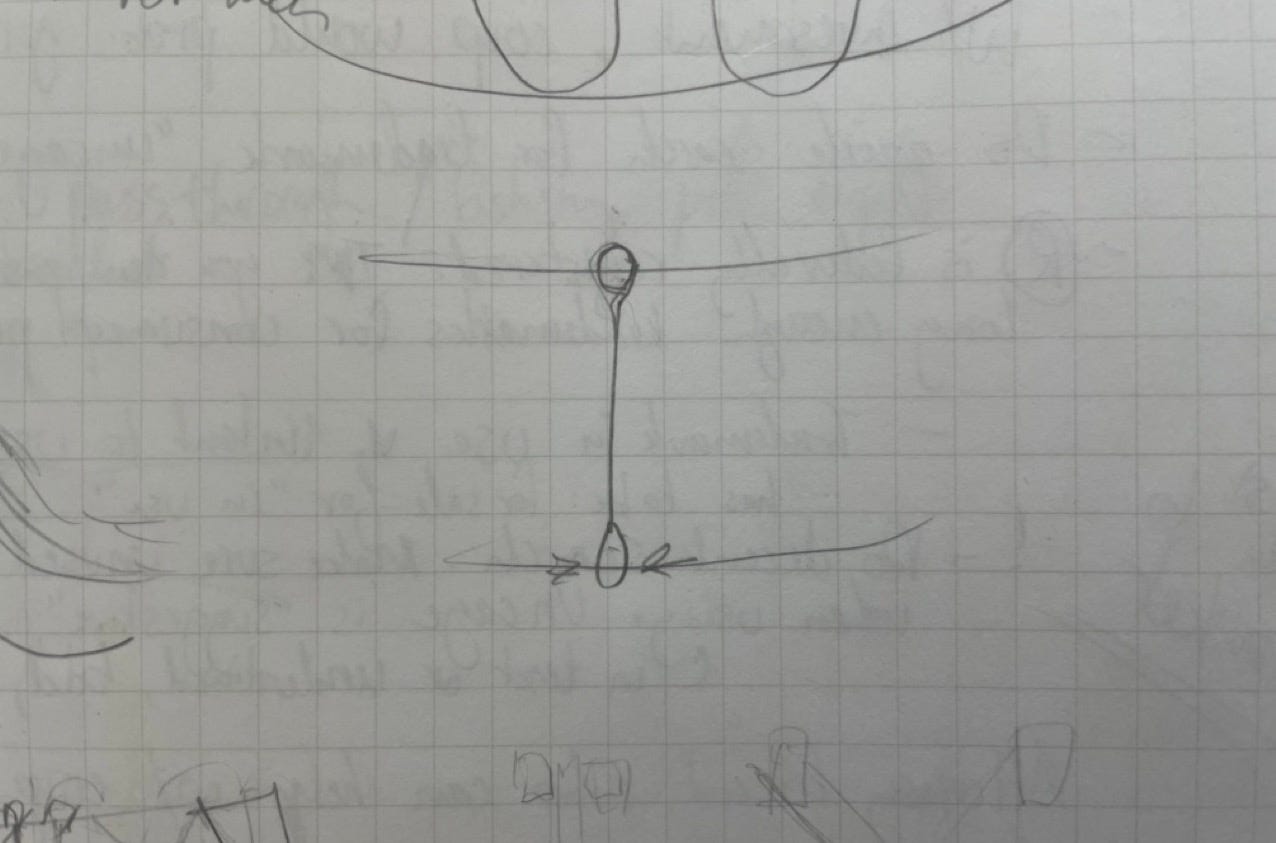
I brainstormed a bunch of different ideas over a few days, but landed on looping the rope around the frame/crossbar at each intersection.
If you’ve been following since the early days of the project, you’ll remember that one of my big goals was to minimize the amount of connections / knots, since knots are usually the weakest point. That’s no longer true.
When I changed from knots to splices, which can retain 90-100% of the rope’s strength, the bend radius became the newest weak point. That’s the challenge with an evolving project – remembering why you made certain assumptions and changing them when the underlying reasoning changes. This new design would emphasize fixing the bend radius at the expense of having more connections.
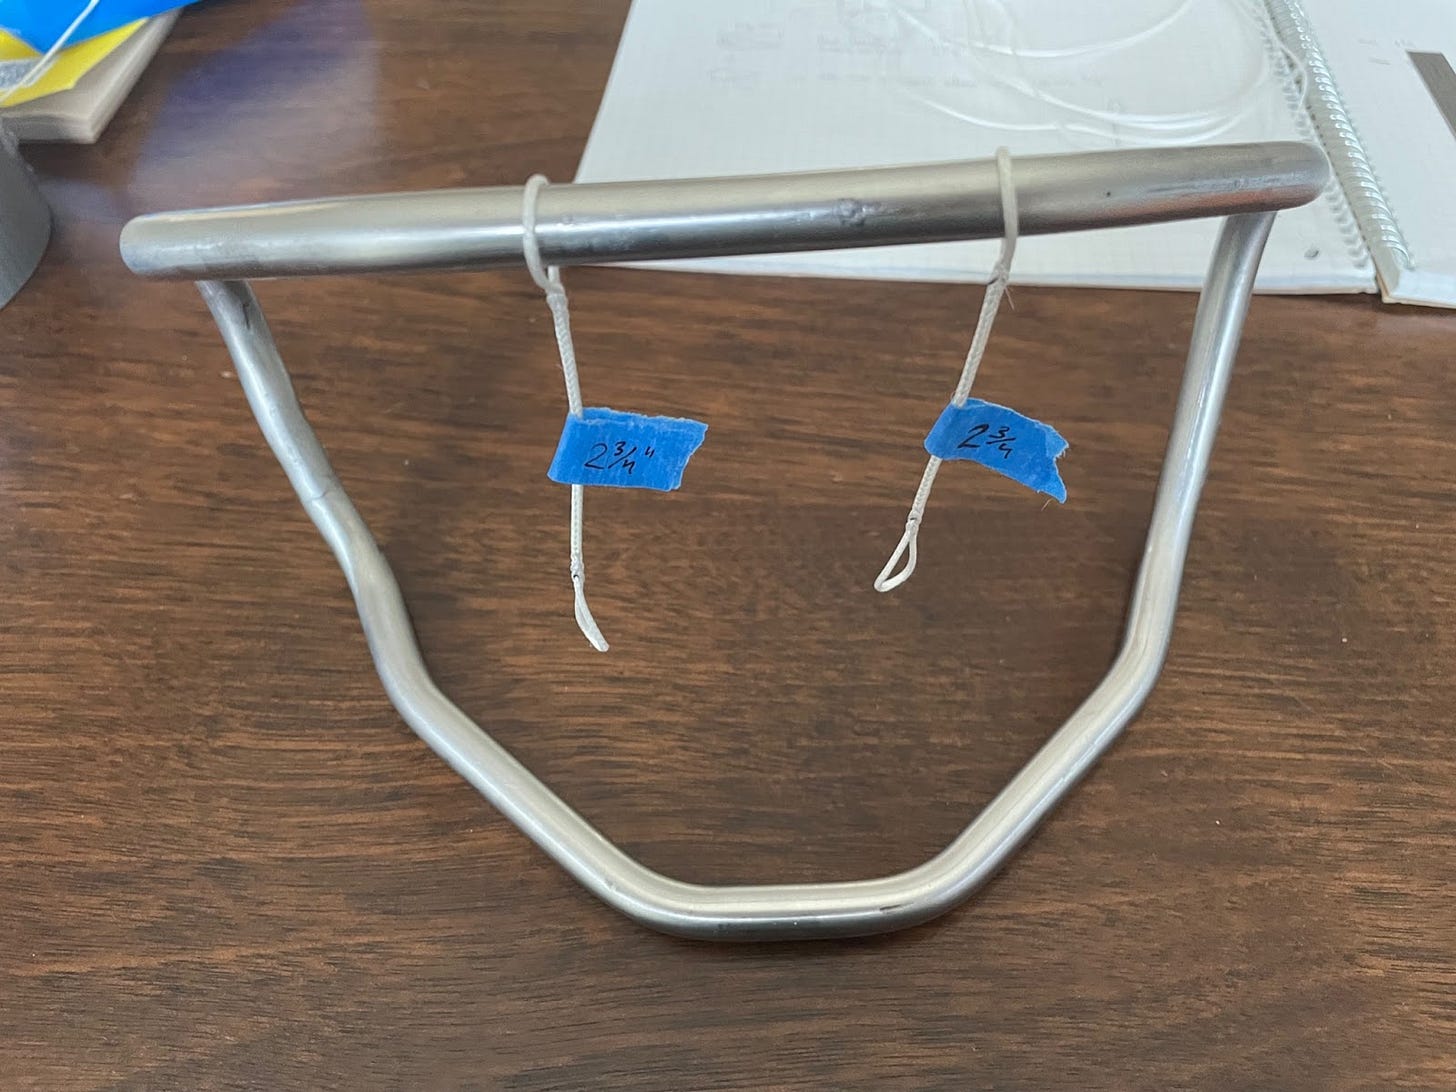
I started building the new design by bending a new crossbar from the same beefy, large diameter tubing I used for the outer frame. For this part of my testing, I wanted to focus entirely on the strings without worrying about the crossbar bending or breaking.
I spliced the first two ropes with a loop on both ends. Each one took me about twenty minutes.
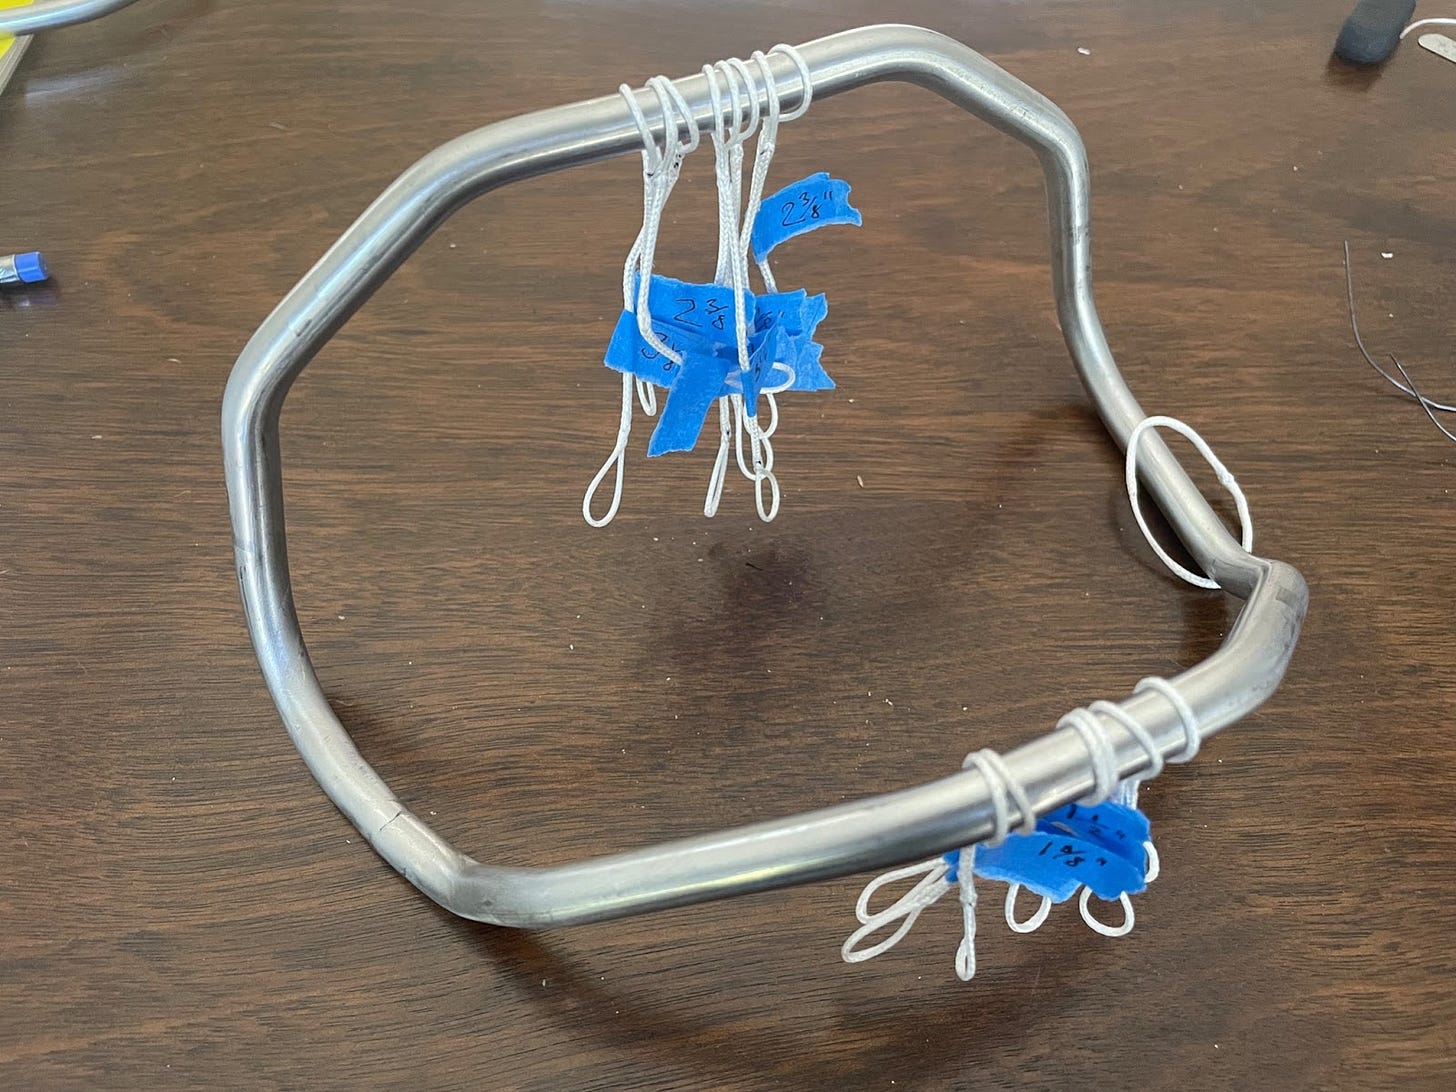
A total of fourteen of those things took the better part of five hours. The difficult part, though, in making something new is figuring out how to make it.
Even a dumb thing like a guide to mark out different segments of the rope takes time. And the constant adjustments as things don’t come out according to plan. But after another couple of hours of figuring things out, I had a version that felt ready to test.
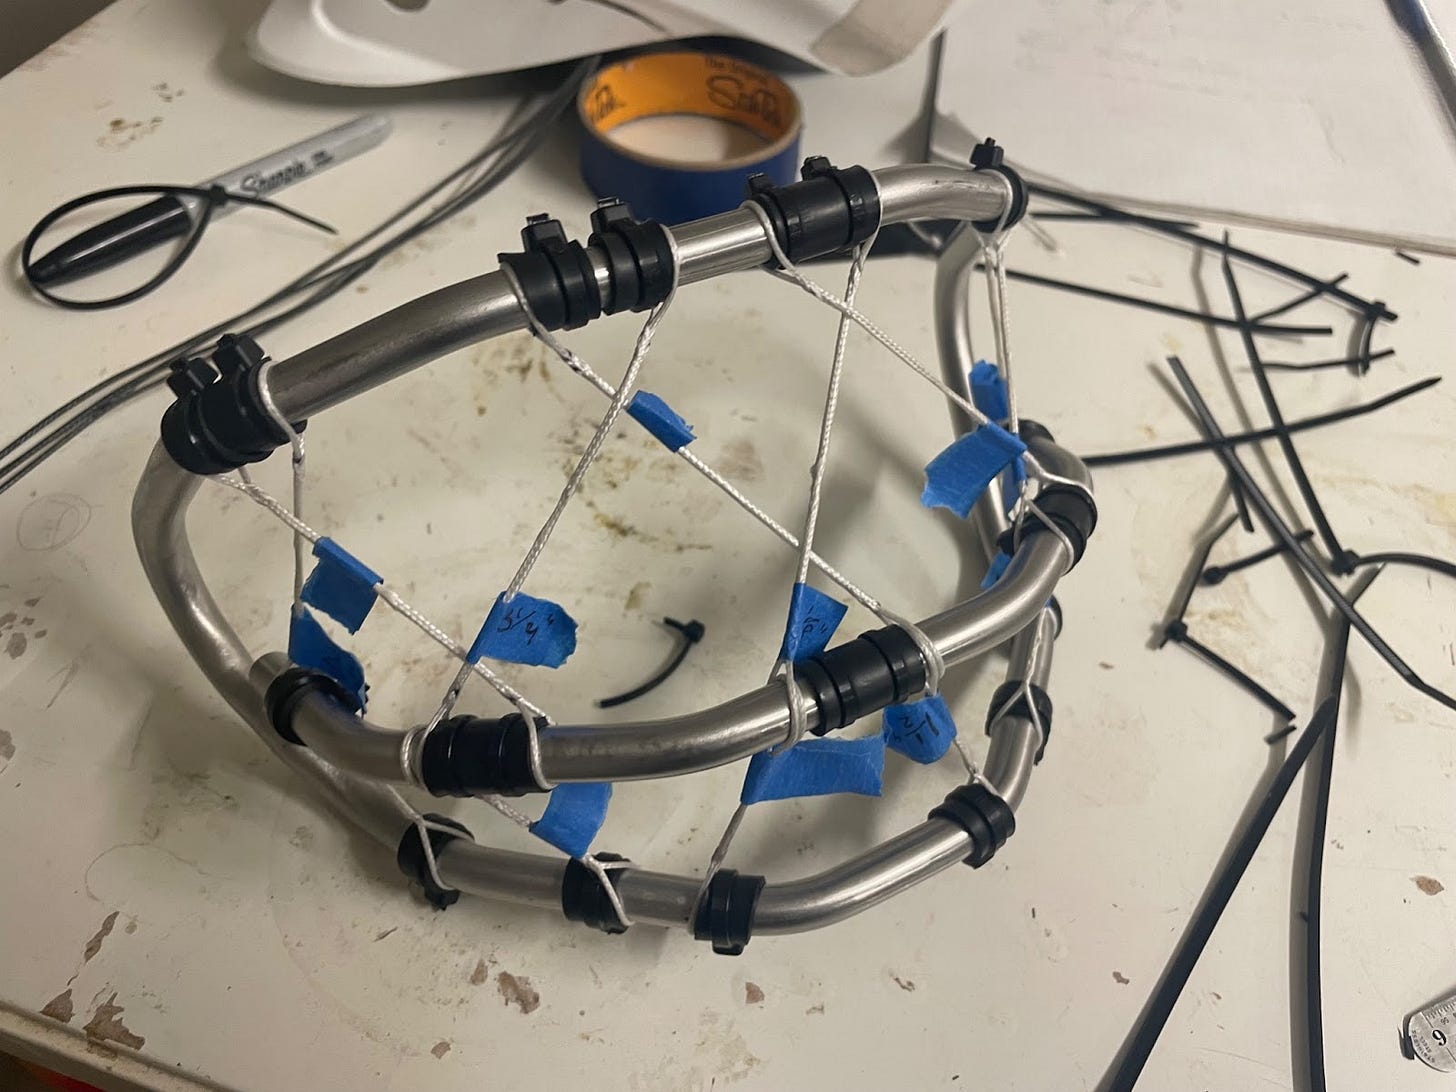
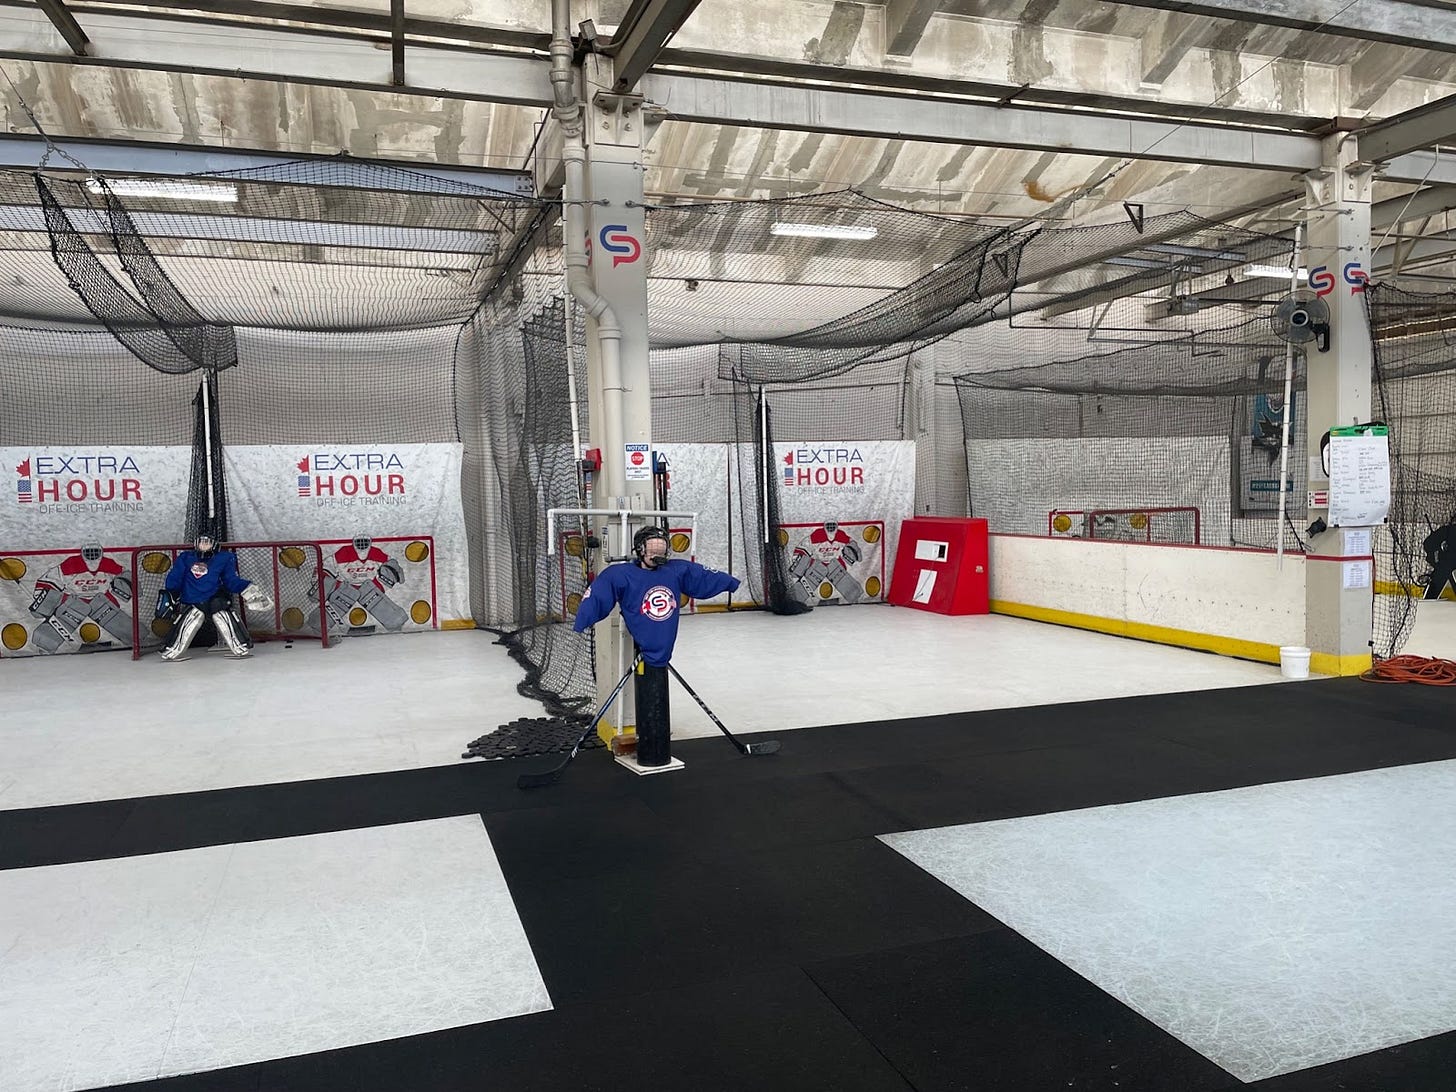
Speaking of testing – for the first time in this project, I’d be testing somewhere other than my garage. I had an appointment for Friday afternoon at Extra Hour Hockey Training in San Jose. The cage with the new design was done on Wednesday.
I didn’t want to go with just one prototype, so that gave me a day to refresh the “concept launch” version. I couldn’t do anything about the bend radius in such a short time, but I could use larger diameter rope as a chafe sleeve. I hoped that would be enough
I bent a new crossbar, drilled holes, fished the rope and chafe sleeves through those holes, and hand spliced each loop over a 15 hour day that ended at 2 am.
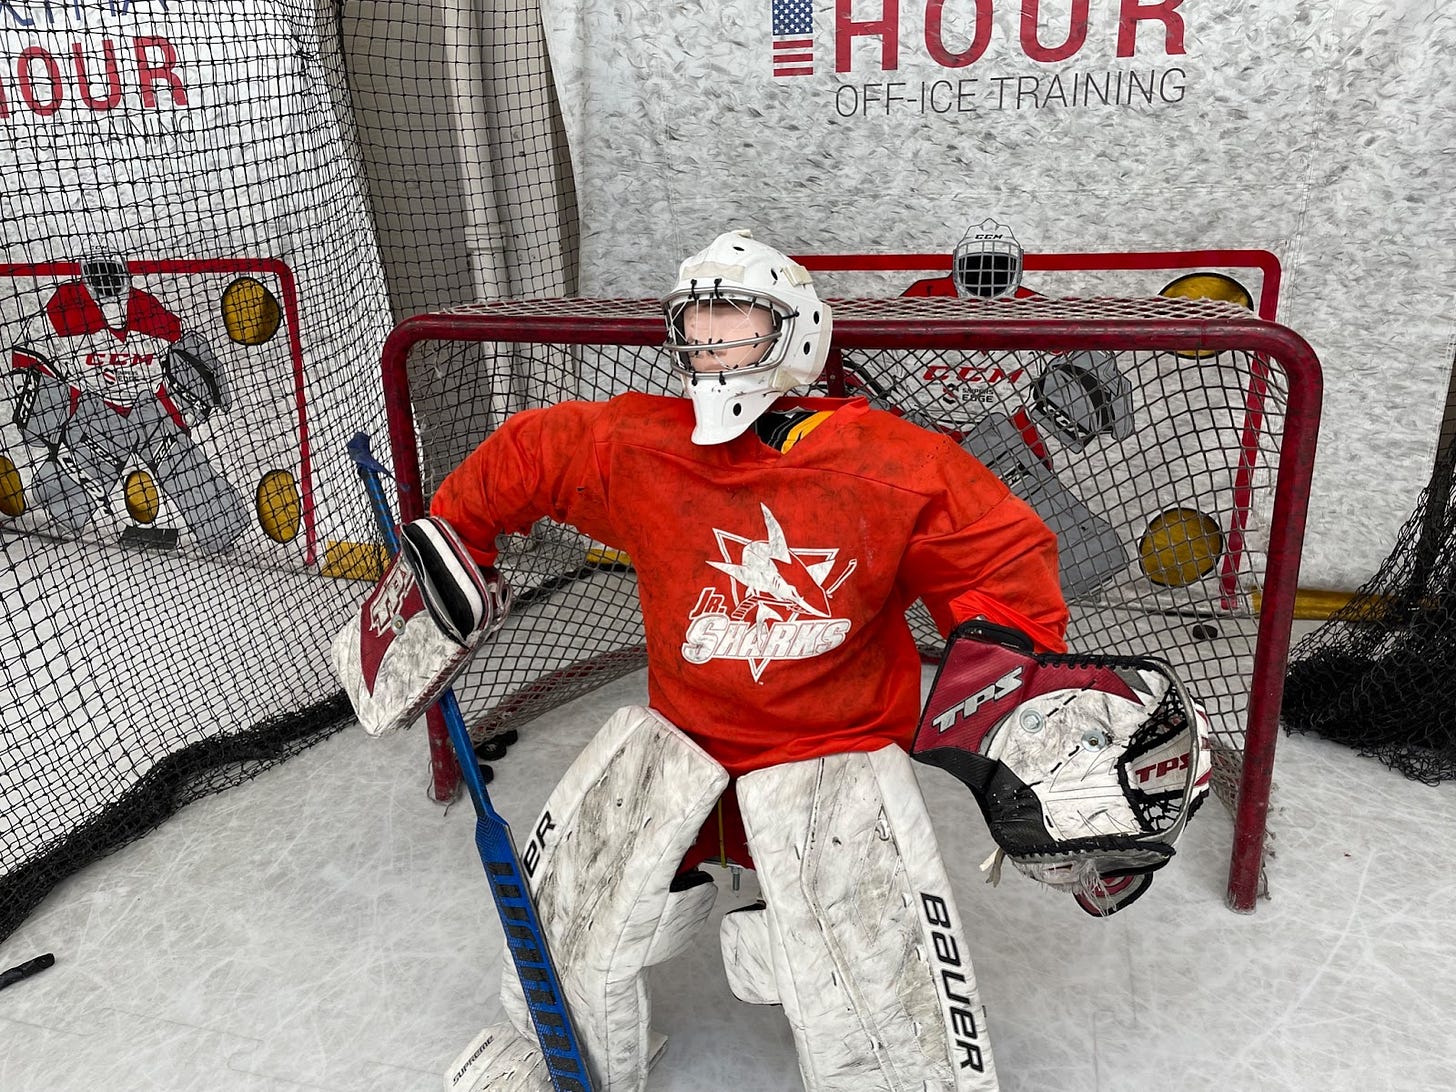
The next day, I drove down to Extra Hour. It’s a very cool facility and I can’t thank them enough (even though they broke my cages) – super friendly people and very generous with their time and help.
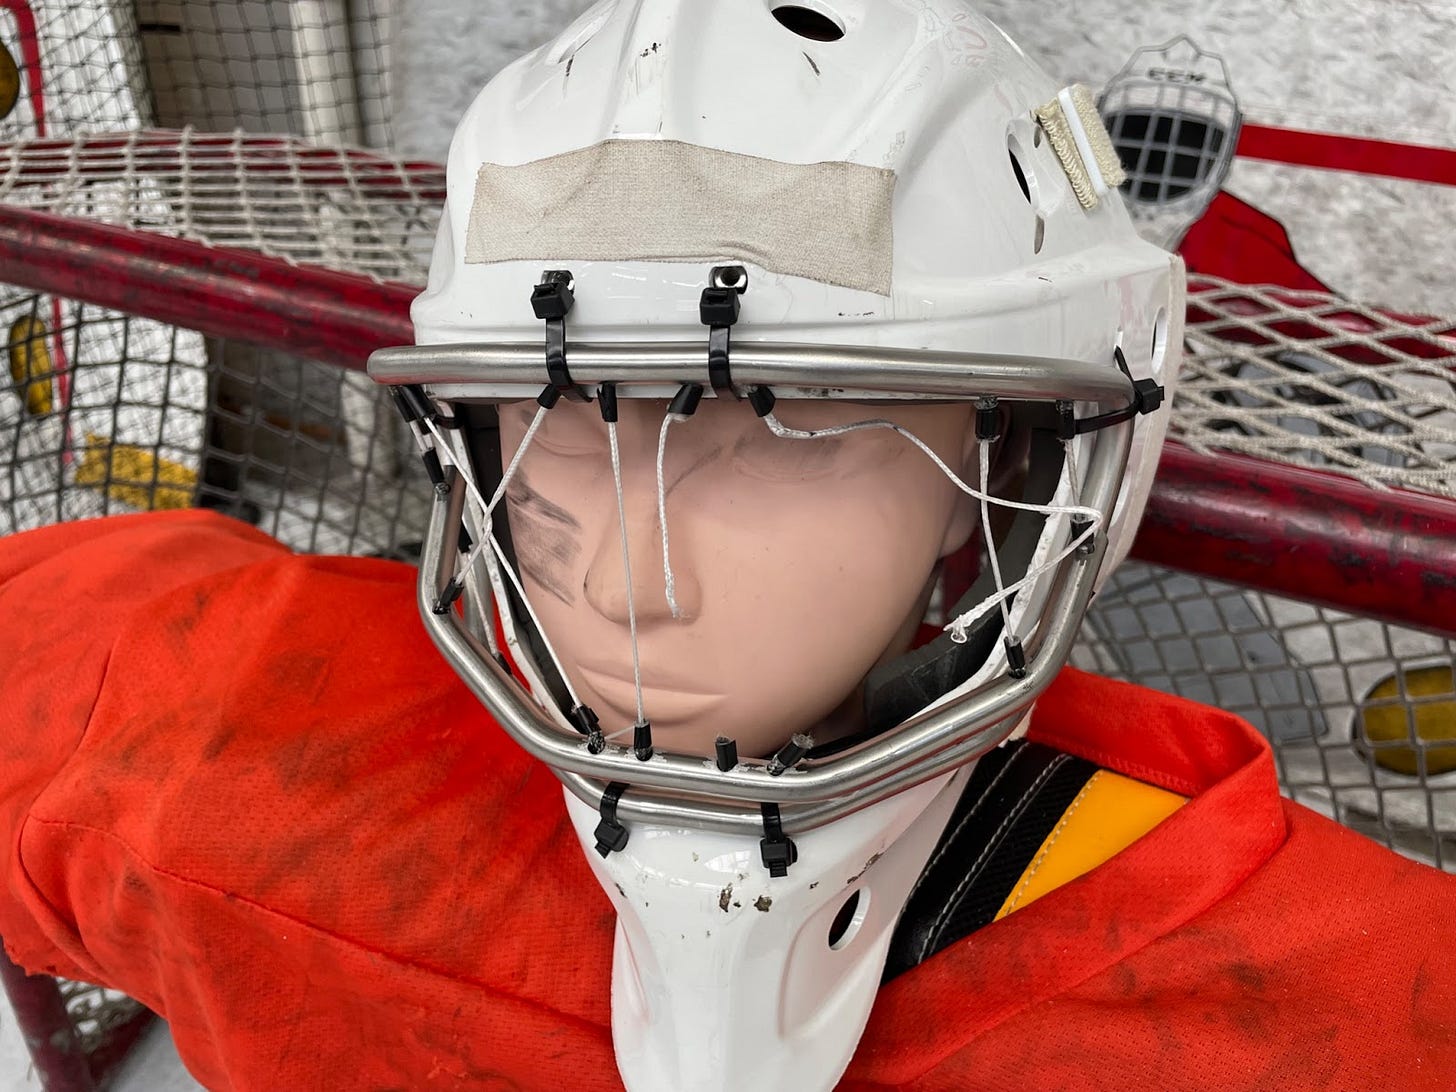
I strapped the “concept launch” version on the dummy goalie and off we went. Anything lower than 50 mph hour was more of a lob so that’s where we started. It took a handful of shots to dial in the aim, but we get one that hits the cage square on. And it breaks. Embarrassing. I thought I’d tested this to 80 mph. What just happened? Okay, save the questions for later.
Strap on the new and improved cage. 50 mph again. A few more shots wide and then one that hits square on. And it breaks too. Damn.
The guys were super nice, talking about how it’s part of the process and all that. I think I kept a pretty brave face, but I was pretty bummed. 30+ hours of fiddly work and careful attention to build those two cages and they break in two minutes. Talk about an anticlimax.
So what did happen? The “concept launch” version cage broke at one of those very sharp corners. Not surprising, considering what I learned about bend radii in ropes.
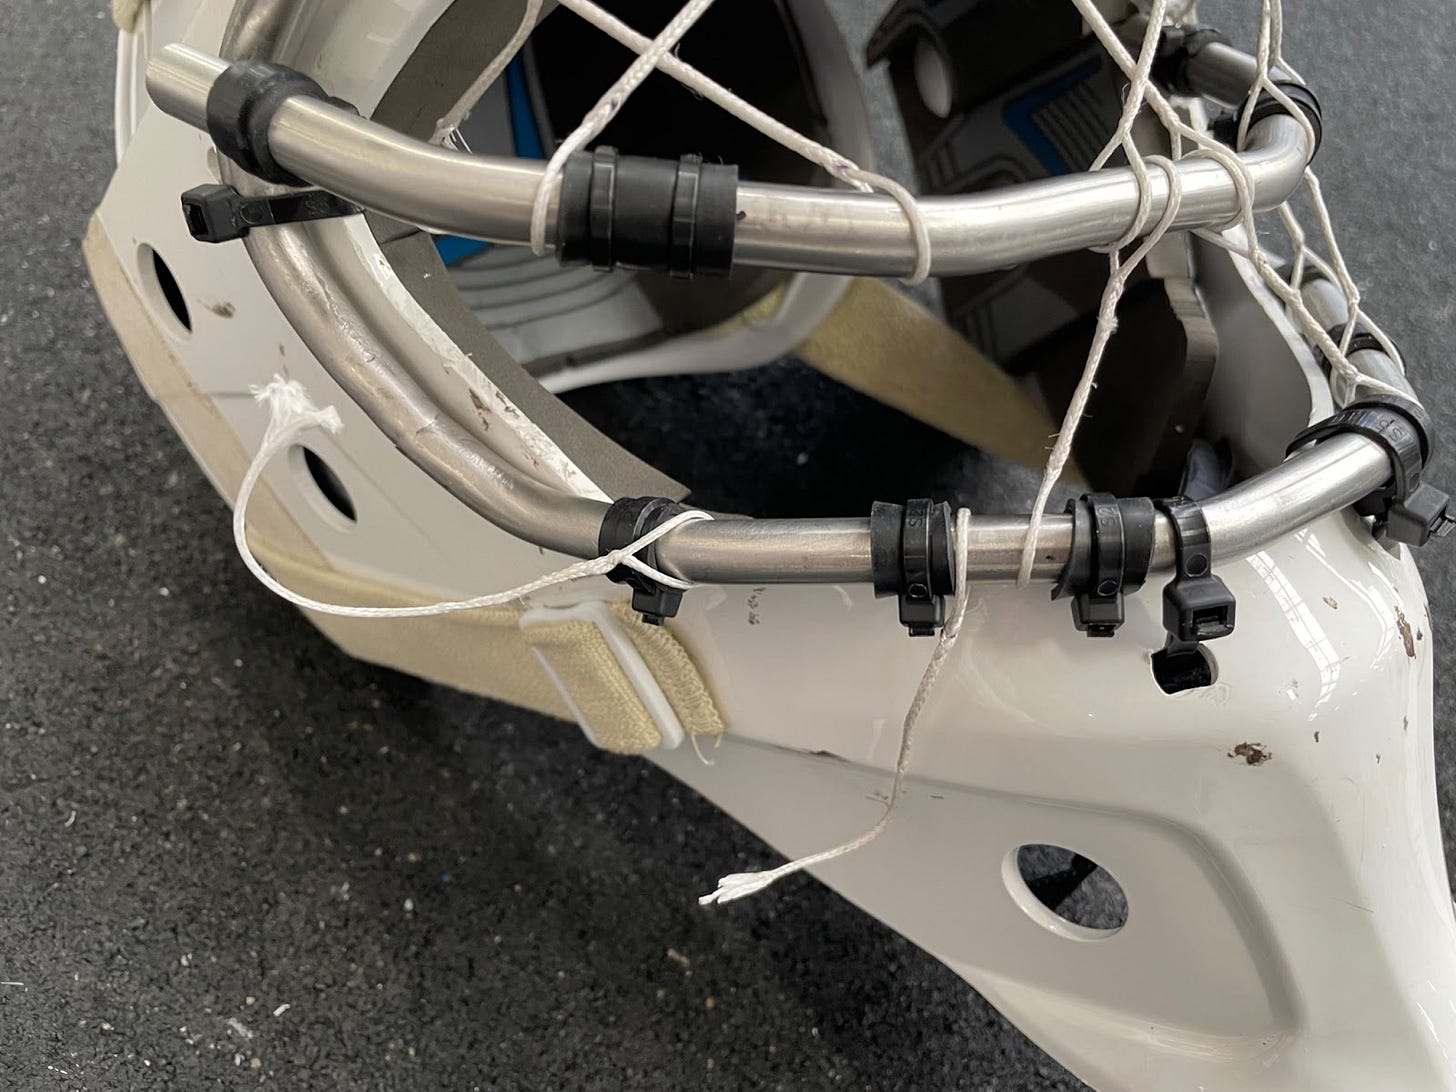
The second version with the improved bend radii failed in a completely different way. Remember how I mentioned in an earlier caption that I had a bad feeling about the very small rope segments and their equally short splices? I should trust my gut more. The material didn’t actually break here, the splices just slid out. Splices are described like chinese finger traps. In this case, there just wasn’t enough finger inside the trap.
On this too, I tried to get away with doing less than the guidelines because of the space constraints and it bit me in the ass.
What about the 80 mph testing I did at home? There’s a couple of possibilities. This version had a stiffer crossbar. The puck was probably much flatter from the puck shooting machine than from my slingshot. The shooting angle was definitely much different, from lower down. I suppose it’s possible that calculating the puck’s speed with elapsed time and distance was flawed. I don’t think I would be that far off though.
I’m embarrassed to share these failures with you, but I’m actually not too distraught over the state of the project. These were things I expected to go wrong and they did. In fact, even before the testing, I had an idea that would solve both the bend radius and splice length issues. I should probably start working on that version.
I’m trying to remind myself I decided to design by experiment (see the “Designing by experiment” section on p. 329 of JE Gordon’s Structures), so that means that I signed myself up for lots of failure. Still, doesn’t take the sting out of it. On we go.
Thanks as always for reading,
Surjan





this is so cool and I am so invested. thank you for sharing your process with us!
Man i just love these entries. Zero doubts you'll fix the weak points. Keep it up!