

Previous Parts in This Series: Part 1: Intro, Part 2: Mold Unknowns, Part 3: Mold Attempt #1, Part 4: Mold Attempt #2, Part 5: Theoretical Understanding, Part 6: Confirming the Theory, Part 7: Mold Attempt #3
I think my ideal project is one that I abandon halfway through. This trunk I’ve been working on is a perfect example. The only thing I learned in the second half was how much worse the real trunk was compared to the trunk in my head.
In my imagination, I’d build a beautiful trunk, install it on my Saab, and skip merrily off onto my next idea. In reality, I built an abomination, scrapped it, tried again, didn’t like it enough to install it on the Saab, but decided it was good enough for me to move on. Here’s what happened and what I learned.
Last time I sent out an update, I had finished the mold and proved the concept behind the trunk -- that discretely-stiffened veins were stiffer than a uniformly-stiffened panel. All that was left was to build it.

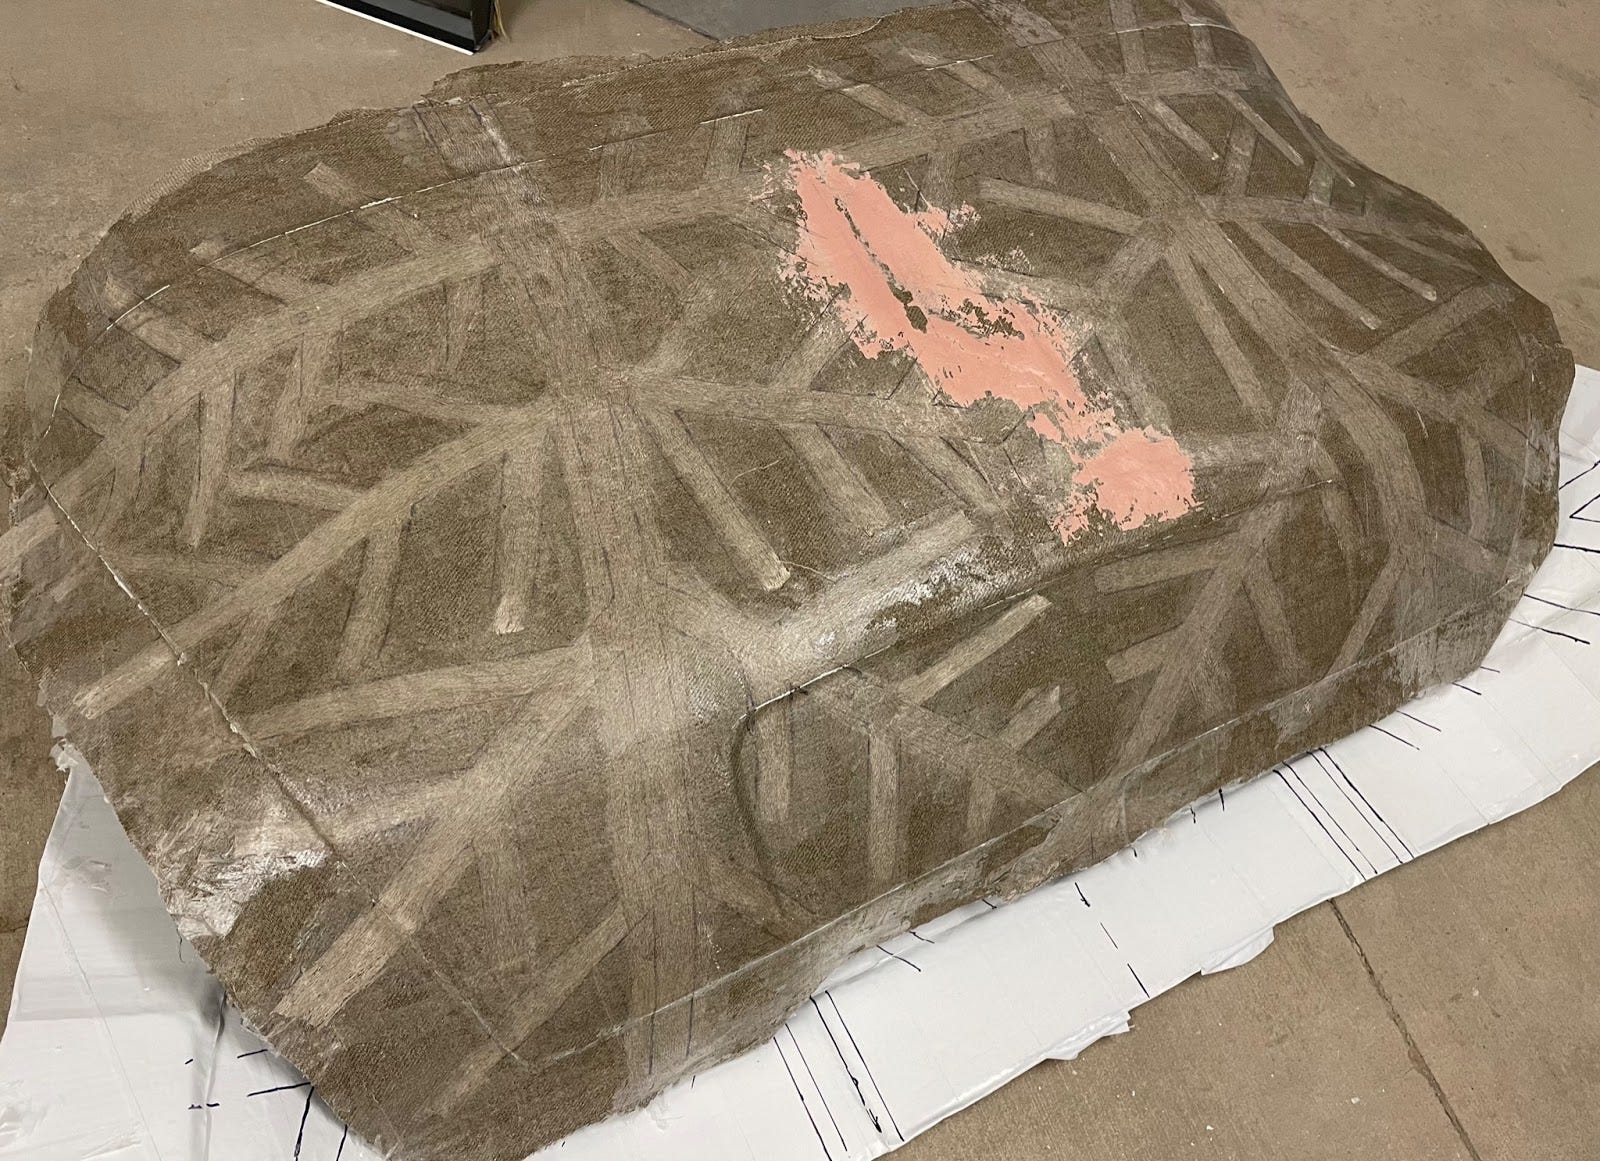
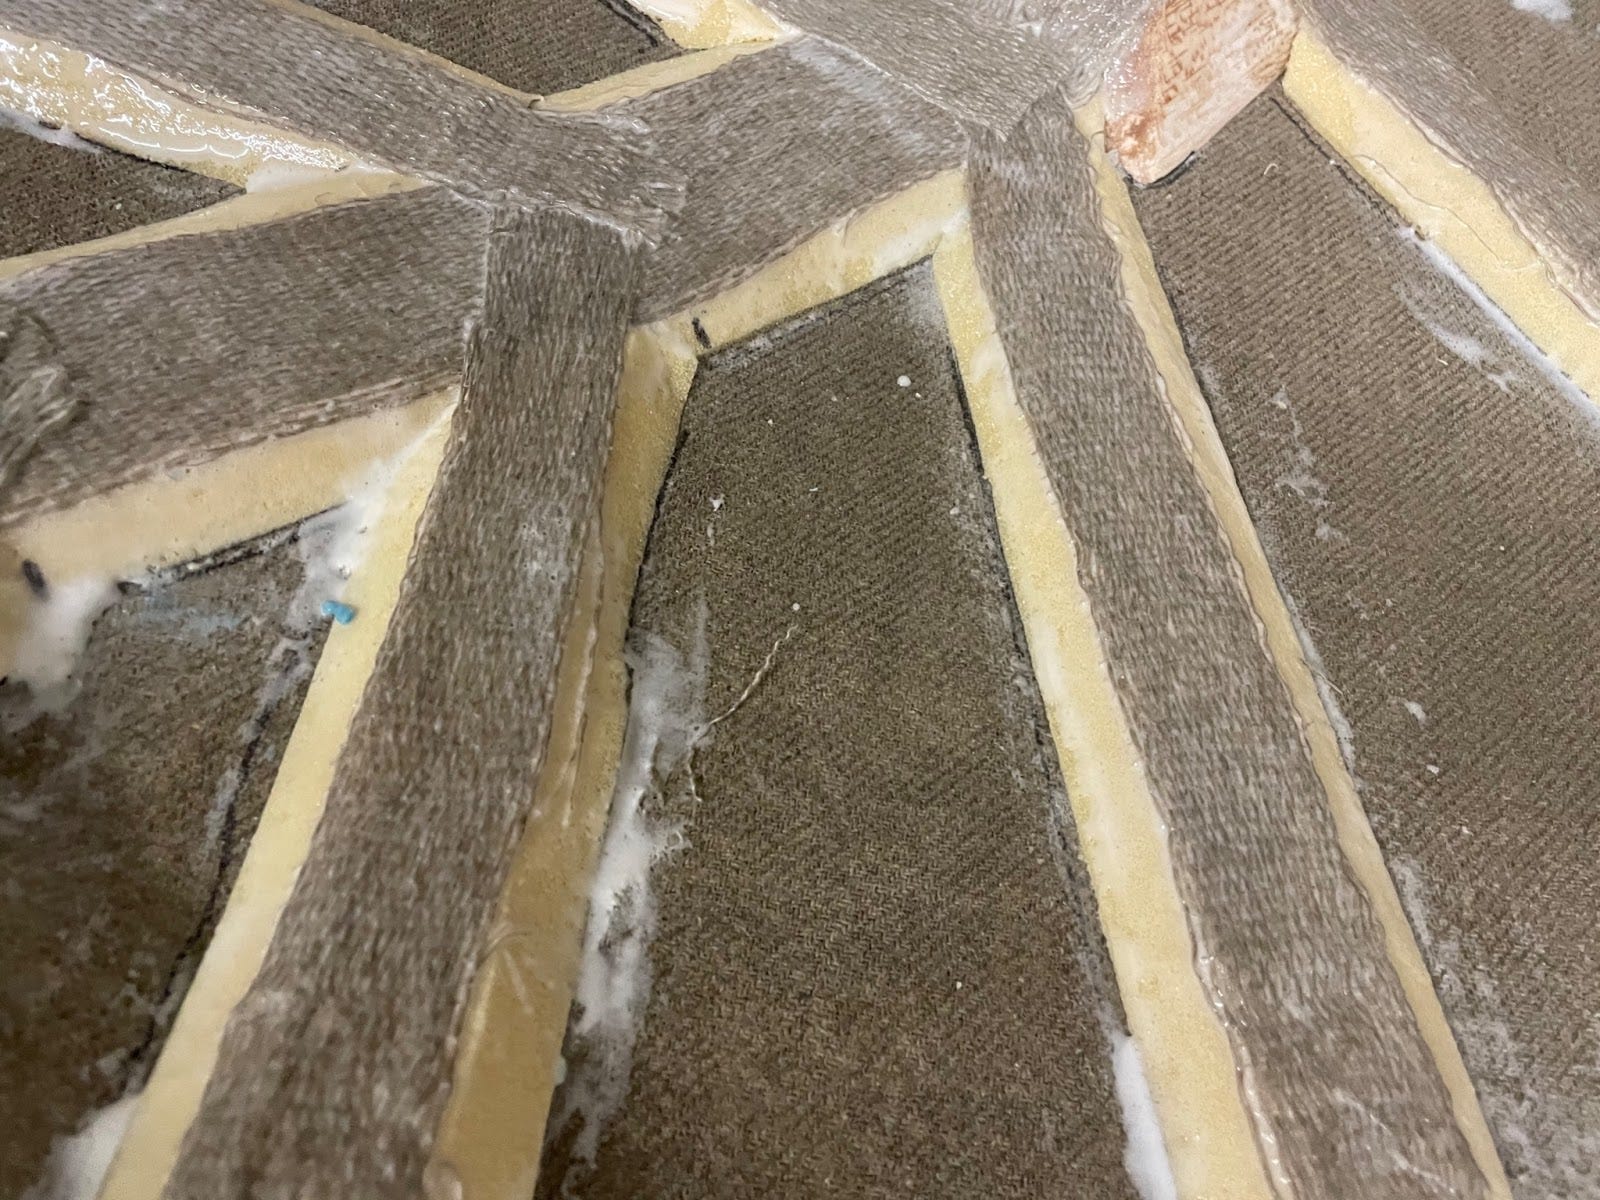
I started by laying out a vein pattern in Sharpie. The pattern was designed to funnel forces towards the hinge attachment points. The pink splotch is a Bondo patch -- an attempt to smooth out the worst of the lumpiness in the mold.
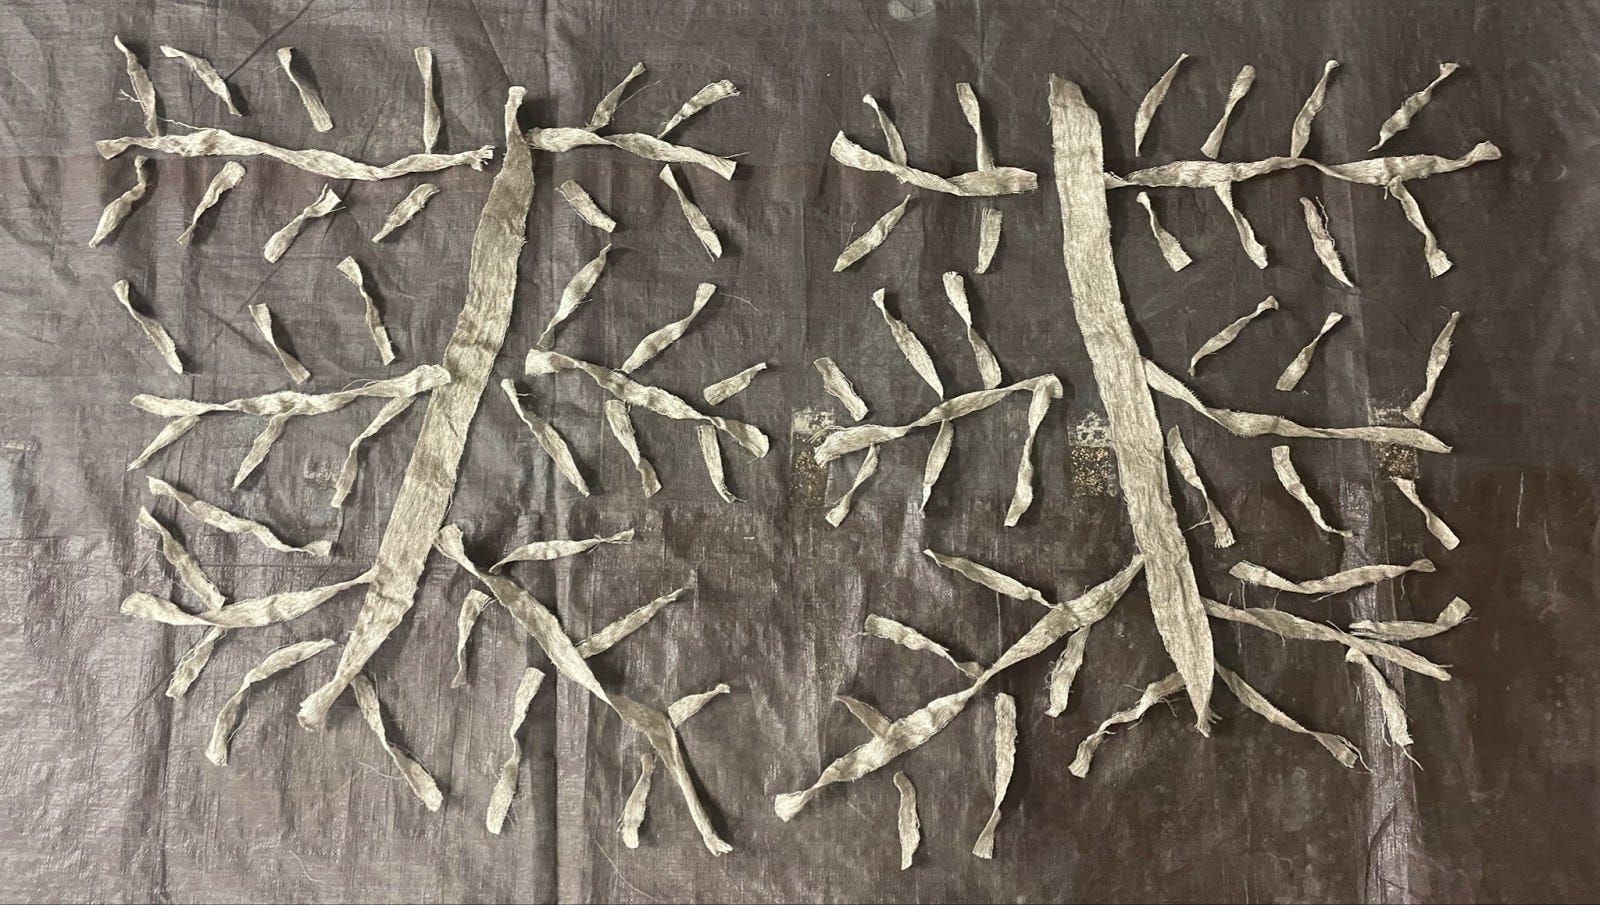
I cut out the pattern in unidirectional linen.
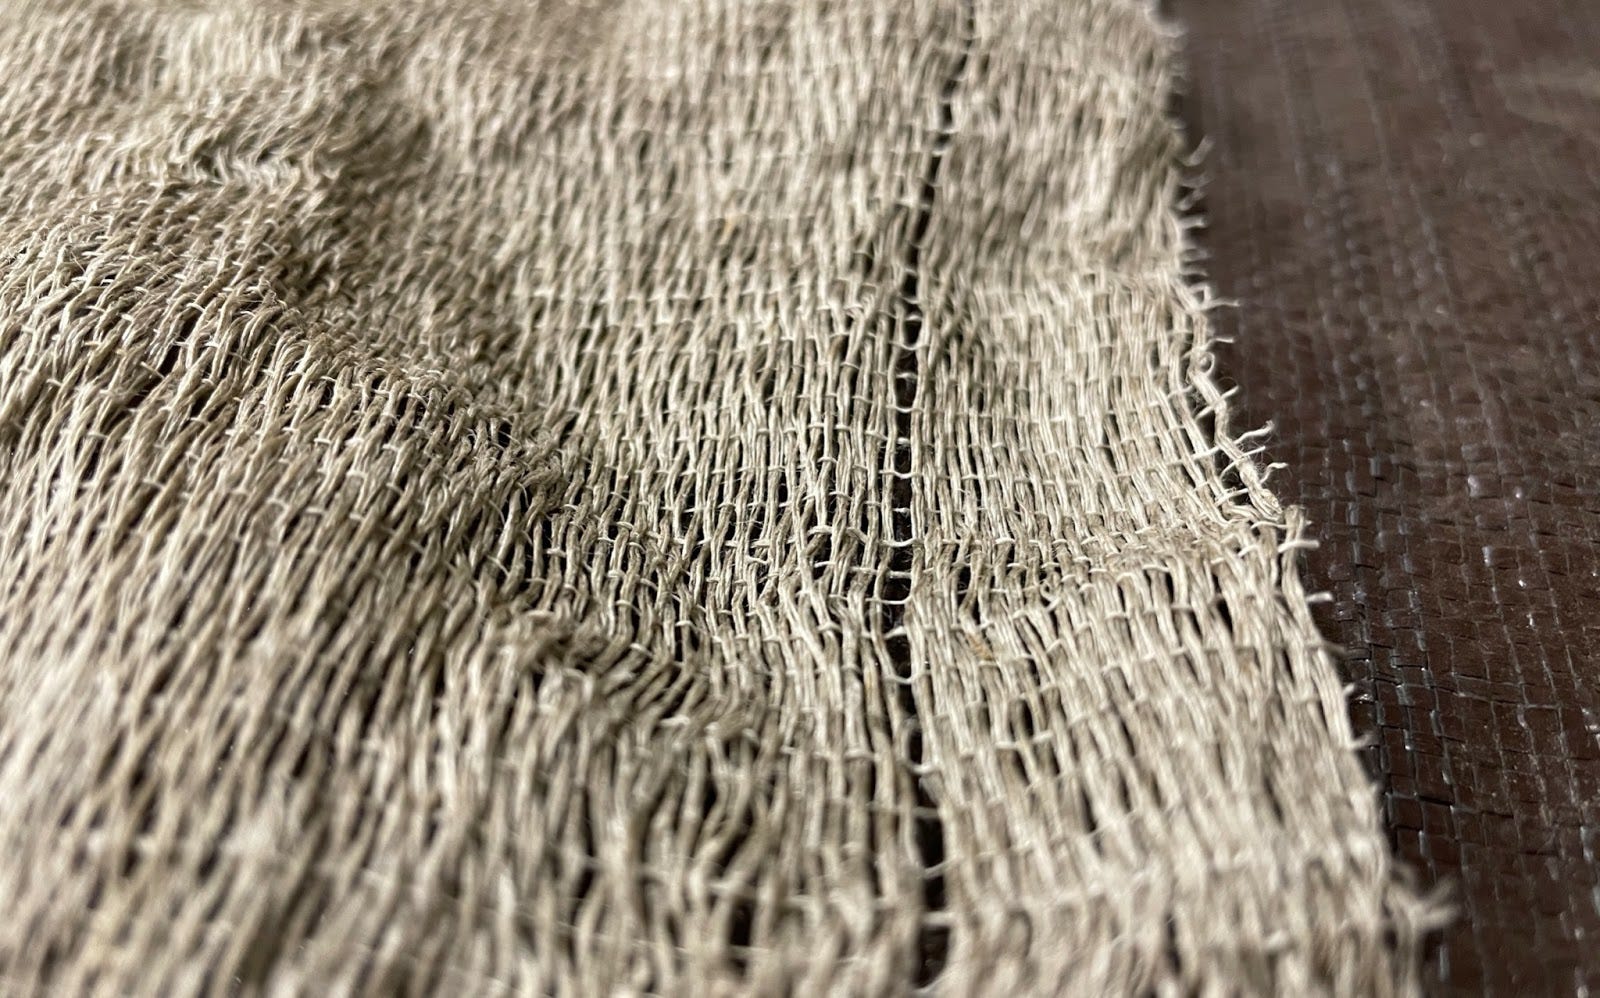
A close up of the uni. You can see most of the fibers aligned along the length of the fabric. This missing fiber is a handy trick I learned from YouTube. Pulling a fiber out gives you a nice easy line to follow when cutting.
Using the method I detailed previously, I glued down the veins and then added two plies of linen fabric.
The vein pattern turned out well, but the Bondo and Sharpie marks transferred over to the trunk.

Despite my best efforts, the fabric seemed to have sucked in the Bondo and Sharpie. There was nothing left to do but scrap the trunk and try again.
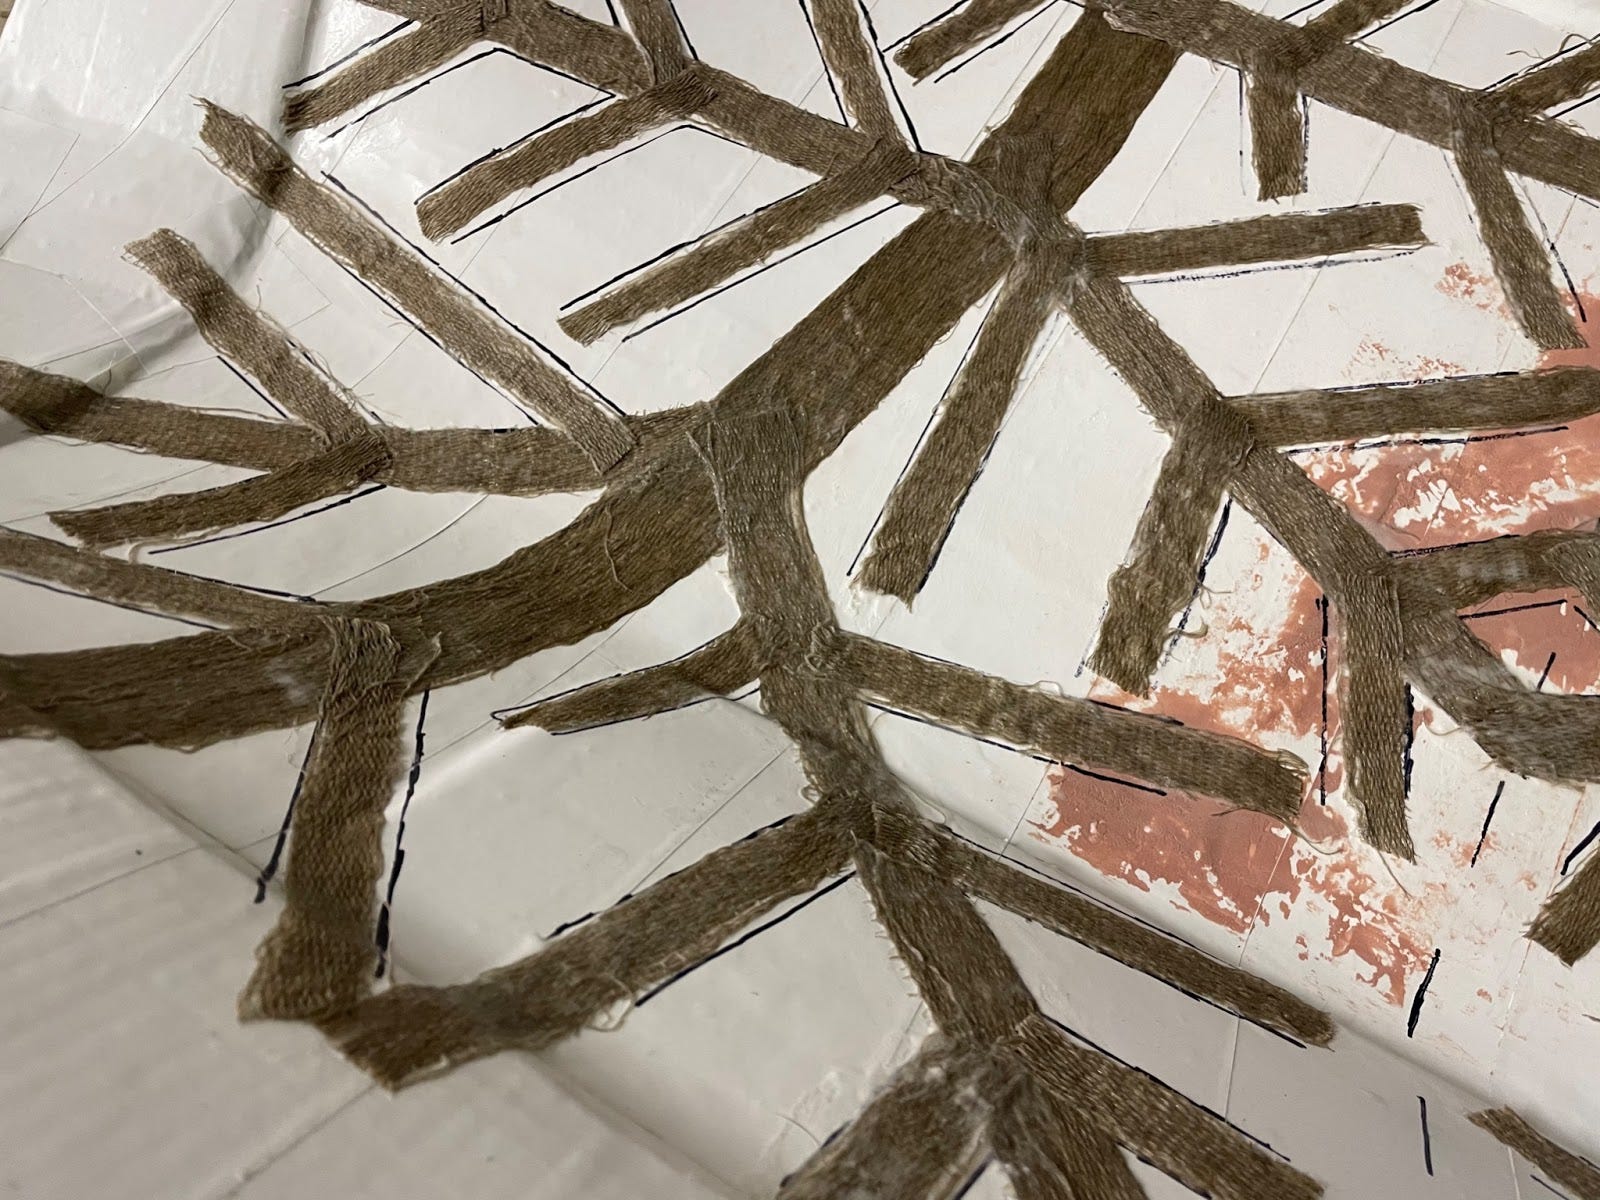
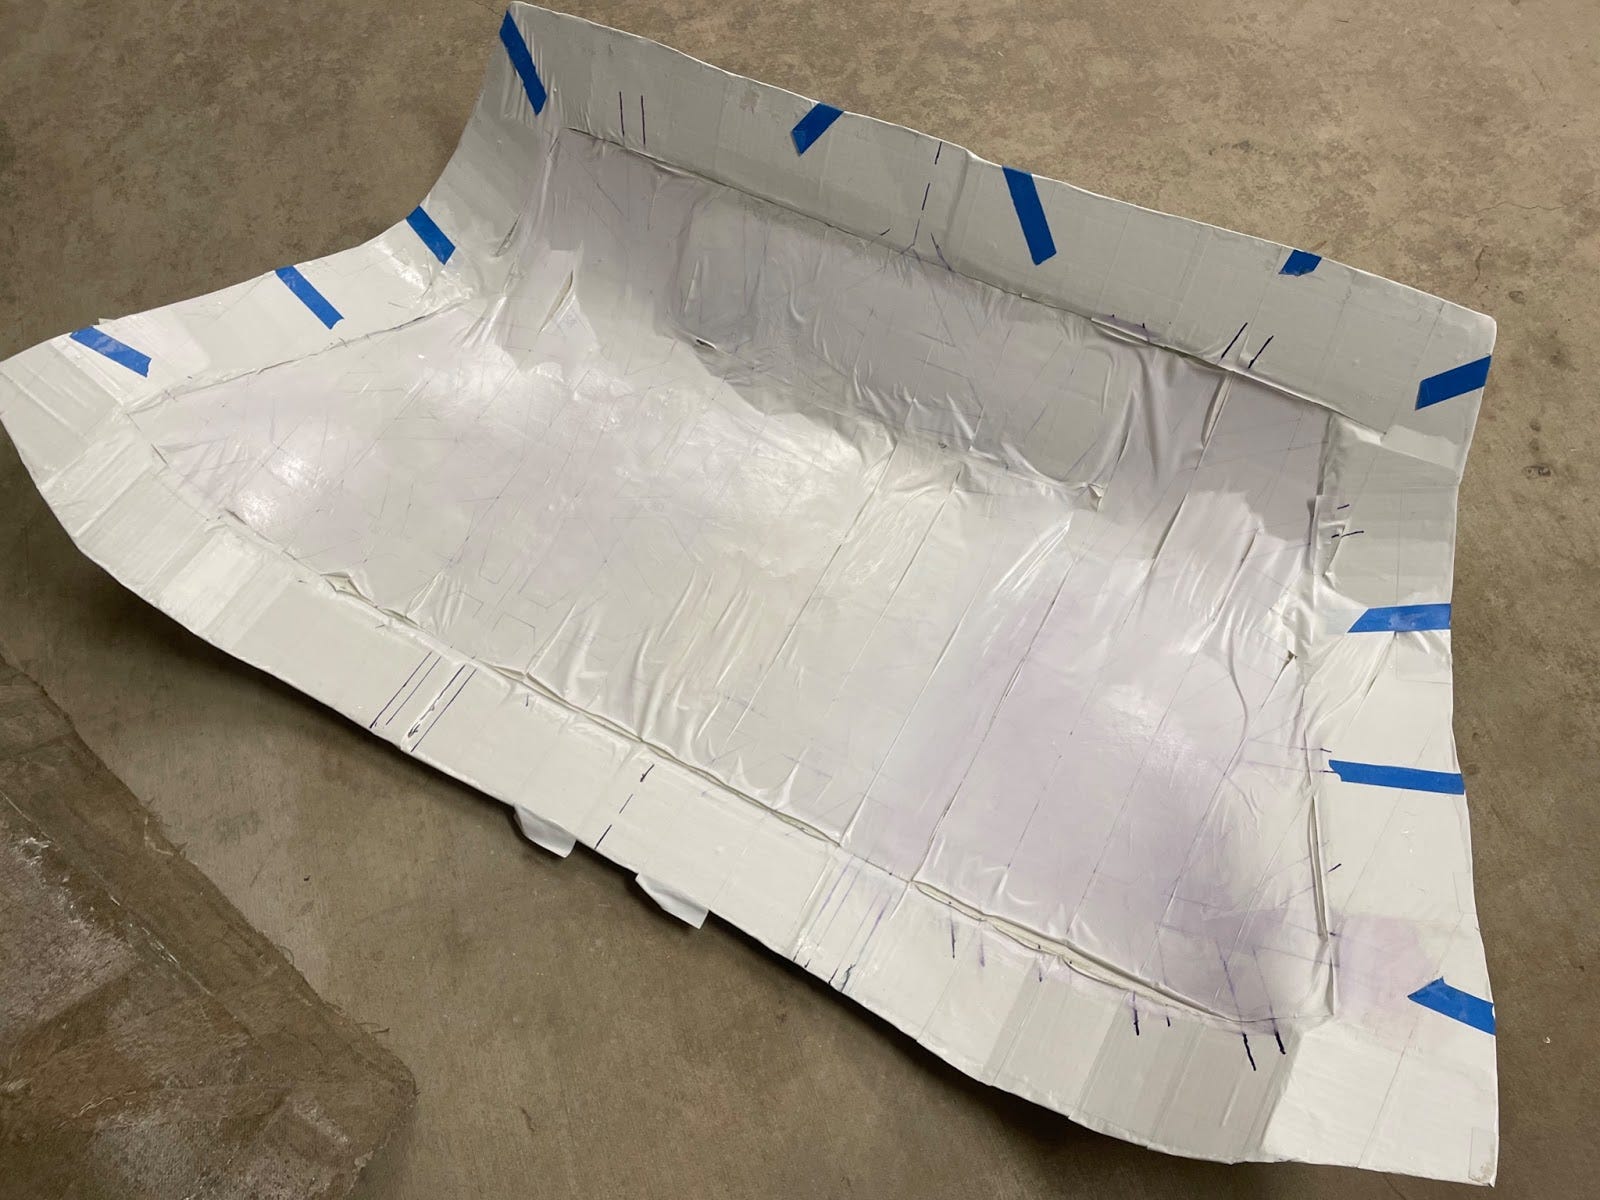
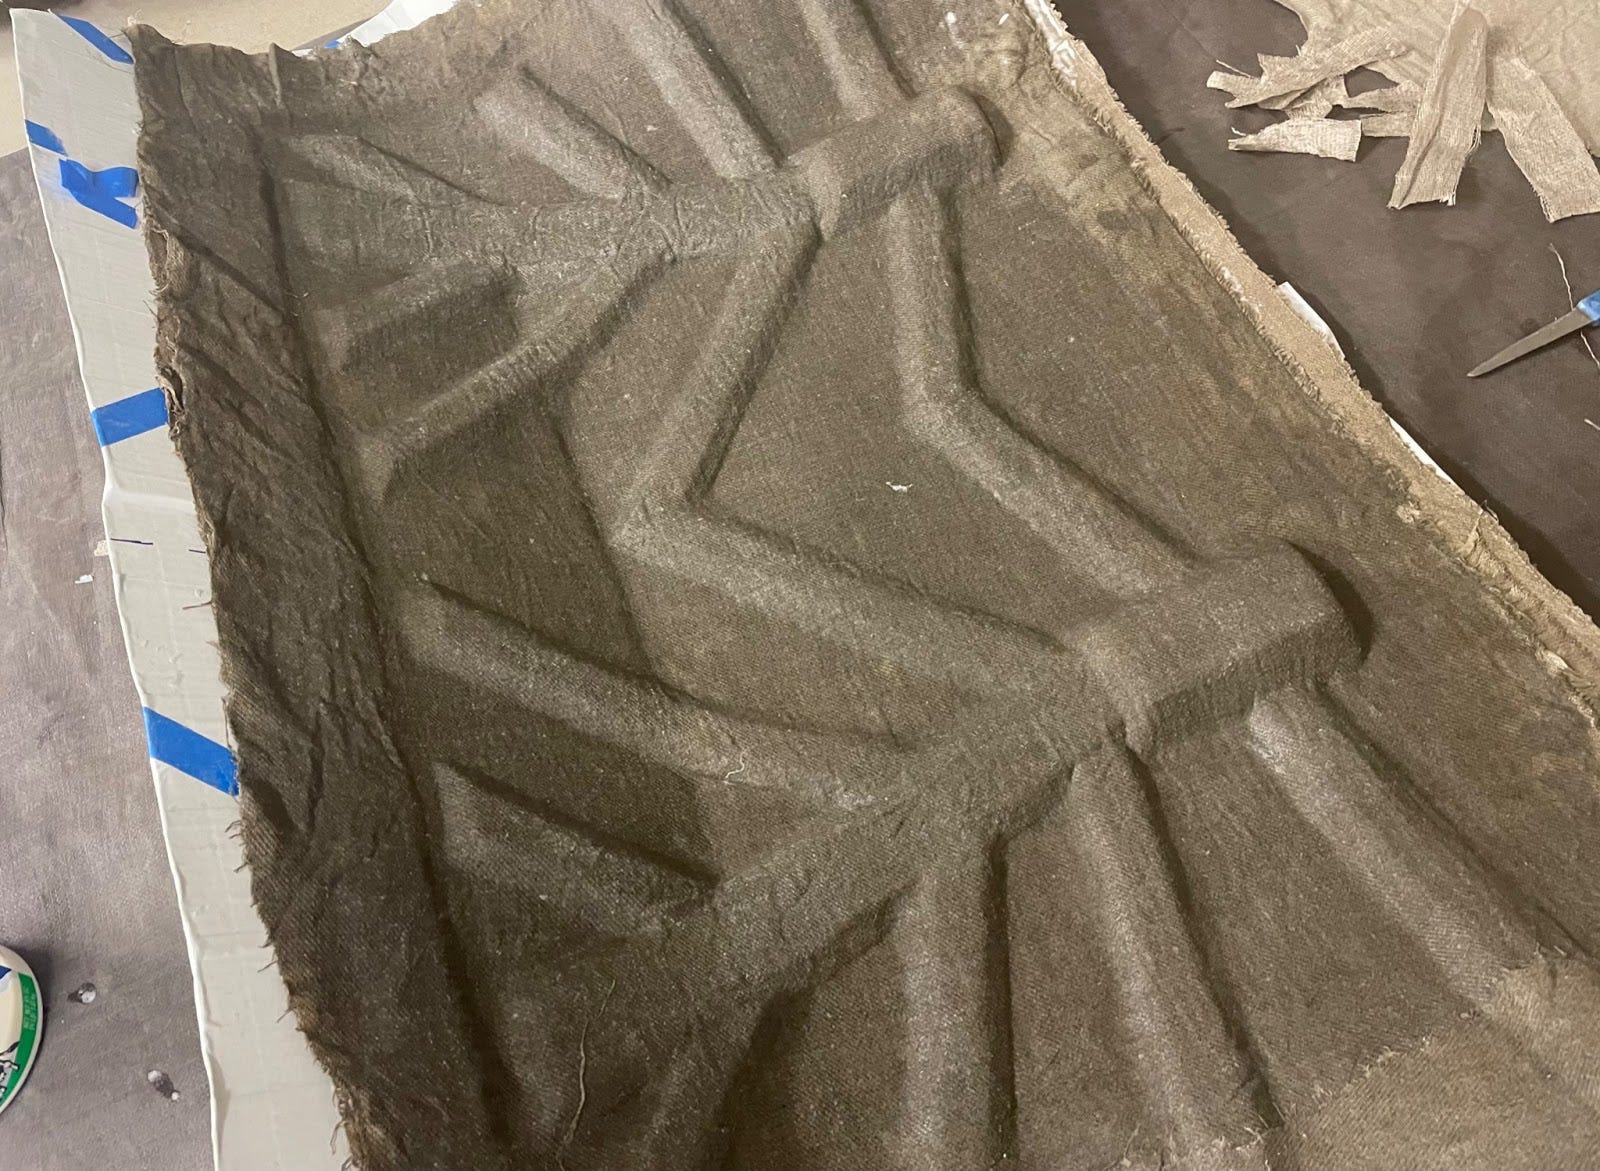
Skipping ahead a few weeks, which I spent painstakingly erasing the Sharpie lines that were still on the mold and scouring, sizing, cutting, and gluing down the fabric for my second attempt. I also simplified the vein pattern this time around. You can see the result above. The dry spots weren’t a big issue -- I got rid of them later with a second coat of glue.
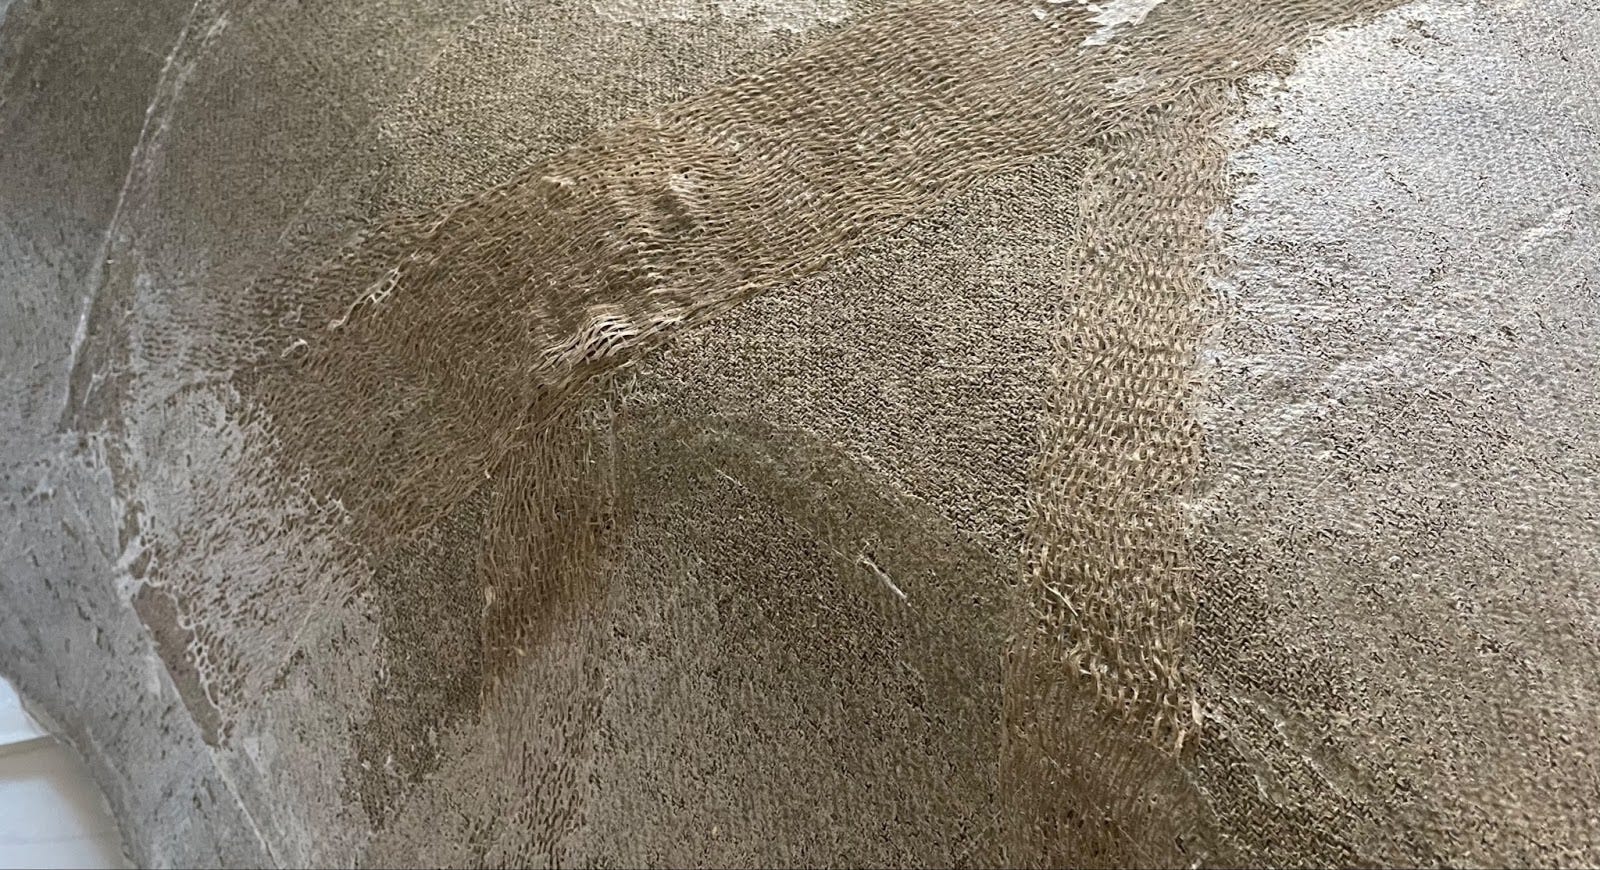
This bubbling, however, was a problem. It looked terrible and there was no way to fix it.
The mold was probably the culprit. After de-molding the part, I saw that the vinyl tape I’d used to line the mold had shrunk. Maybe the cleaner I used to wipe off the Sharpie affected the tape somehow? It was the only reason I could think of, considering that the tape worked well during my first attempt. In any case, if I wanted to scrap this trunk as well and try a third time, I’d have to put a lot of effort into rebuilding or repairing the mold. I decided against it.
This is “an engineering self-study” and I’d already learned everything I wanted to learn, conceptually. A third attempt would only, if I was lucky, get me a trunk that I wouldn’t actually mind installing on the Saab. So I decided to see the ugly, but otherwise sound, second attempt through to the end.
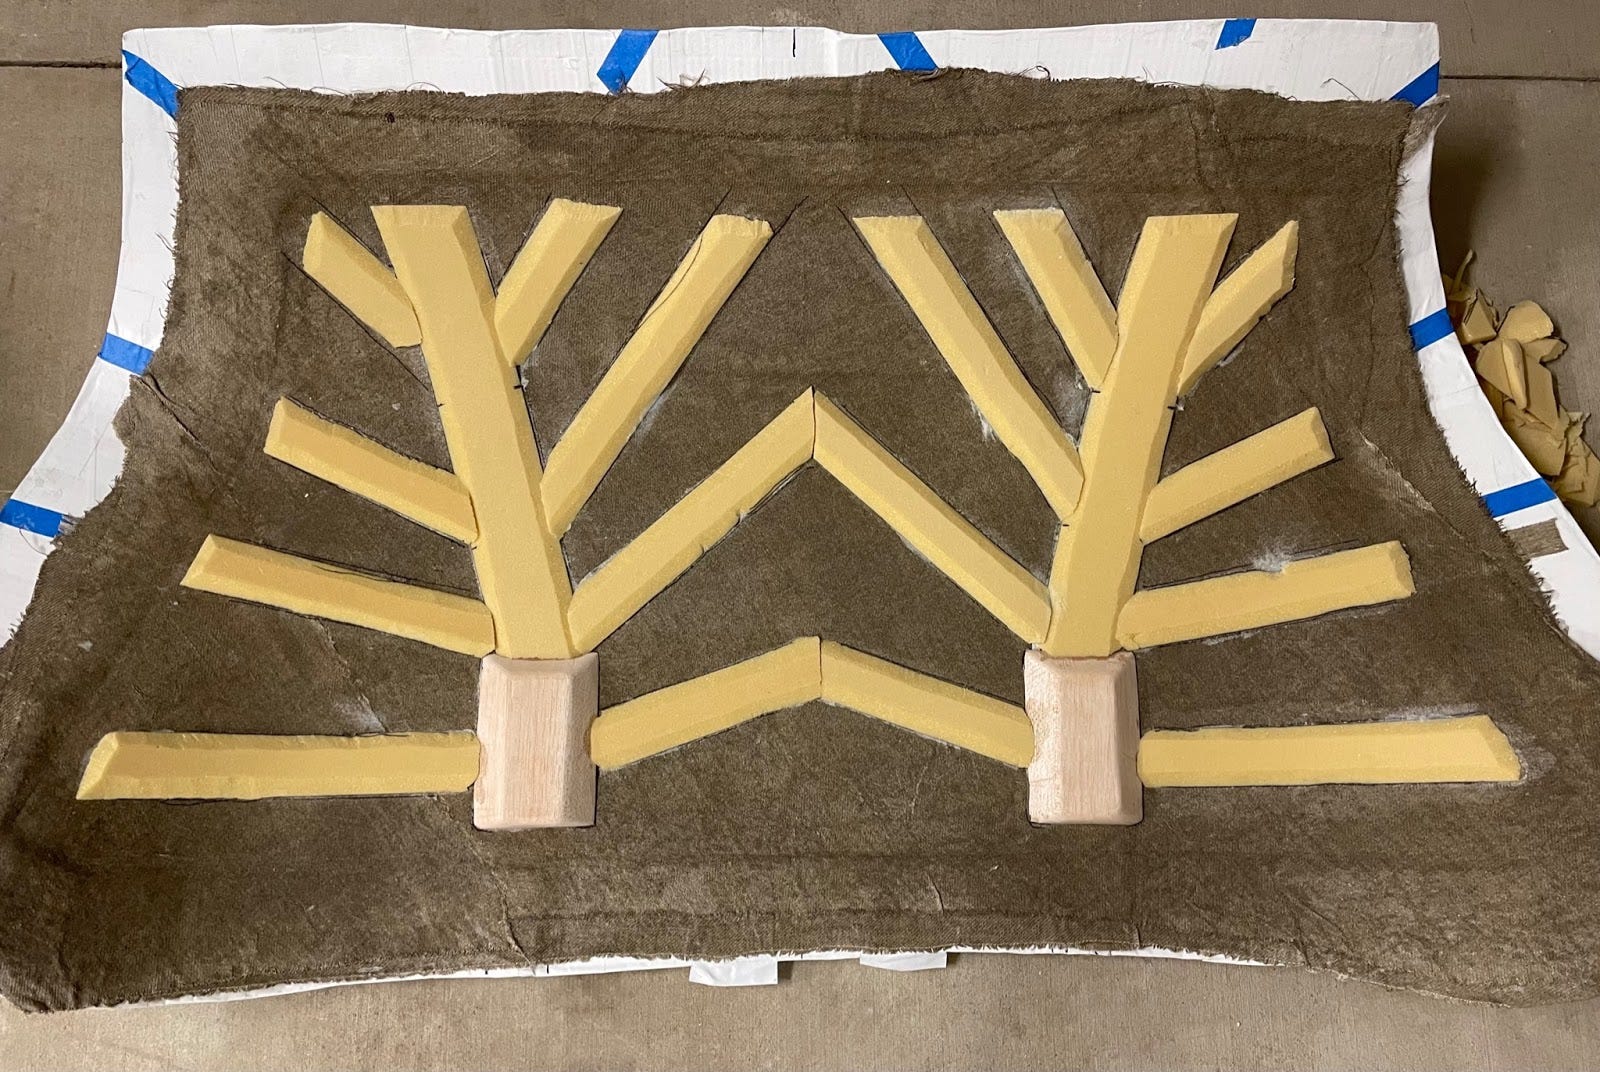
On top of those outer plies, which you’ve already seen, I glued down the core. I used taller balsa blocks where the trunk would attach to the hinge. The rest of the core was a foam. Each piece of core was cut and chamfered by hand.
On top of the core, I glued down a layer of uni along the veins.
Two more layers of fabric followed.
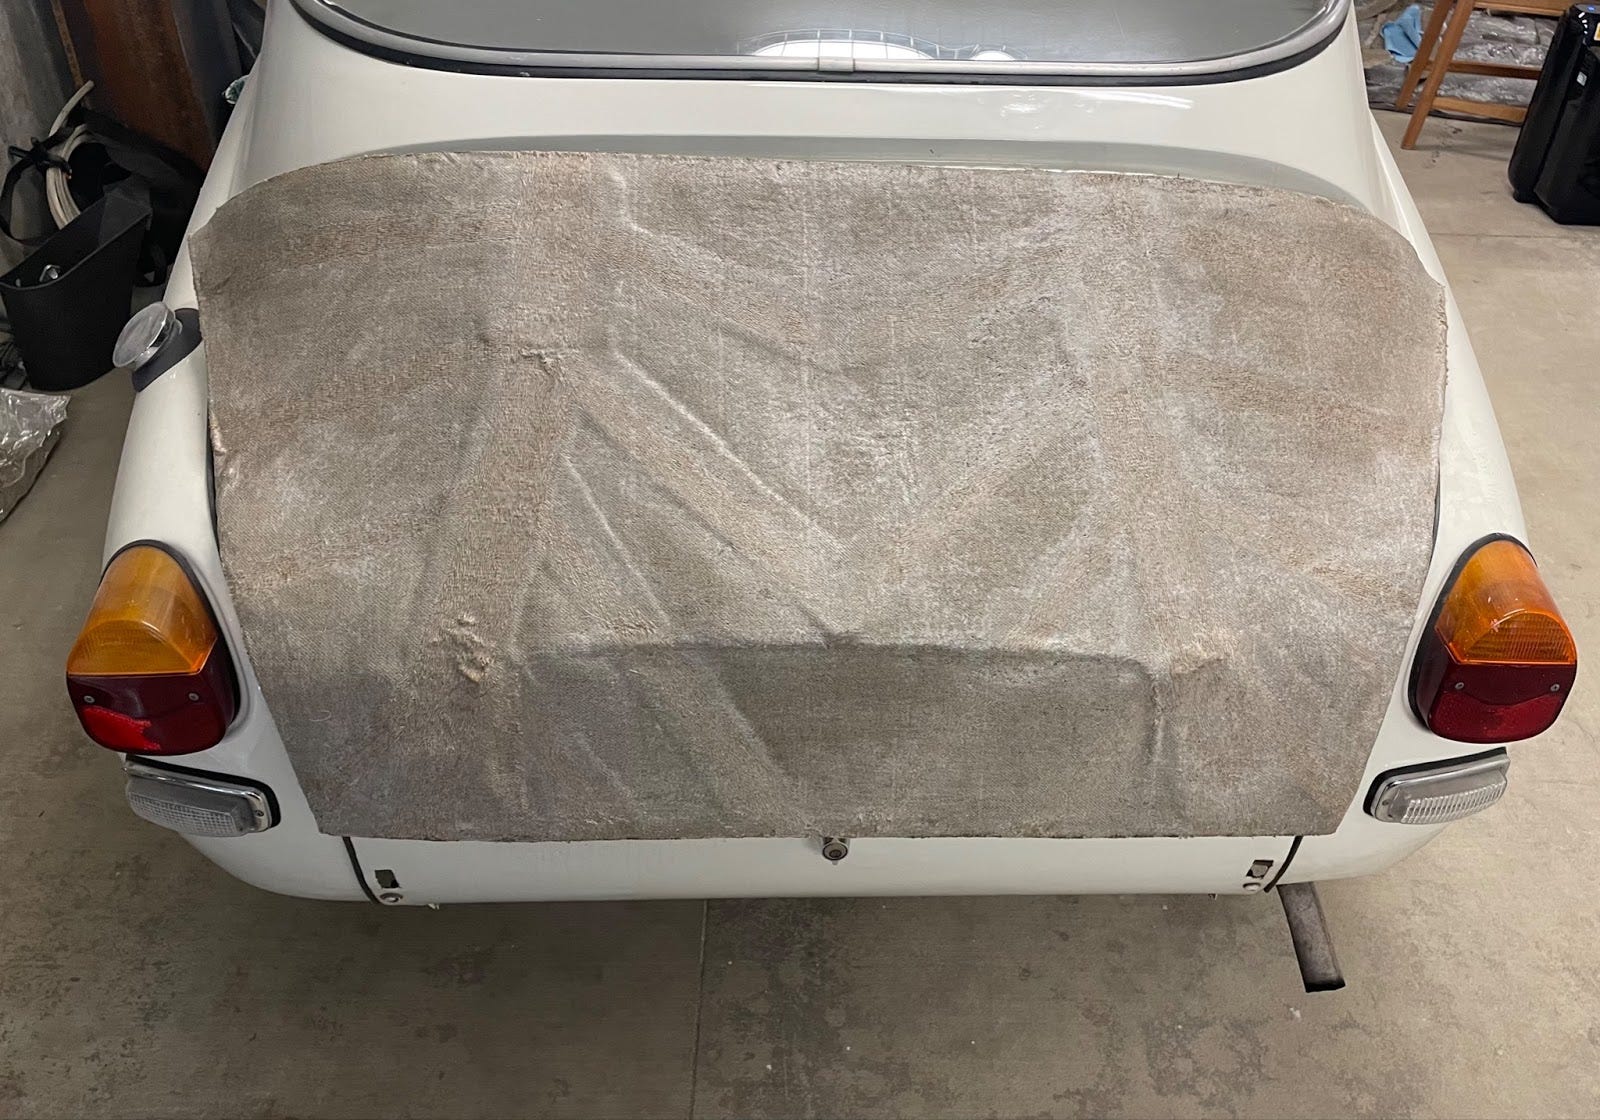
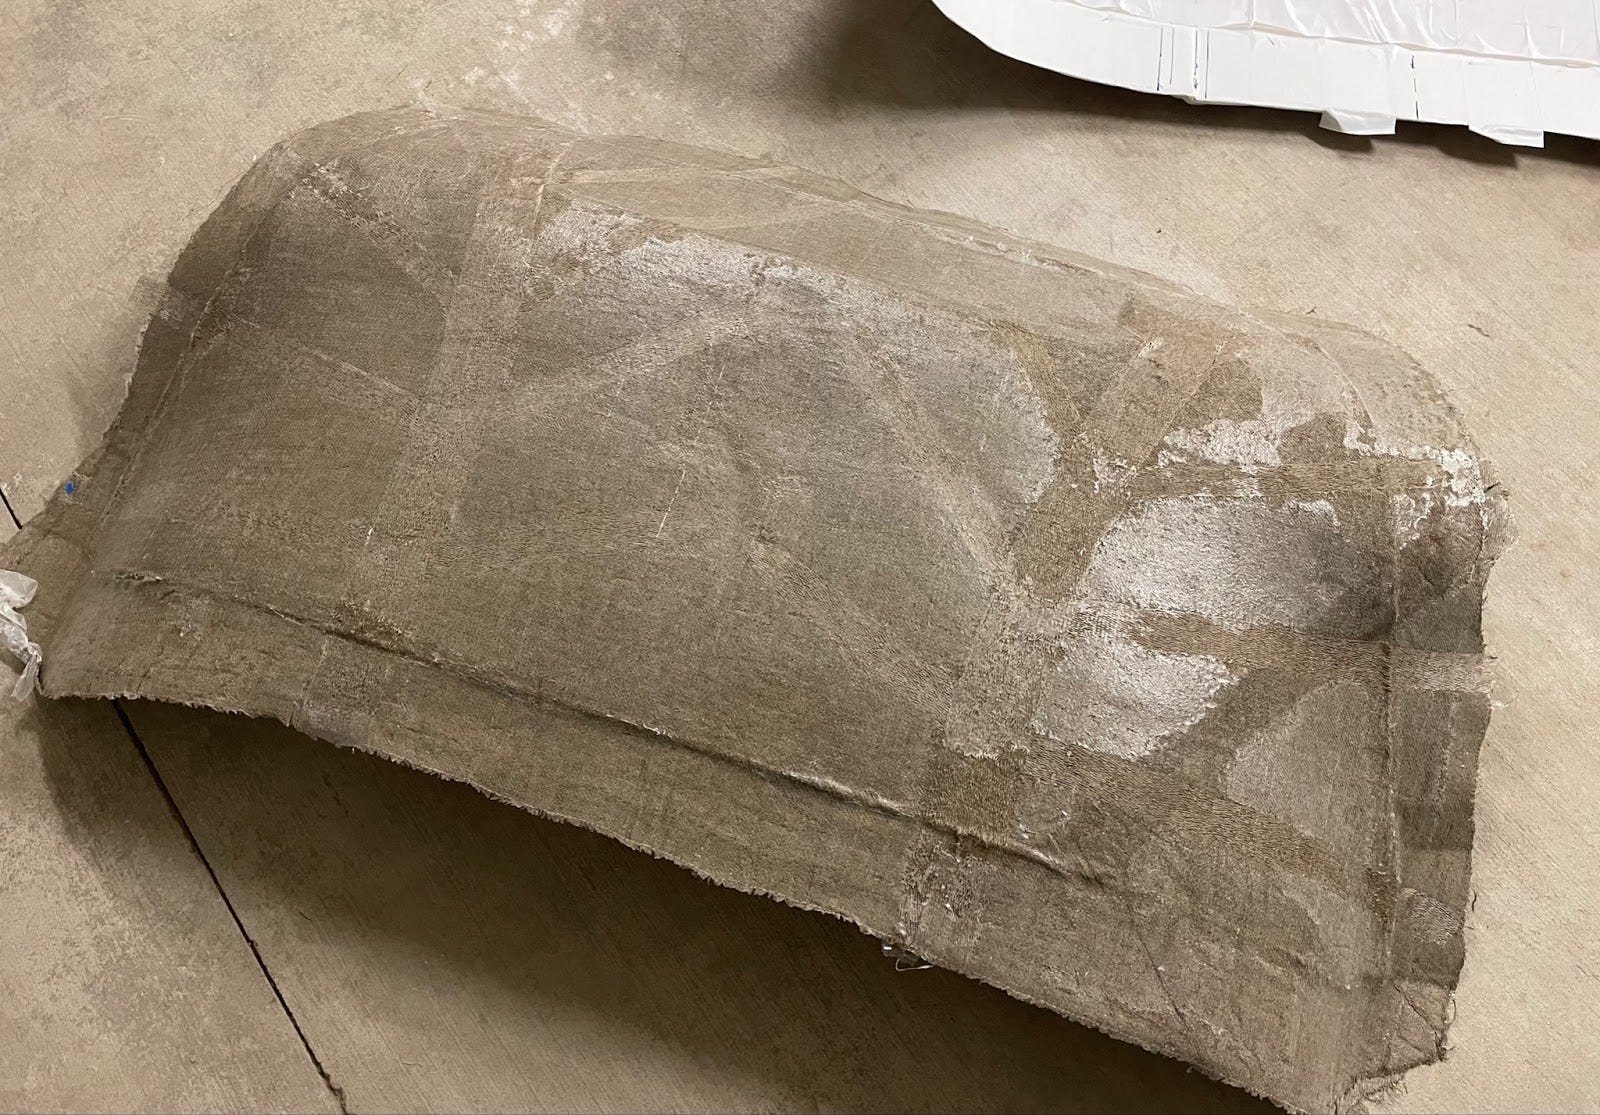
And here’s the final product. You can see the potential. It would have looked great if the part hadn’t warped as the casein glue shrank while curing. And if the part hadn’t developed those weird lumps. And if I hadn’t put another coat of glue on the outside in an effort to shine things up and get rid of the dry spots. Instead, I ended up with a milky finish. Pretty sure nobody has ever asked for a milky finish.
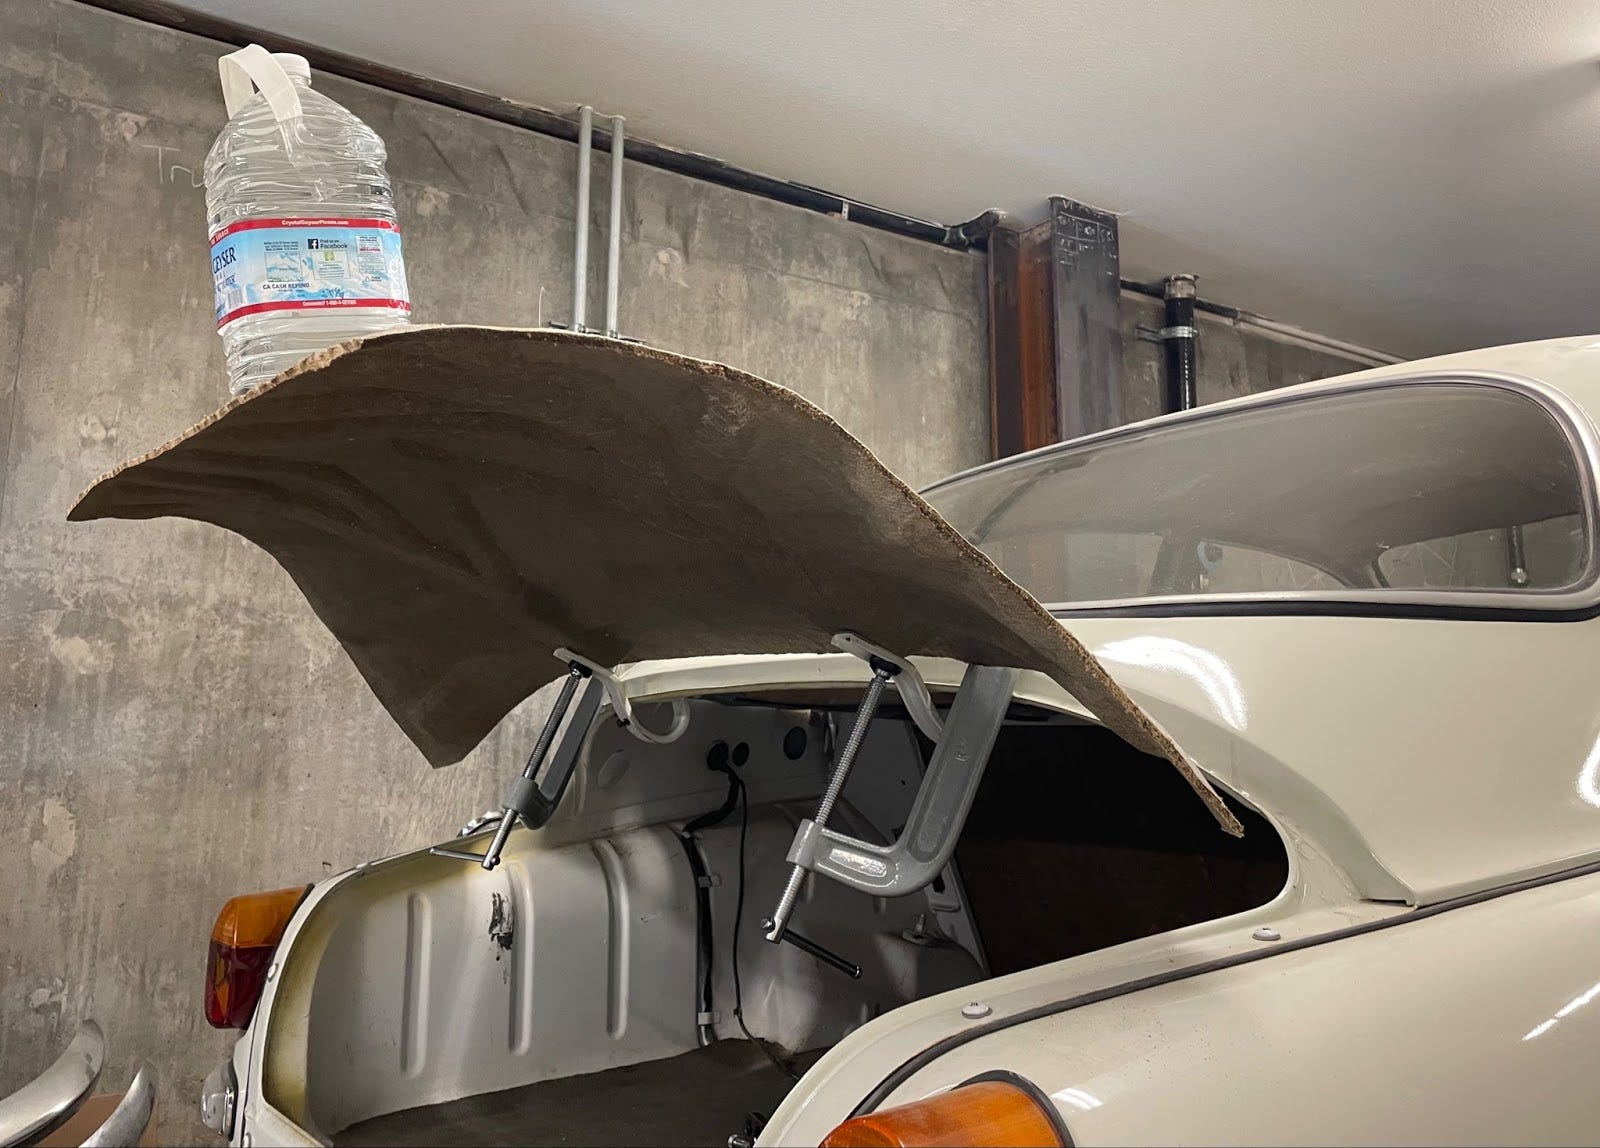
The trunk is really stiff for its weight. It weighs 5 pounds. The original trunk is 22 pounds. Shown above is trunk supporting a gallon of water, which weighs 8.5 pounds.
So the trunk project has come to an end. Here’s what I learned.
I should not go off the beaten path in concept AND material AND process for the part AND the mold and expect everything to work out well.
Materials science (for me) is a slow series of trials and errors and is probably something I should work on in the background rather than as an integral part of a project.
The leaf vein concept is an interesting (and stiffer) alternative to a typical cored panel. And it’s particularly attractive for cantilever applications with discrete attachment points.
However, the leaf vein based stiffeners are extremely labor-intensive, so it probably doesn’t make sense for most applications. It could be useful for areas with high curvature. The slimmer core pieces means that they themselves are easier to bend -- even though they’re stiffer as a unit.
It’s really hard for me to get out of the frame of thinking I was schooled in. When I went into the long explanation of beam bending, I fell back into derivations, which I don’t enjoy. My goal is to use more physical experimentation.
Casein glue’s tendency to shrink as it dries is a pretty fatal flaw for larger composite parts.
I focused more on learning underlying concepts than trying to hit some stiffness target. The trunk didn’t really lend itself to a quantifiable goal, but I want my next project to have one.
Overall, I’m glad to be done with this one. I feel like I have a much deeper understanding of bending -- and that was the goal going in.
I love when readers get in touch. Leave a comment, reply to this email, email me at surjan@fastmail.com, or find me on LinkedIn.
Drawing exercise #36. If you missed it, here’s why I’m learning to draw.

Yeah, love seeing new posts from you in my inbox. I was impressed with the final result - do you think you'd be able to provide video of manipulation of the trunk (or any other sample, really)? I think the stiffness would be more intuitively shown in a video as opposed to the photo.
For your list of learnings at the end:
Do you think one could use a papier-maché/egg-carton material mono-piece for the stiffener(s)? It could be pressed in one go from recycled paper pulp, a similar price to egg cartons (which I have to assume are cheap).
For the shrinkage, do you think a filler such as calc-carb or lime would help? I guess the alternative would be to look into a non-drying glue.
Thanks for the article!
Another great post, thanks for sharing. It's sad that the outcome disappointed you, but I look forward to whatever is next, and it's really cool that you've got to the point of making a boot lid out of natural composite that is both stiffer & lighter than the original. That's a good achievement!
> The only thing I learned in the second half was how much worse the real trunk was compared to the trunk in my head.
You might enjoy Ira Glass's "Advice to Beginners":
“Nobody tells this to people who are beginners, I wish someone told me. All of us who do creative work, we get into it because we have good taste. But there is this gap. For the first couple years you make stuff, it’s just not that good. It’s trying to be good, it has potential, but it’s not. But your taste, the thing that got you into the game, is still killer. And your taste is why your work disappoints you. A lot of people never get past this phase, they quit. Most people I know who do interesting, creative work went through years of this. We know our work doesn’t have this special thing that we want it to have. We all go through this. And if you are just starting out or you are still in this phase, you gotta know its normal and the most important thing you can do is do a lot of work. Put yourself on a deadline so that every week you will finish one story. It is only by going through a volume of work that you will close that gap, and your work will be as good as your ambitions. And I took longer to figure out how to do this than anyone I’ve ever met. It’s gonna take a while. It’s normal to take a while. You’ve just gotta fight your way through.”