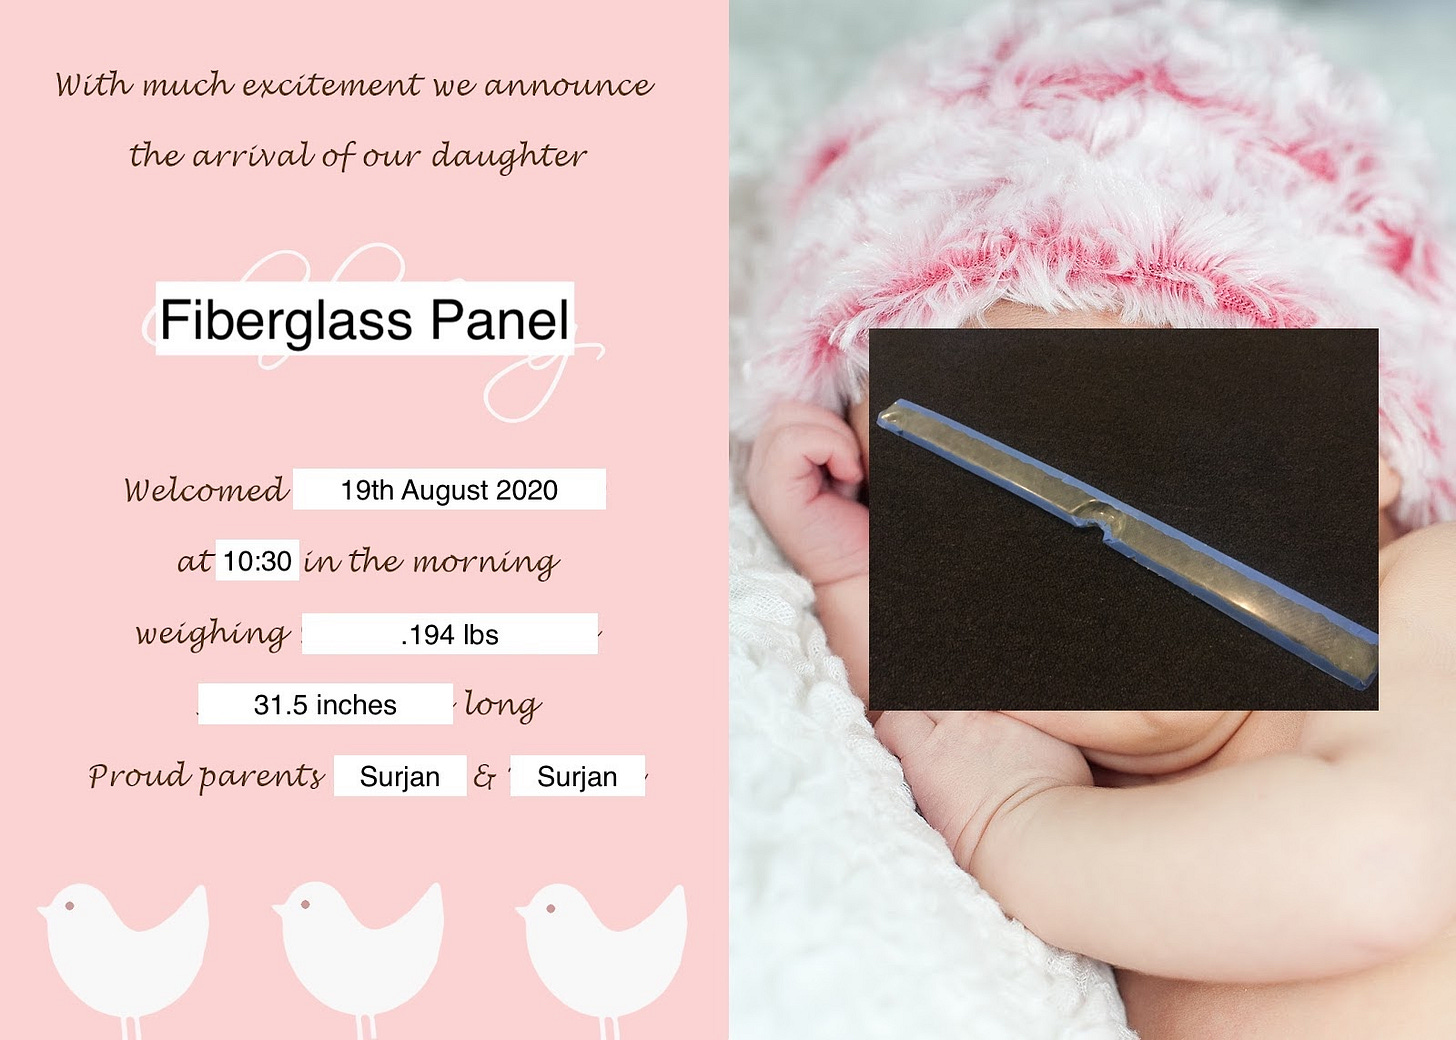
I’m pretty happy with the fiberglass panel I finished making. Is this a case of a parent loving their objectively ugly baby? Possibly, but it’s taken a bit of elbow grease to get to this point, so I’m going to enjoy it for a minute.
Finishing the Mold
Last time in this saga, I made a fiberglass mold from a panel on my Saab 96. At the end of that post, I was downbeat; almost all of the paint from the panel had stuck to my mold. I left you on a bit of a cliffhanger: what would the surface of the mold look like under that paint? I would ask for a drumroll, but you’d have to sustain it for a whole paragraph as I complain about my self-inflicted workload.
This bit sucked. I didn’t use paint thinner (a) because it might’ve melted the mold and (b) because I didn’t have any, so I couldn’t test it out. So I bent over my mold and chipped away at the paint. I don’t know what exactly went wrong when I was making the mold, but the tooling wax and mineral oil I used to keep the panel and mold separate did not work at all. The paint was really well stuck to the mold. For a few hours, I battled the paint with a scraper and some random other small, sharp things I had. To get those last stubborn flecks, I went over the whole thing with 400 grit sandpaper. Finally, I could see what I was working with.
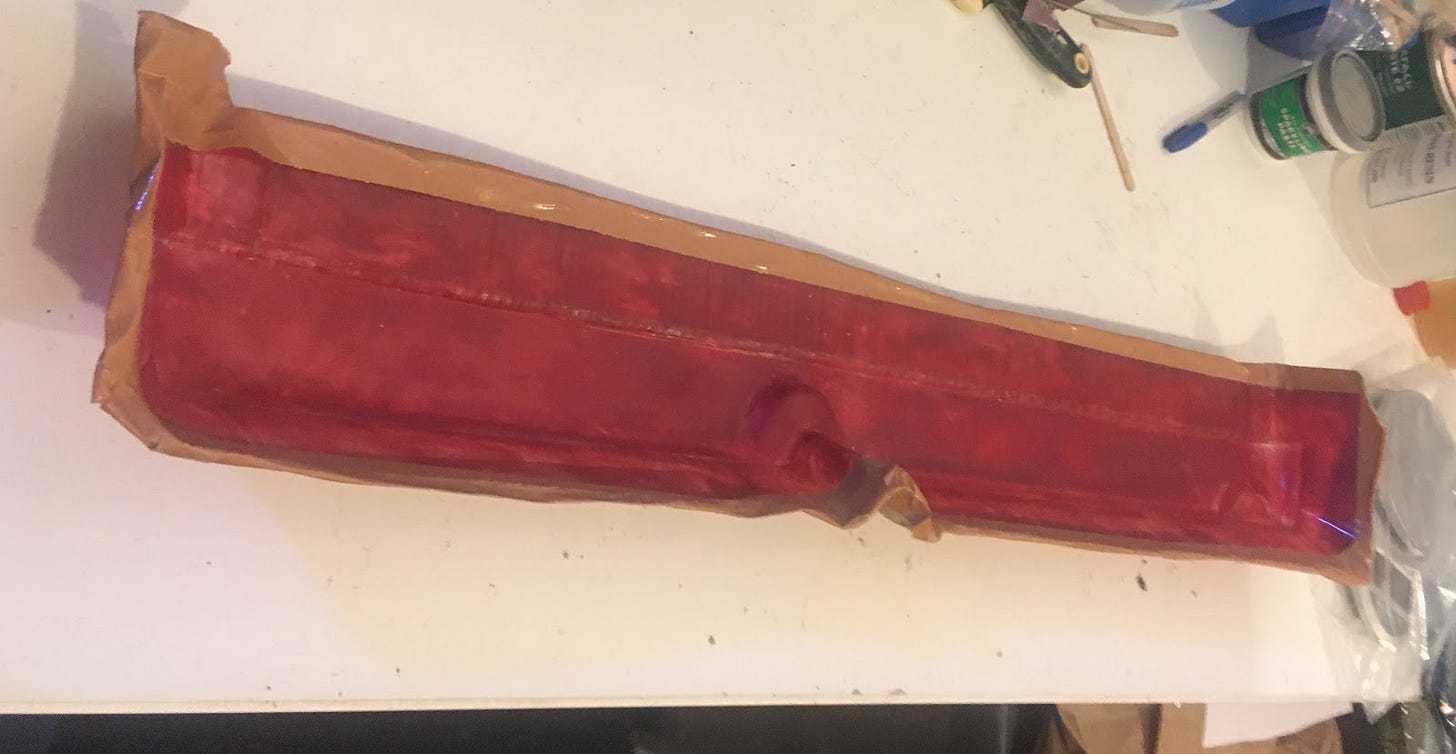
It actually looked alright. I did have a couple of small craters in the surface though. For those following along at home, you’ll need two things to make craters of your own: 1. Air bubbles between your fiberglass and gelcoat. 2. Patches of extremely thin gel coat that crack away. As an added bonus, the extremely thin gel coat results in a rough surface where the underlying fiberglass peeks through. As you might remember, I tried working the fiberglass down pretty hard in the corners to avoid air bubbles. In doing that, I must have squeezed too much gel coat out.
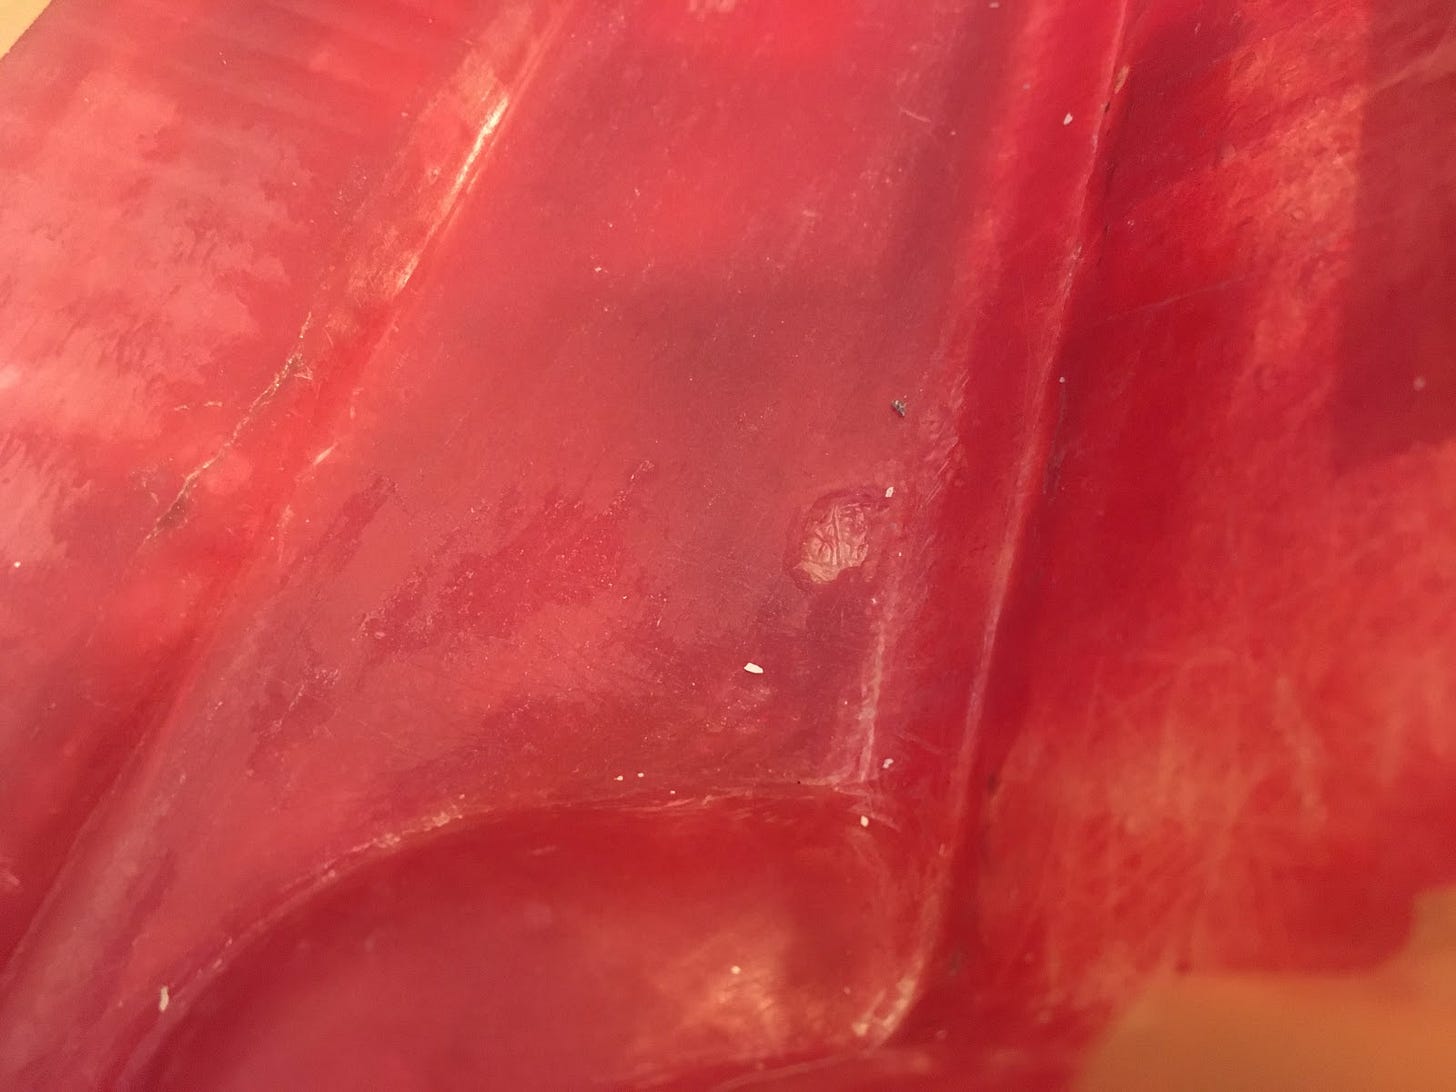
To fix both the craters and the roughness, I needed more gel coat, so I mixed up epoxy and thickener just like before. I filled the craters and swiped over the rough patches to cover the exposed fiberglass strands. After curing, my repair areas stood proud of the rest of the surface, so it was back to the sandpaper.
As I started to sand, I found that this latest batch of gel coat held one more “learning moment”, which is what I’m calling mistakes now. I hadn’t added any coloring to this batch. As a result, I couldn’t see the unevenness in the surface, since the top layer was clear. I had to rely solely on feel. It turned out all right, but once again, I just made life difficult for myself. After sanding down the high spots, the surface was looking even. I continued making the mold as smooth as I could with a 1500 grit wet sand followed by a polish.
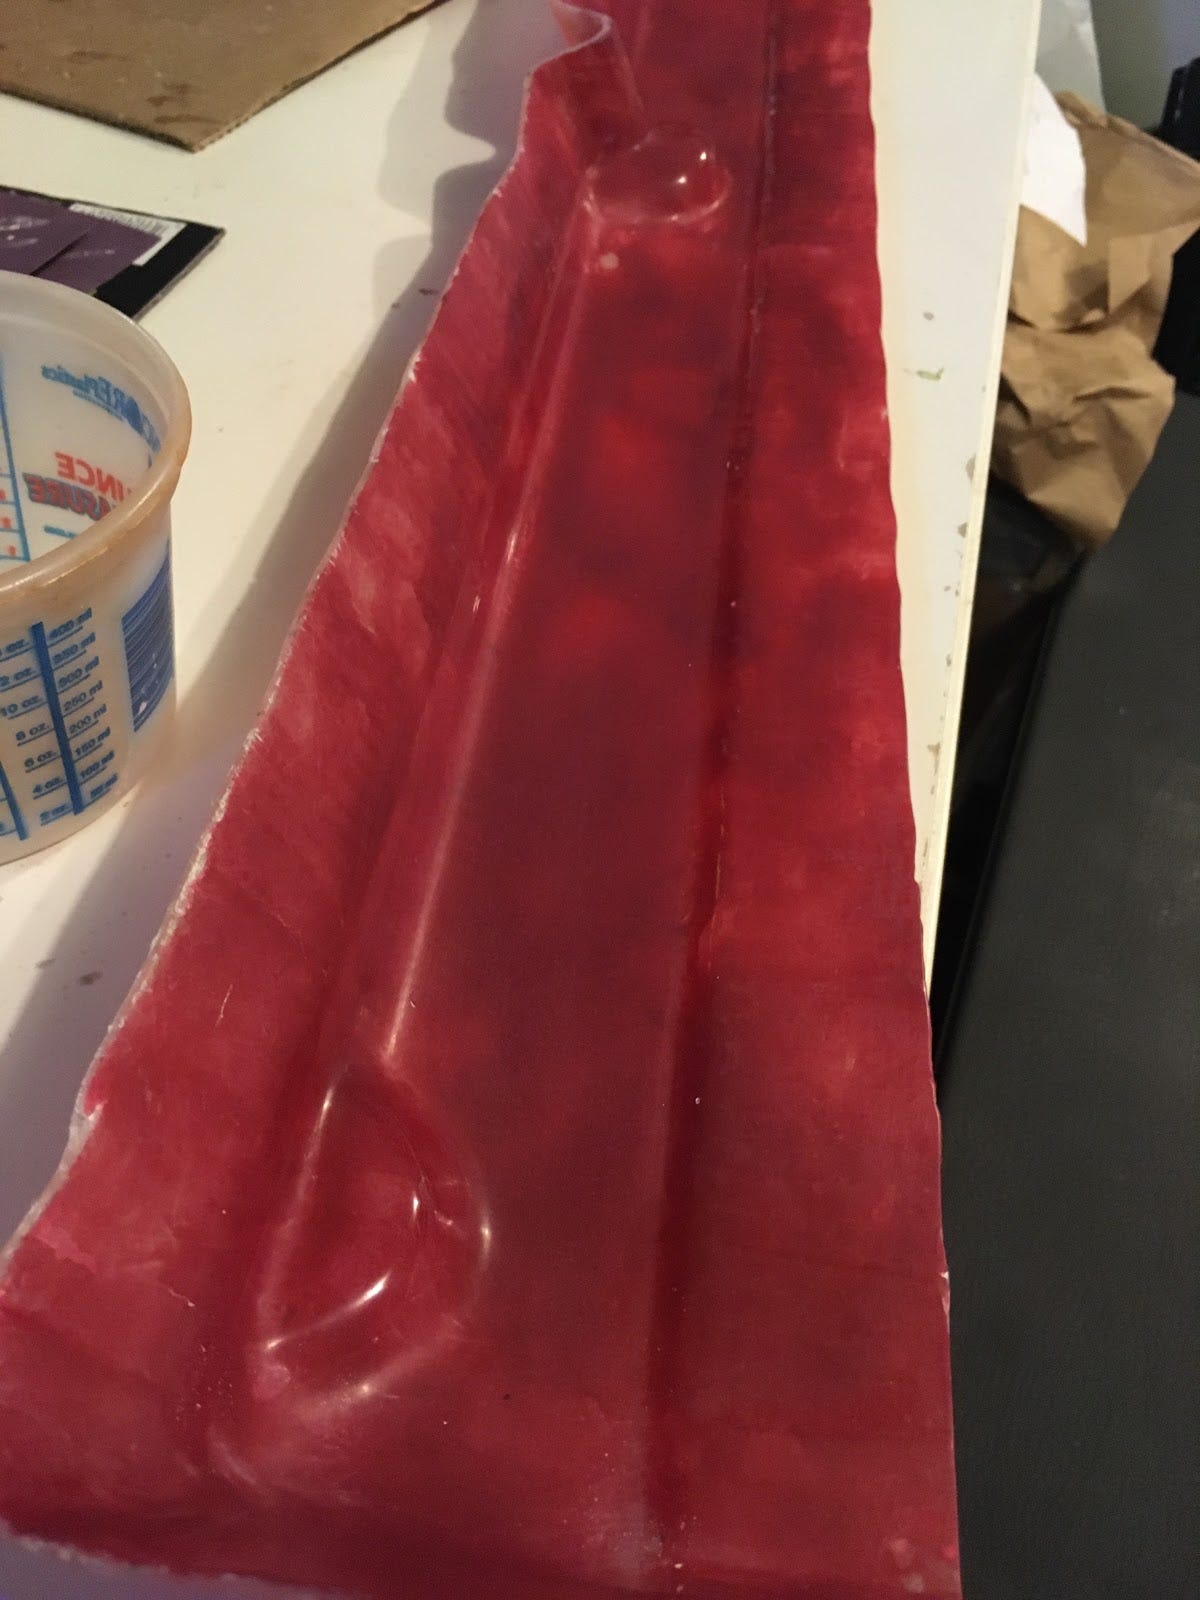
Turns out you can polish a turd if you cover it in a bit of epoxy.
The Fiberglass
Over the course of the last few posts, I’ve clearly established myself as a bit of an expert when it comes to making composite parts. It’s only fair that I let you in on some nuggets of wisdom that I’ve learned along the way. Maybe you too can get on my stratospheric level.
Preparation is everything when it comes to composites-- largely because of the epoxy resin. It stays liquid for a finite amount of time after its two parts are mixed together, so after you’ve mixed your epoxy, you don’t want to be scrambling around like a chicken-less head, as my dad says. When it does dry, it’s an enormous pain in the backside to remove from anything, so a big part of the preparation lies in protecting anything you don’t want epoxied. For example, there is a piece of a paper towel that is now permanently epoxied to my table. Of course, I did this for demonstration purposes; as an expert, I’d never do something so silly.
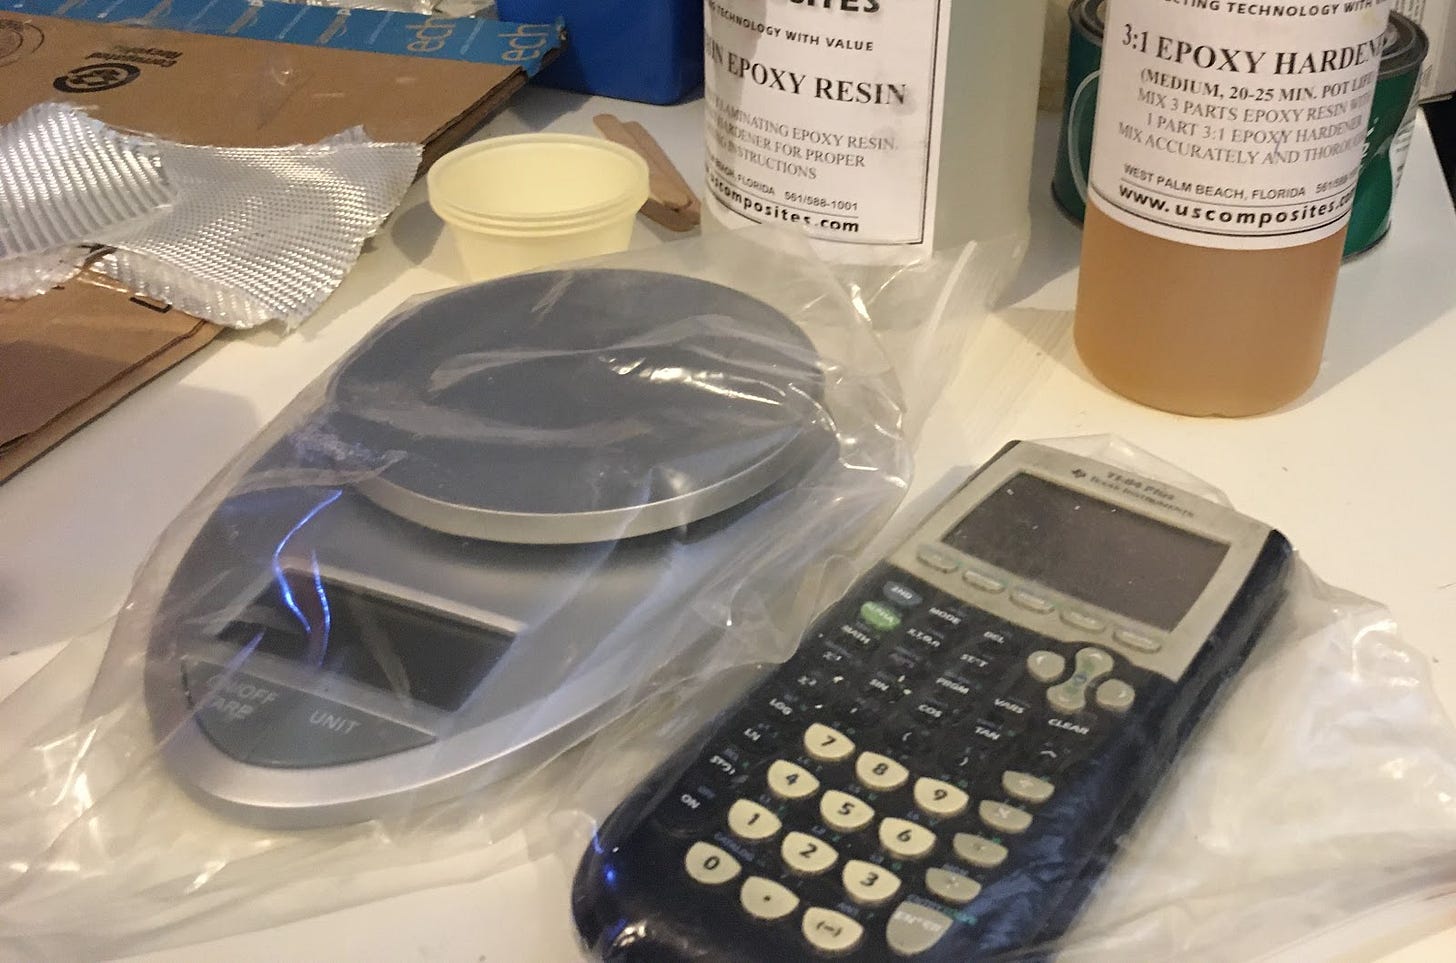
Since that demonstration, I’ve been working on top of a piece of cardboard. I’ve also put my weighing scale (to weigh out the epoxy mixture) and calculator (to calculate the epoxy mixture) in plastic bags. You’ll also want to lay out everything you need in advance: mixing cups, mixing sticks (popsicle sticks), fiberglass (pre-cut to the appropriate shape), etc., etc. I won’t go through everything, since I’ll probably forget something, but what I’ve found useful is to mentally run through every action from the moment the epoxy is mixed all the way through to completion. One other trick is to prep your paint brushes. You don’t want bristles coming detached and falling into your part, so you should smack around your paint brush a bit and shake loose any bristles that aren’t team players.
With everything ready to go, I prepped the tool surface. This time, there was no “innovation”. I stuck to tooling wax and PVA, which I was able to apply in a much thinner and more consistent layer by patiently watching for drips. Once the PVA dried, I could mix the epoxy and get going. Things moved pretty quick from there. I brushed on a coat of epoxy on the mold - this would be the outside of the part and help with the surface finish. The epoxy coat was followed by a layer of fiberglass, a twill fabric which draped nicely into all the corners. Because of its drapability, I used one large piece of fabric for the whole part. I wet that layer (ply) out with epoxy and then it was rinse and repeat for plies two and three. Add fabric and wet it out. Simple enough. I battled a few air bubbles but I think I came out on top.
A day later, it was time to release the part from the mold. This time, thankfully, the de-molding was uneventful. I flexed the mold in a few directions to get things loose, stuck in a popsicle stick, and “pop” went the panel. Success! Even the mold looked like it was in good condition, ready to go again. On the panel, there were a few air bubbles (just to let you know that it’s handmade) and possibly an area in the corner where the fabric was a bit distorted where I had overworked it, but not too shabby.
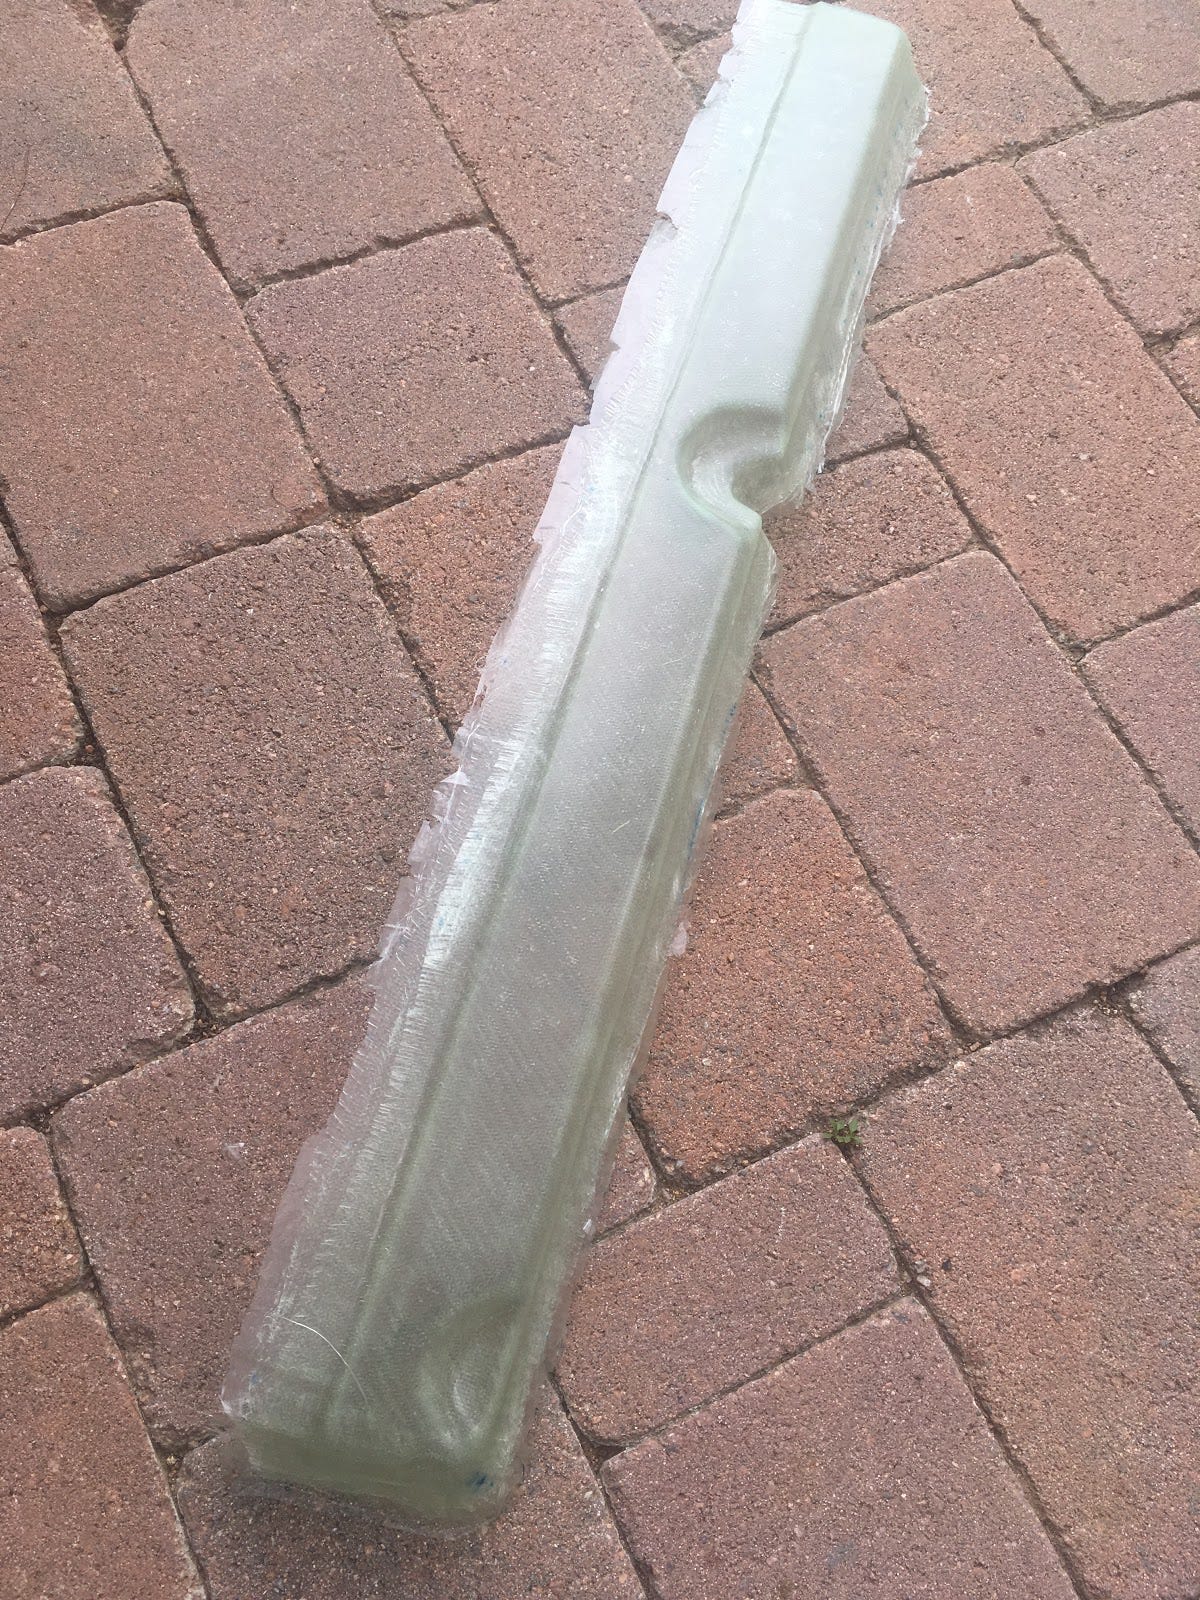
The last job was trimming the part down to its final size. I had used a sawzall on my mold, but it was a bit like trying to dice a tomato with a chainsaw. In college, I had success with a carbide cutting wheel on a Dremel. No longer flush with school funds, I decided to go with a cheaper Black & Decker version this time. I snapped two of the cutting discs after cutting about three inches, but in the end, an allegedly diamond-coated engraving tool worked well enough. The other good thing about a Dremel-like tool is that you can duel wield it with a vacuum. Fiberglass/epoxy dust is not nice. In fact, that brings me to the last tip. Fiberglass and carbon fiber dust has a knack for getting into your pores and providing long-lasting irritation. Long sleeves are a good idea, but you can also rub your exposed skin with baby powder, a much more pleasant thing to have in your pores than fiberglass.
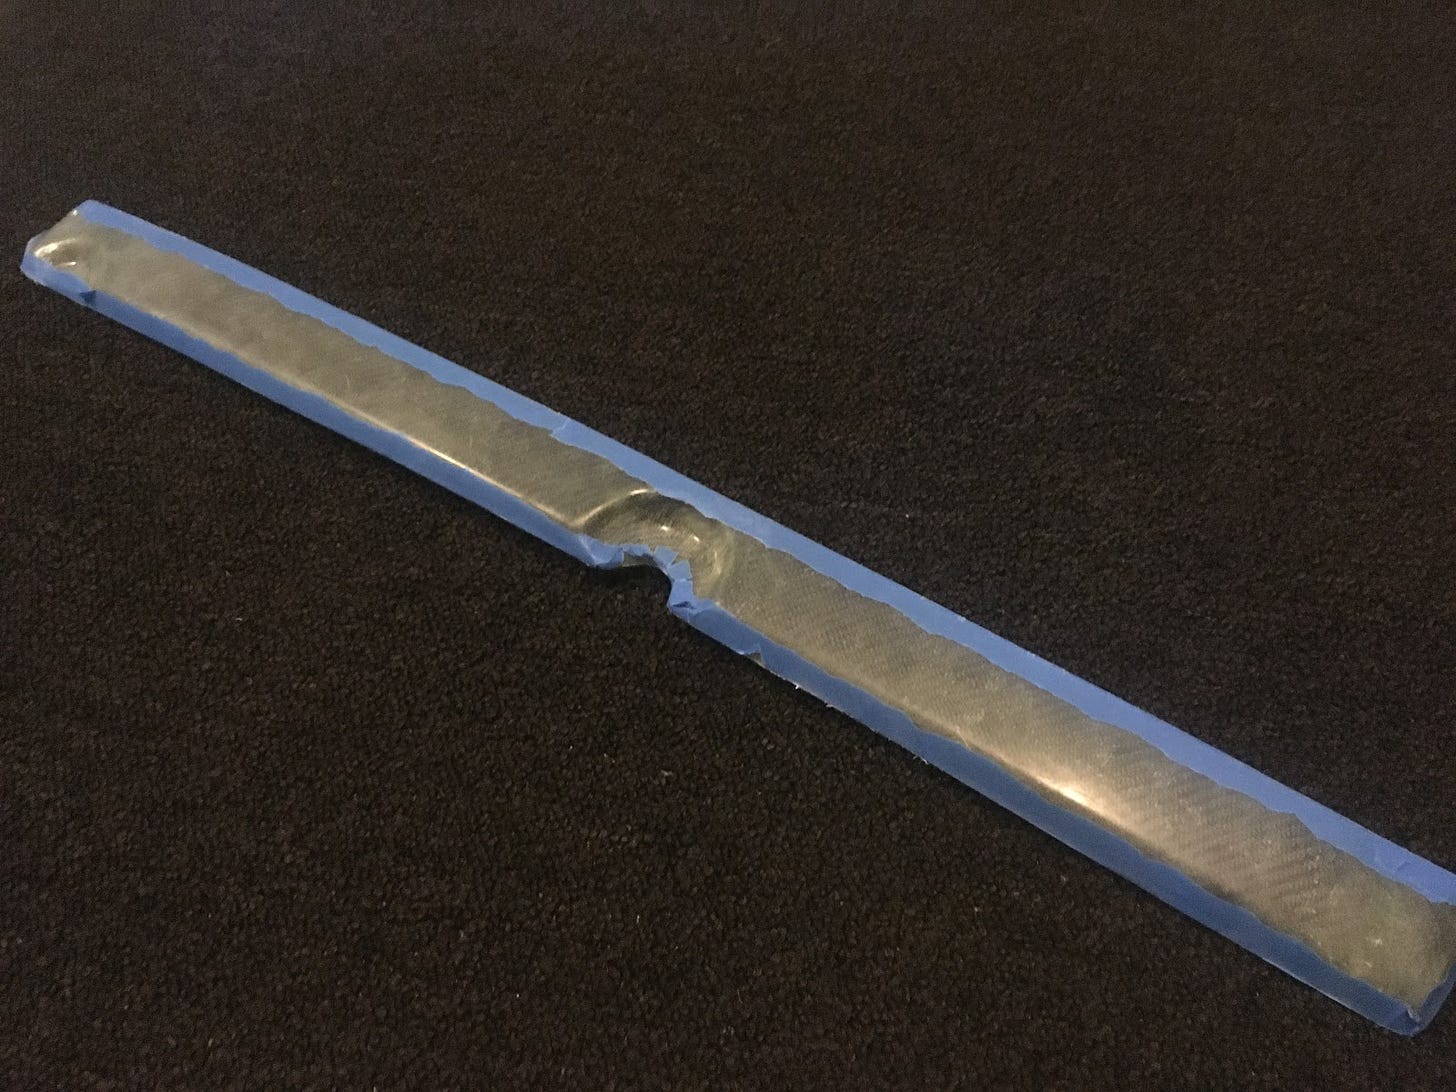
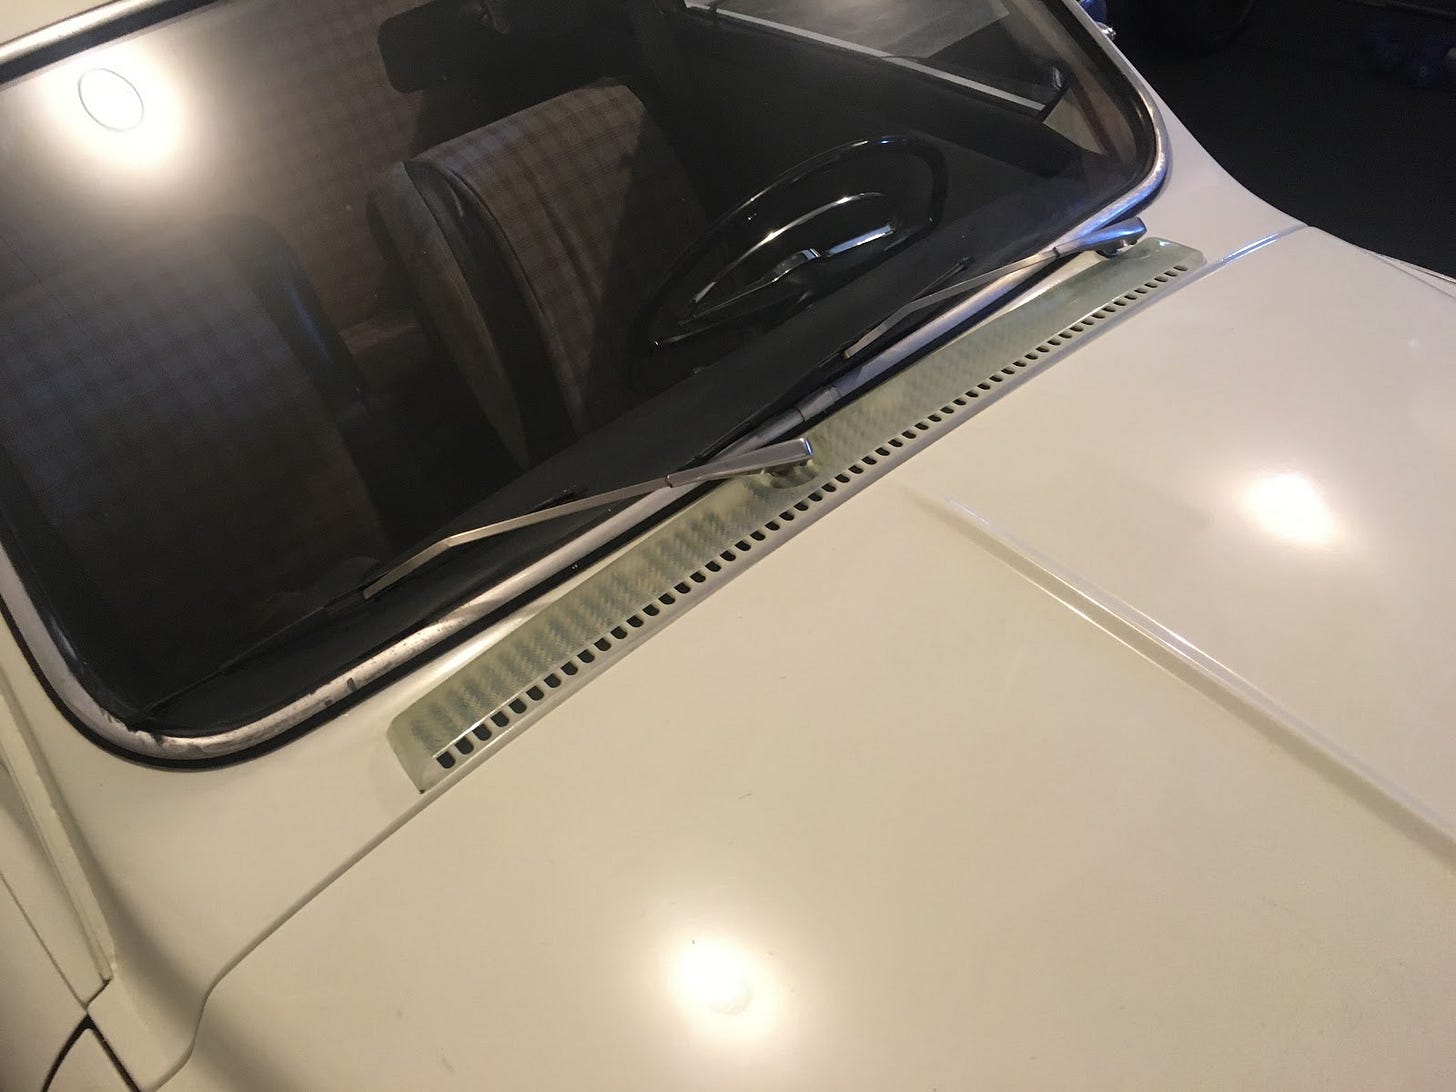
Trimming done and part finished. It looked pretty decent, fit pretty decently, and weighed only .194 lbs compared to 1.05 lbs for the original panel. But before you turn to the person next to you and say, “See, I told you composites are light”, you should not be too impressed. My part is a lot floppier than the original -- usably floppy, but floppy nonetheless. Here are some pictures of it mocked up on the car.
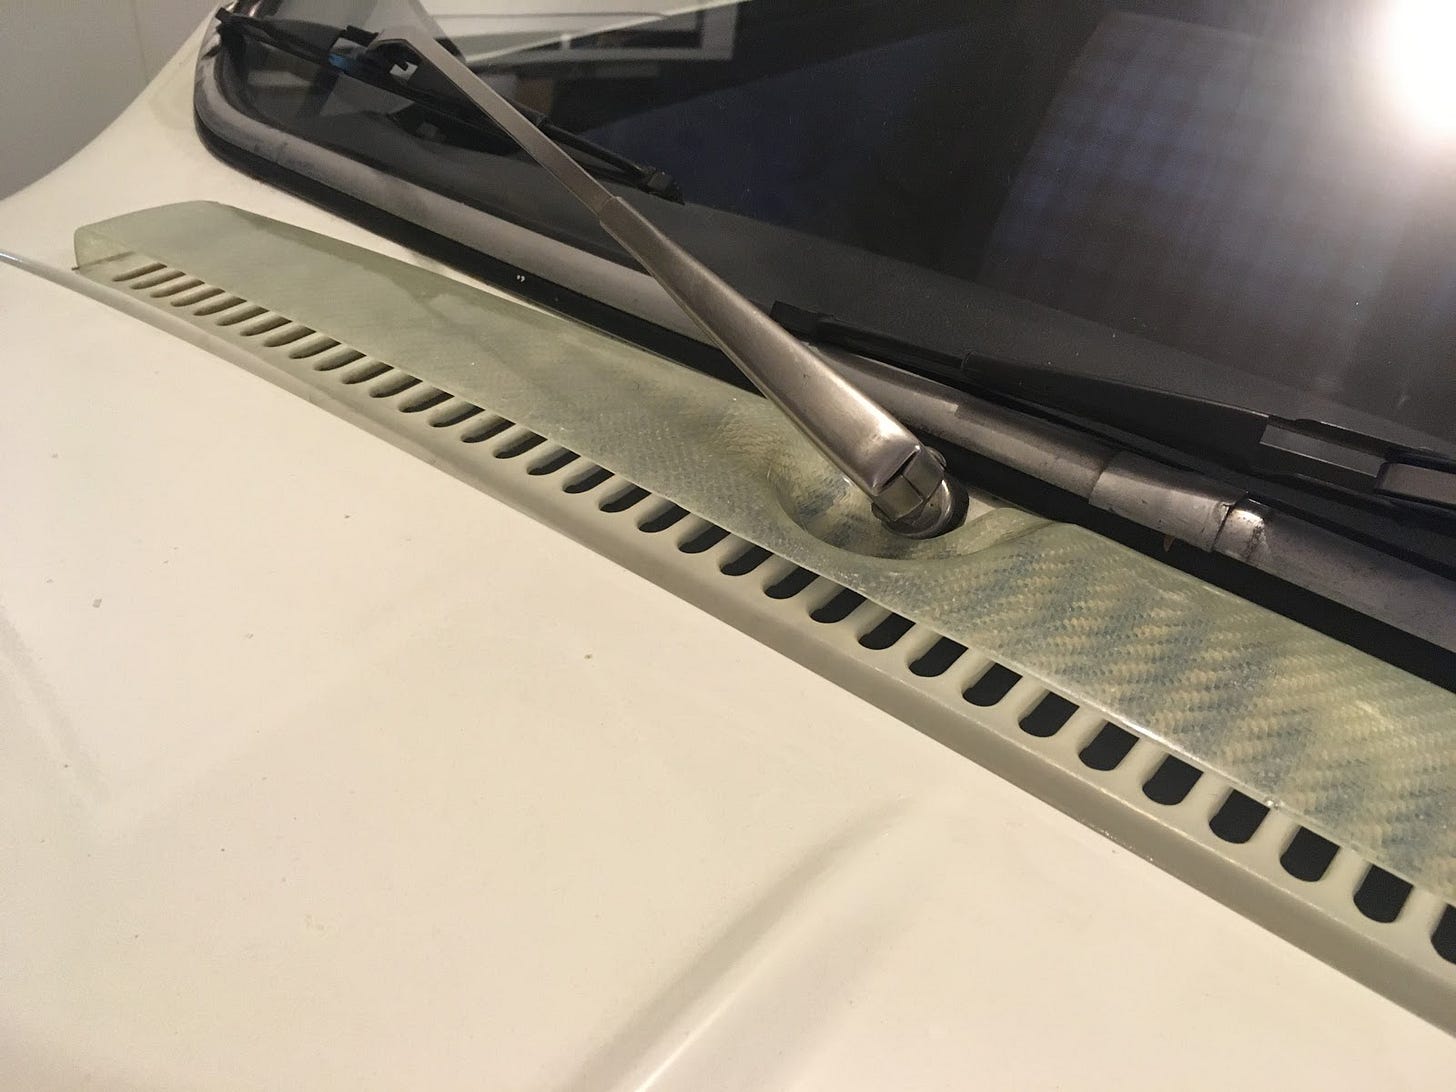
So what’s next? Mount it and be done? Not quite. I didn’t commit career suicide just to make fiberglass parts; I committed career suicide to try to make more interesting things. This is just a baby step along the way. Stay tuned...
Corrections? Questions? Comments? I’d love to have your input. Leave a comment, email me at surjan@substack.com, or find me on LinkedIn.
Drawing exercise #13. If you missed it, here’s why I’m learning to draw.


Nice work! I think you do yourself a disservice with all the self-deprecating humour, everybody makes mistakes but how you deal with them is what makes an expert, and you dealt with your mistakes well and made a very nice part.
That TI-84 looks to be in good shape. Bravo! And don't understate your work here. You built something that looks like it came off a factory production line. That's awesome!