This is one of those times where it’s not that fun to learn in public. I just got done making my first unaccompanied fiberglass mold and I’d grade myself at about a C-. My ego would prefer to pretend like everything went well and move on. Unfortunately that’s probably not the best way to learn, so let’s retrace my journey -- full of wrong turns and dead ends.
I left off at the end of post #20 feeling ready to make a proper mold. (I’d suggest reading that post if you haven’t already. It goes over some basic mold-making concepts and experimentation that I’ll reference in this post.) The first steps of making the mold were pulling the panel off of the Saab and preparing its surface.

My plan was to build the mold on top of the panel, like building a muffin pan around an upside-down muffin. The outside surface of the panel would become the inside surface of the mold, so I had three main requirements for the surface of the panel:
In order for the mold to have a smooth surface, the panel itself should have a smooth surface.
The panel’s surface should be slippery enough that the mold and the panel would be able to separate. No use having smooth surfaces if they never see the light of day.
The surface and paint of the original panel should stay in good condition after the molding process. I wanted to have the option to put the panel back on the car if I screwed up majorly.
To sum up the requirements: 1. Smoothness 2. Slipperiness 3. Protection
Dead-end #1: Protection
For the protection of the panel, I thought I would cover the whole thing in clear packing tape. In my previous experiments, I had success with packing tape on cardboard, with the tape providing both protection and slipperiness. But as soon as I laid down the first strip of tape on the panel, I realized that my idea wasn’t going to work. The tape had applied smoothly over the cardboard “L”s, because the “L” curved in only one direction. This panel had complicated curvature and there was no way I was going to get the tape to sit flat in those areas. If the tape were wrinkled, the mold would mirror those wrinkles. I would have to give up the smoothness of the surface to get the protection from the tape. That was not a trade I could live with. Packing tape on the panel, then, was my first dead end.
I considered other options, like vinyl wrap, for protection of the panel. But the effort and time didn’t seem worthwhile. If I could do well on requirement #2, the slipperiness, the panel would release cleanly from the mold and there would be no damage to the panel. Whatever I added to provide the slipperiness would also provide the protection (in theory).
Dead-end #2: Fitment
When I was removing the panel from the car, I noticed another issue that I wanted to address: the fitment of the panel. On the sides of the panel, there was a noticeable gap to the body of the car. Since I was going through the effort of remaking the panel, I thought I’d take care of that gap too.

My solution was to extend the shape of my new panel down further. To do this, I’d have to extend the mold, which in turn, meant extending the original panel. Whatever I added as an extension would have to blend seamlessly back to the original surface. Again, any steps or roughness would be mirrored in the mold. This transition from the panel to the extension would usually done with Bondo. Bondo is applied as a paste and then sanded down to the desired shape when hard, so it’s ideal for transitions. The trouble for me was that Bondo is an automotive body filler, meaning that it’s not supposed to come off easily. To get it off, I might have to sand through the Bondo and risk damaging the panel.
I tried to think of alternatives to Bondo that could be easily scraped off and came up with Play-Doh. For some strange reason, I didn't have any lying around, but I did find a DIY recipe online. Two parts flour, one part salt, and one part water. It was a pretty nice consistency, but when I tested it on the panel, I had difficulty blending it out. I could only get the dough so thin, leaving a slight but noticeable step down from dough to panel. The dough hardened admirably on the panel overnight, but sanding removed material in flakes and chunks, making it impossible to achieve a smooth and fair surface. At least I was able to get the doughy blob off the panel after soaking it in some water.
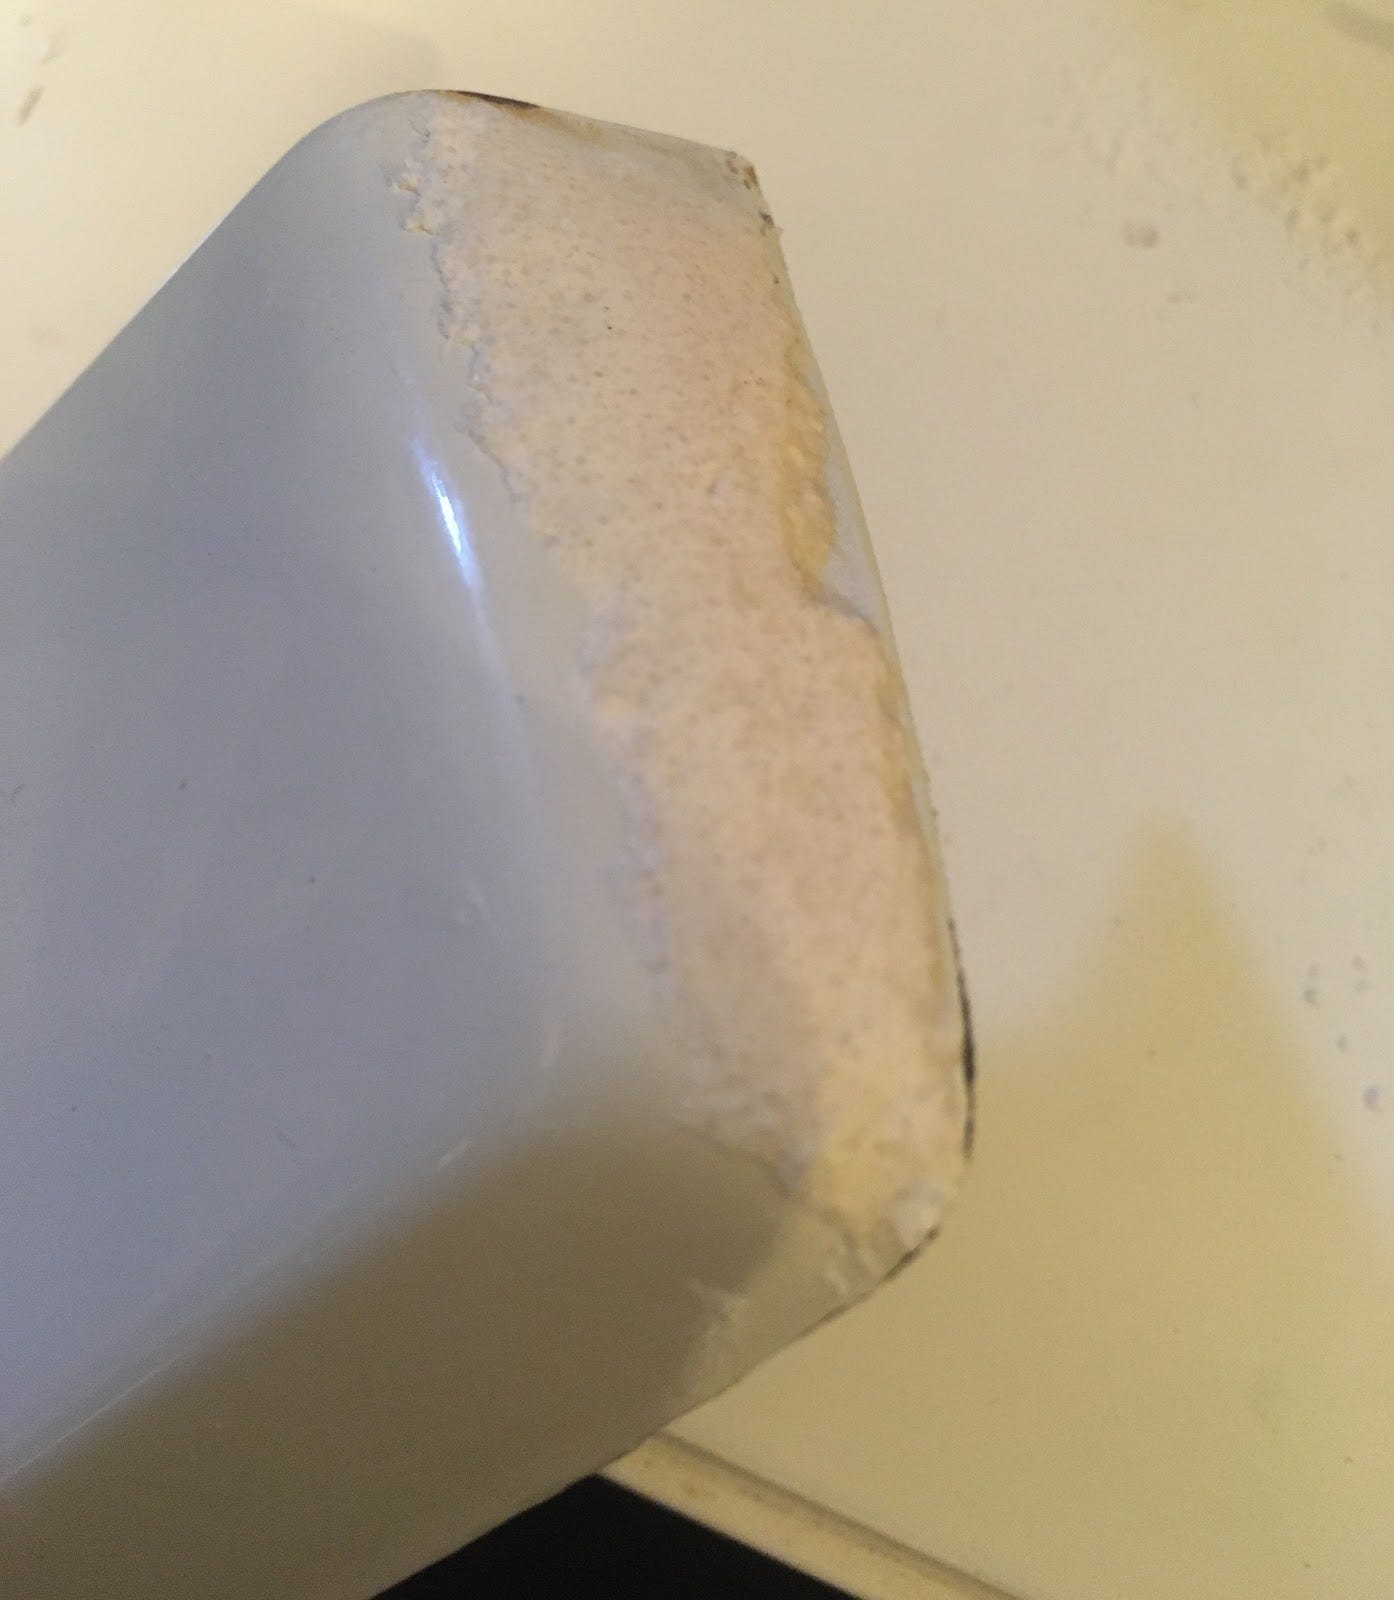
Back to square one, but with new knowledge. At least, this time, I had some fresh Play-Doh to fiddle with as I mulled things over. I glanced through some cabinets to see if anything would get the gears turning. Aha! Spackle! Spackle dries hard, is pretty sandable, and is water-soluble. A perfect solution. I even found that spackle could be “sanded” with a wet rag. This would really allow me to smooth the spackle without damaging the panel at all. The only question that remained was how the spackle would interact with the epoxy gel coat. The gel coat, you will remember, is painted on the outside of the plug/panel to form the inside surface of the mold.
I decided to do a test; I spread out some spackle, let it dry, and covered it in release agents (release wax and mineral oil). I could see that the spackle was soaking up the release agents, but I couldn’t do much besides adding more and carrying on. Over my released spackle, I applied an epoxy gel coat and let it cure. The following day, when I removed the epoxy, the spackle came along with it. Not a good sign. I chipped out a little spackle and then left the epoxy/spackle blob in a container of water, hoping that the spackle would dissolve away. That kind of worked, but the surface of the epoxy was very rough. It seemed that the spackle was just too porous, absorbing the release agents and not providing a smooth surface for the epoxy to form against. The spackle would maybe work if I sprayed it with primer to seal its surface, but I couldn’t do that without spraying the panel as well.
This was dead end number two: I couldn’t think of a way to extend the panel that would be easily reversible. Bondo and primer would be difficult to remove without damage. Play-Doh and spackle didn’t give me a smooth enough surface.
I took a step back and revisited the original problem - the panel not fitting. This whole Bondo/Play-Doh/spackle struggle was a problem that I created for myself when I decided to extend the panel. Maybe instead of extending the panel to get it to fit, I could just cut it a bit shorter. Cutting the panel would change how it sits on the car, but I wasn’t too worried about that. My goal here is to explore my ideas in composites, not build something worthy of a Concours d’Elegance. That was good enough reasoning for me, so I decided to solve the fitment issue by trimming the panel shorter when it eventually came out of the mold.
Mold-making: Flange
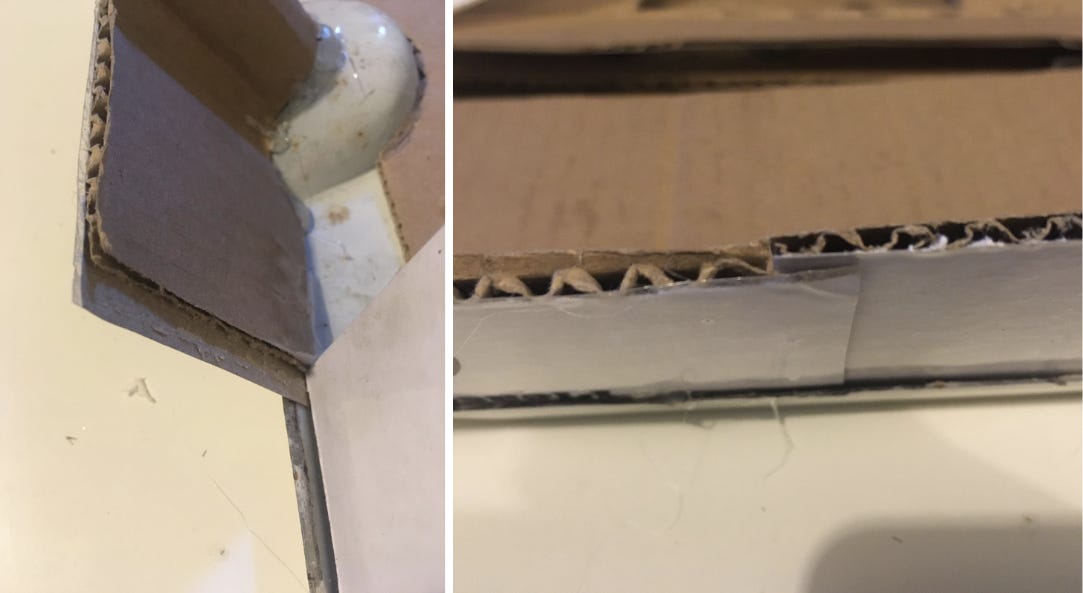
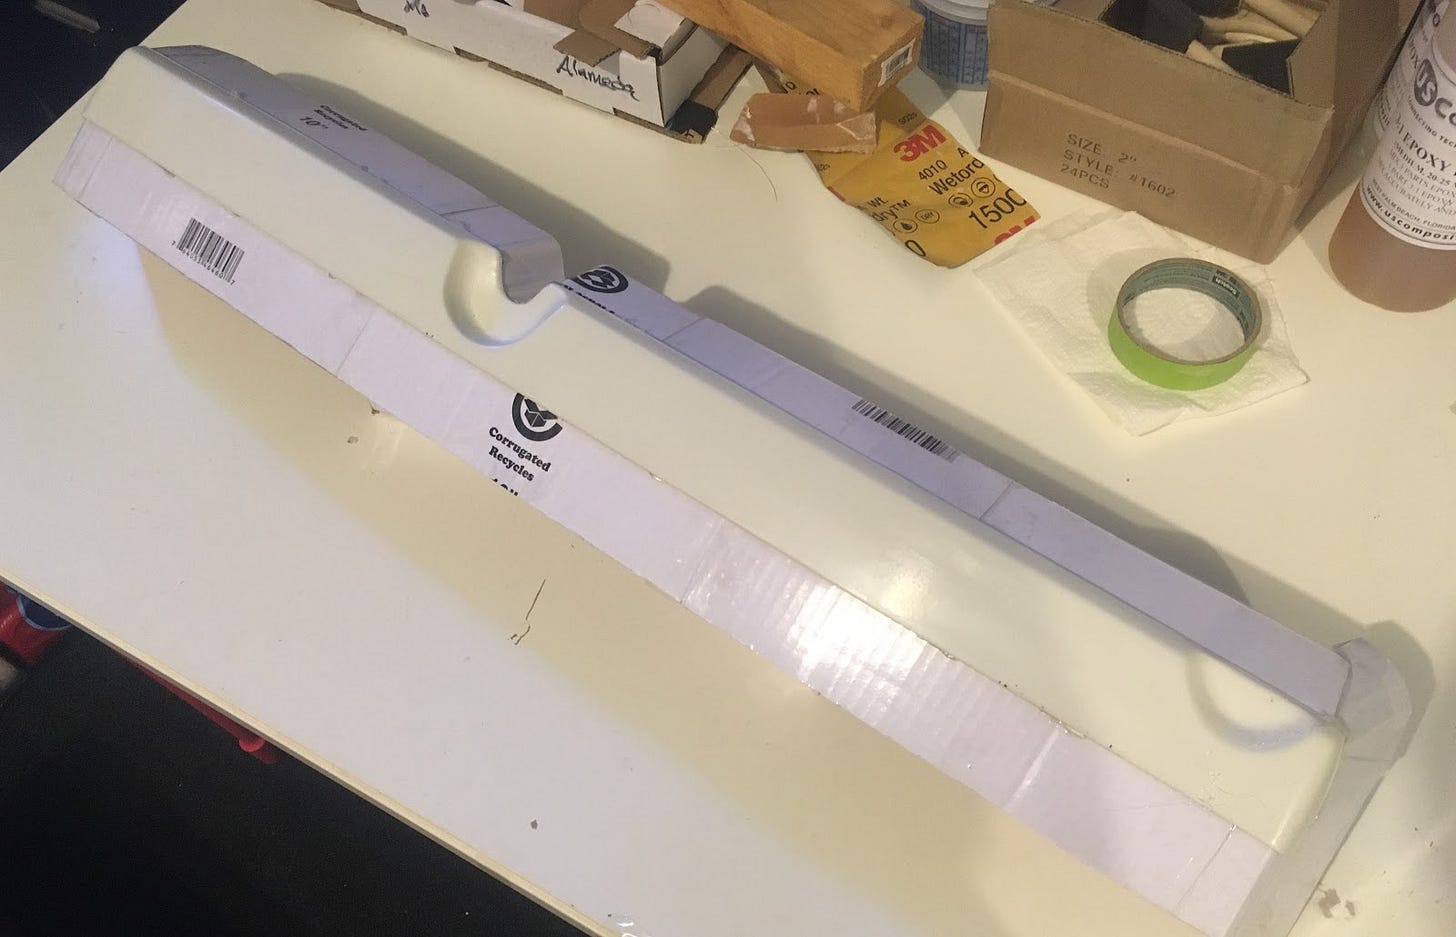
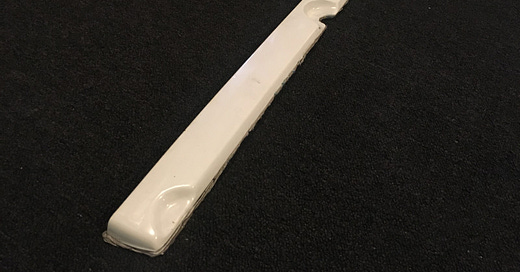
With those dead ends dealt with - by complete avoidance - it was time to start building the actual mold. I started by adding flanges to give my mold more surface area. Surface area comes in handy when laying up composite parts in a mold. The part can be made larger than necessary and trimmed back to the correct size, leaving clean edges. For my flanges, I used cardboard covered in packing tape, which I attached to the Saab panel with tape and hot glue. I was reasonably proud of my method for joining pieces of cardboard together. If I had overlapped the cardboard without modification, the step between the pieces would have been huge. So I cut away part of the corrugation and inside sheet of the cardboard, leaving just the outside surface, as you can see below in the picture to the left. That way, when I overlapped the cardboard, the step was much more manageable - only the height of that outer sheet.
Mold-making: Radius
Flange in place, I moved on to making a smooth transition between the flange and the panel. Unlike the previous Bondo/Play-Doh/spackle experiments, this time, the transition would fall entirely outside the “edge of part”, or trim line. Because this surface would eventually get trimmed away from the finished panel, I didn’t have to worry about matching the curvature of the original panel.
I still needed a smooth transition, so I didn’t get voids at the edge of my part, but I could change the curvature. I decided on the candle wax and skewer method that I outlined in post #20. The method worked well, but it was extremely time consuming. The little shavings of wax were a pain in the backside. The wax got everywhere, getting stuck to my table, clothes, and beard. I don’t recommend candle wax unless you’re a bit of a masochist. I’ll probably look for a different solution next time.
Mold-making: Release and Gel Coat
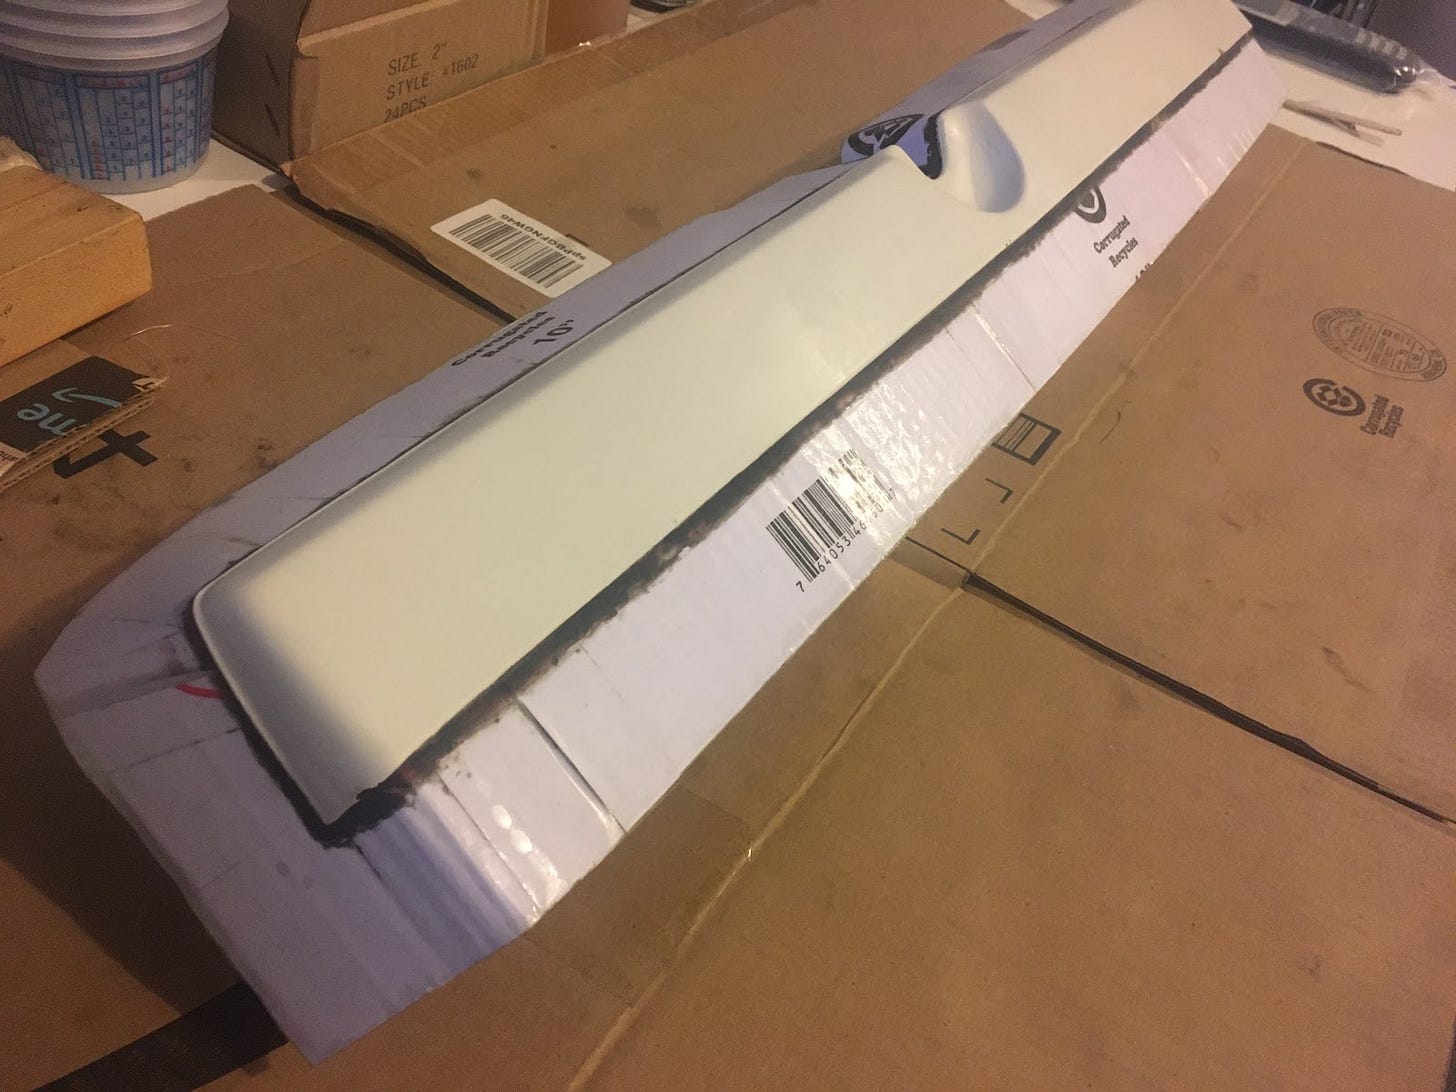
For the release/slipperiness, I used a combination of the release wax that I had purchased and the mineral oil. The more usual combination is release wax and PVA, but as you might remember, I’m not a big fan of working with PVA. I had good confidence that my combination would work just as well.
The gel coat, too, was largely a carryover from older experiments, though I did add slightly less thickener. This time, I aimed for the consistency of a thick honey. That seemed to be a good call as the gel coat spread smoothly. My best recipe yet.
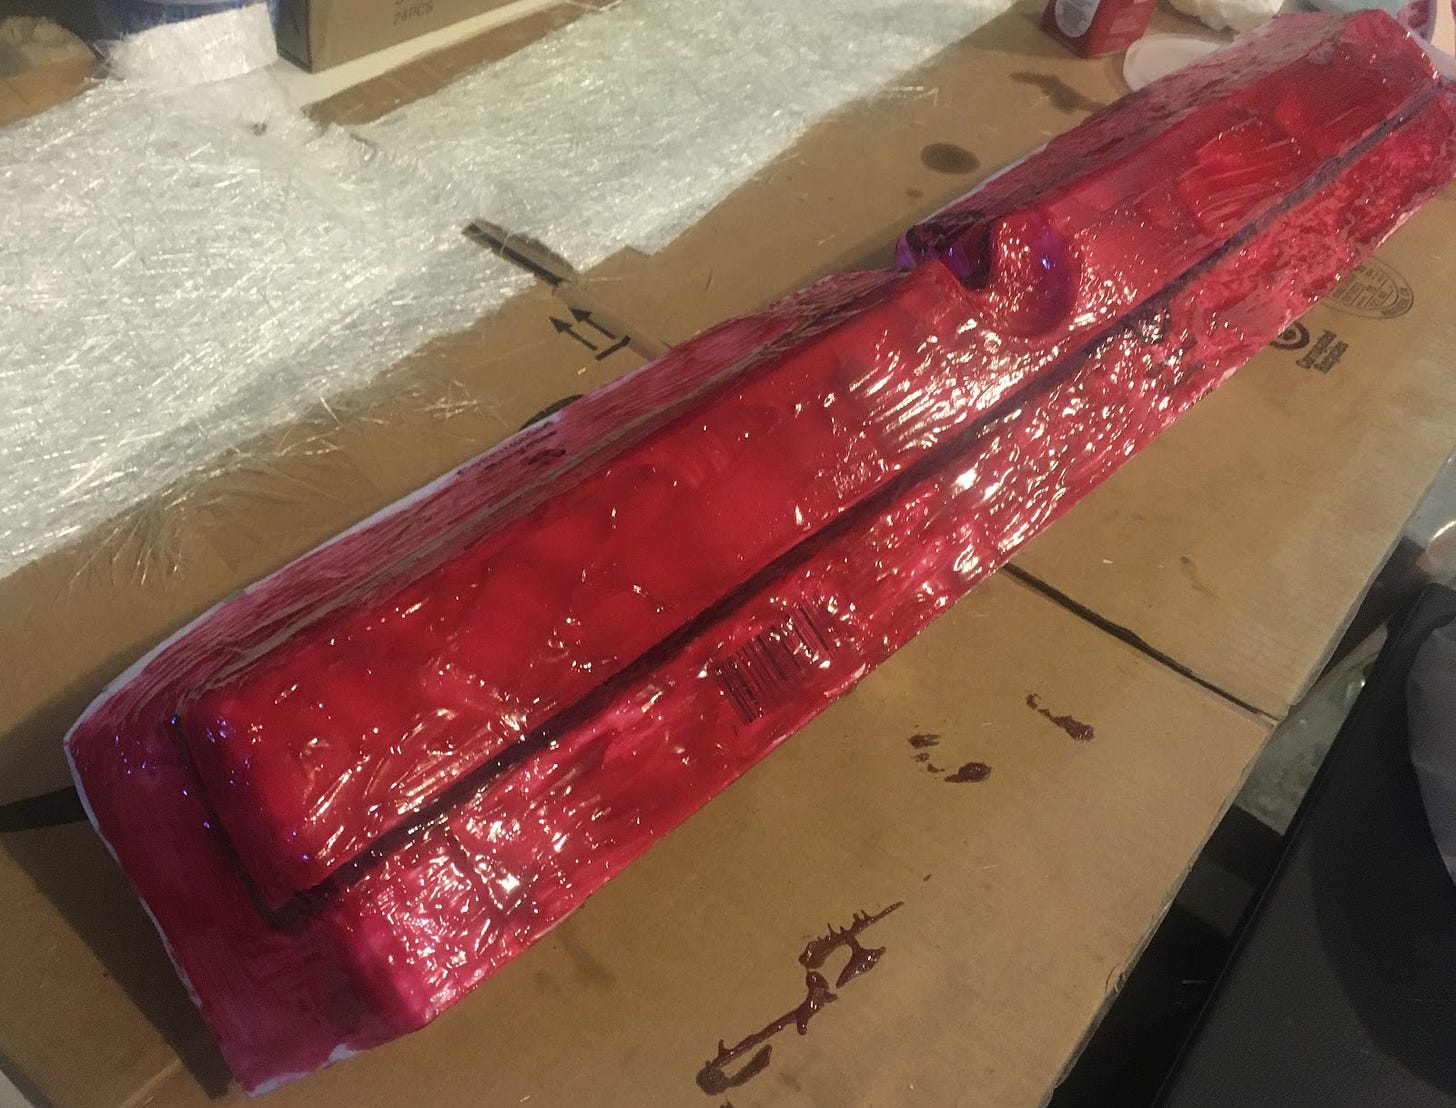
Mold-making: Fiberglass
Now came the final step of the mold-making: adding fiberglass to give structure and stiffness to the mold. When the applied gel coat got a little bit tacky, I knew it was firm enough that it wouldn’t squeeze out from under the fiberglass. I started using epoxy to glue down the fiberglass on the right half of the mold. I found that I really had to work the fabric down into the corners. The fabric was “bridging” across corners -- getting stuck on the surfaces on either side of the corner and leaving an air gap in the corner itself. Correcting the bridging was not easy. I needed more slack in the fabric so that it could properly sit down in the corners. But in order to move, the fabric had be dragged through the syrup-like glue. As I tried to combat the bridging and work the fiberglass into the corners, the epoxy that I had in my mixing cup began to cure and harden.
By the time I moved to the left hand side of the mold, the epoxy was a mucus-like consistency. I thought I could still use it, so I slathered it over the fiberglass on the left half. Bad decision. The epoxy was viscous enough that it wasn’t penetrating the fiberglass down to the gel coat. The lighter color of the fiberglass told me there were tiny air bubbles between my gel coat and fiberglass. The risk was that the two layers of the mold wouldn’t be glued together well and when I went to pull the mold off the panel, the gel coat might separate from the fiberglass. I tried working the epoxy in with my gloved fingers but to no effect. At this point, I was pretty dejected. There was still a chance everything could work out, so there was no use quitting early. But it was hard to muster up the motivation. It was hot in my garage, my back hurt from doing actual work after a few years sedentary at a desk, and my mold looked terrible. On the other hand, if I gave up now I’d have to start all over from scratch. Half suckage now versus whole suckage later. I reluctantly got back to work.
I mixed another batch of epoxy and began wetting the rest of the fiberglass down. The epoxy was workable, but there was another concern now. All the while I was fumbling around, my gel coat was curing and hardening. If the gel coat fully cured before I got the fiberglass down, the bond between gel coat and fiberglass might not be that strong. I could have the same problem that the air bubbles would have caused. The two layers of my mold might separate - each useless alone.

Knowing this, I tried to work as quickly as I could, slapping epoxy down on fiberglass and focusing more on wetting out large areas than worrying about every air bubble. It wasn’t pretty, but I had gotten one layer of fiberglass down. A second batch of epoxy and a second layer of fiberglass followed without much drama. Now it was in the lap of the moldy gods.
Some Lessons Learned
Back on my couch, I sat and stewed for a bit. The obvious mistake was that I used partially cured epoxy, but how I got to be in that situation deserved some thought. One factor was the large batch of epoxy I had mixed. I remember learning that epoxy tends to cure faster when there’s a lot of it together. Epoxy gets hot (exotherms) as it cures. Epoxy also cures faster when warm. When part of the batch begins to cure, it heats up the rest of the batch, which in turn causes the rest of the batch to cure faster and get hotter and so on. (This can and has caused fires when containers of mixed epoxies are thrown in the trash.) Next time, I’ll make smaller batches of epoxy.
Another factor was probably my late start. The garage was pretty hot by the time I got started. As I mentioned, epoxy cures quicker when it’s warm. So not only would an earlier start be more comfortable for me, but it would also give me more working time with the epoxy.
Finally, my choice of fabric for the mold likely contributed as well. I used a thick, chopped-strand fiberglass mat. It was quite good to build thickness quickly on the mold, but that thickness may have contributed to the bridging. A thinner material would conform better to curvature, meaning that I wouldn’t have to spend nearly as much time working material down into the corners. Good lessons, but ones that I hoped I wouldn’t have to use too soon in re-making this mold.
The Reveal
The next morning, the fiberglass had cured. It was time to pull everything apart and see the result. I flipped over the mold and began pulling up the cardboard flanges. These released pretty well and gave me confidence that the panel would let go of the mold easily as well. After ripping out all the cardboard, I tugged on the panel a few times. Nothing really happened, but I wasn’t too concerned at this point. In the past, when I’ve pulled things out of molds, I had to pry a good amount before the part would release all at once with a satisfying pop. So I scraped away the wax radius to give me access to the edge of the panel. I could just flex the mold a bit to give myself a gap. Into the gap, I hammered popsicle sticks, working my way along the edges until I heard a good pop.
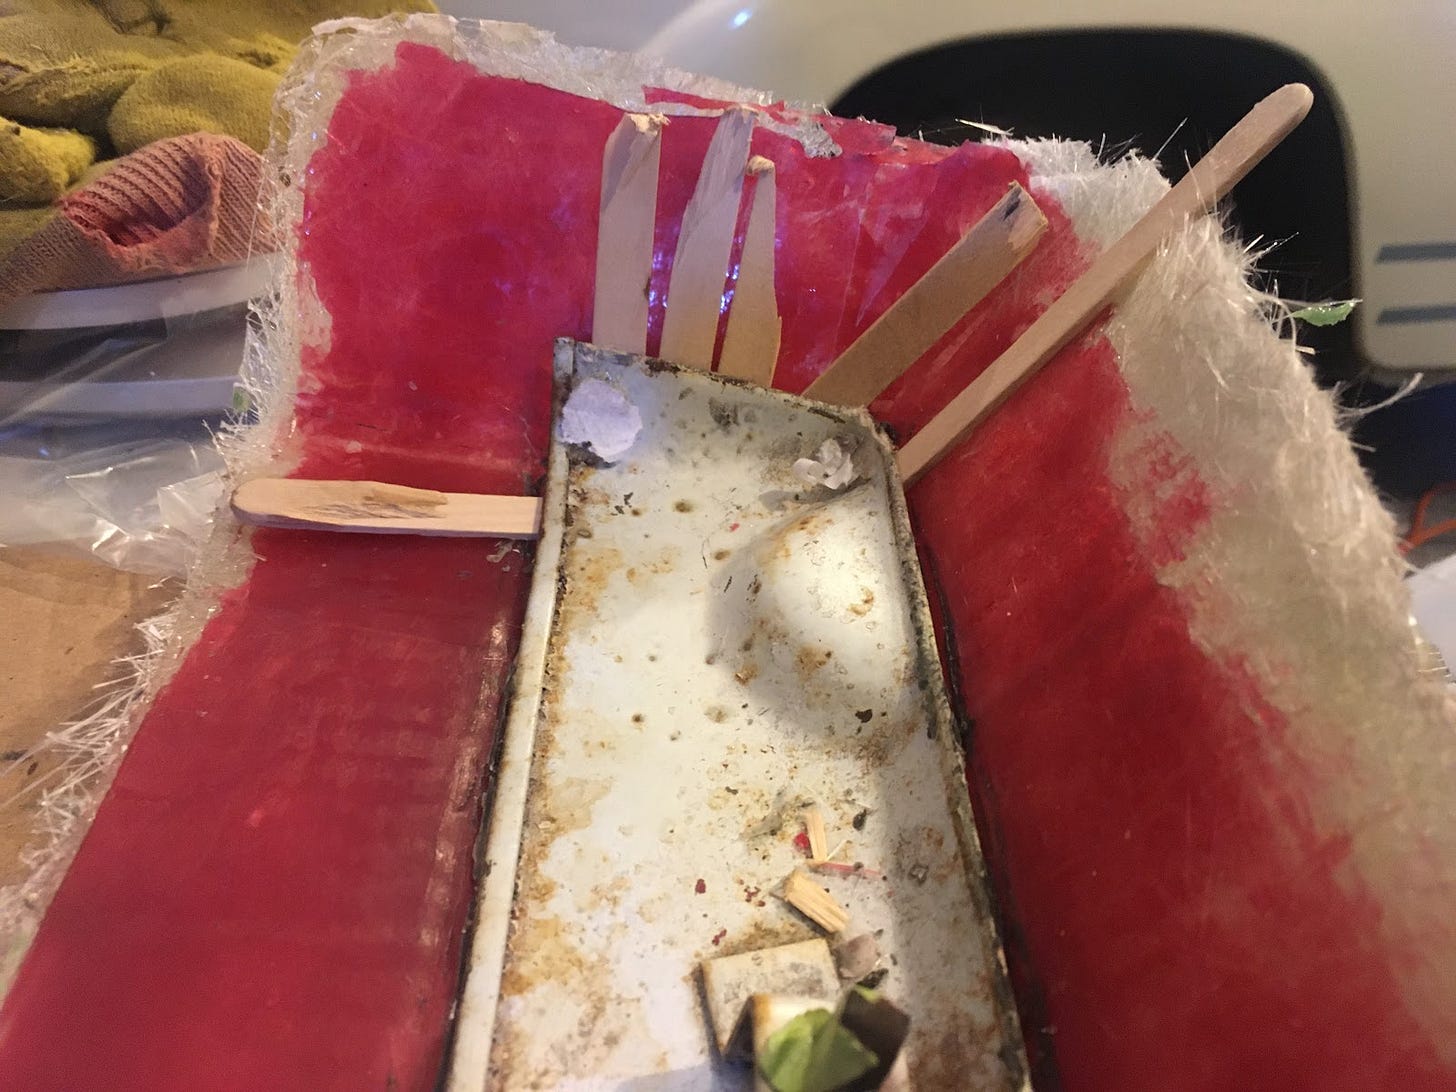
I pulled up on the panel, but only half of it released. Uh oh. I continued hammering in popsicle sticks along the edges that were still stuck until finally the whole panel came up. This is what I saw.
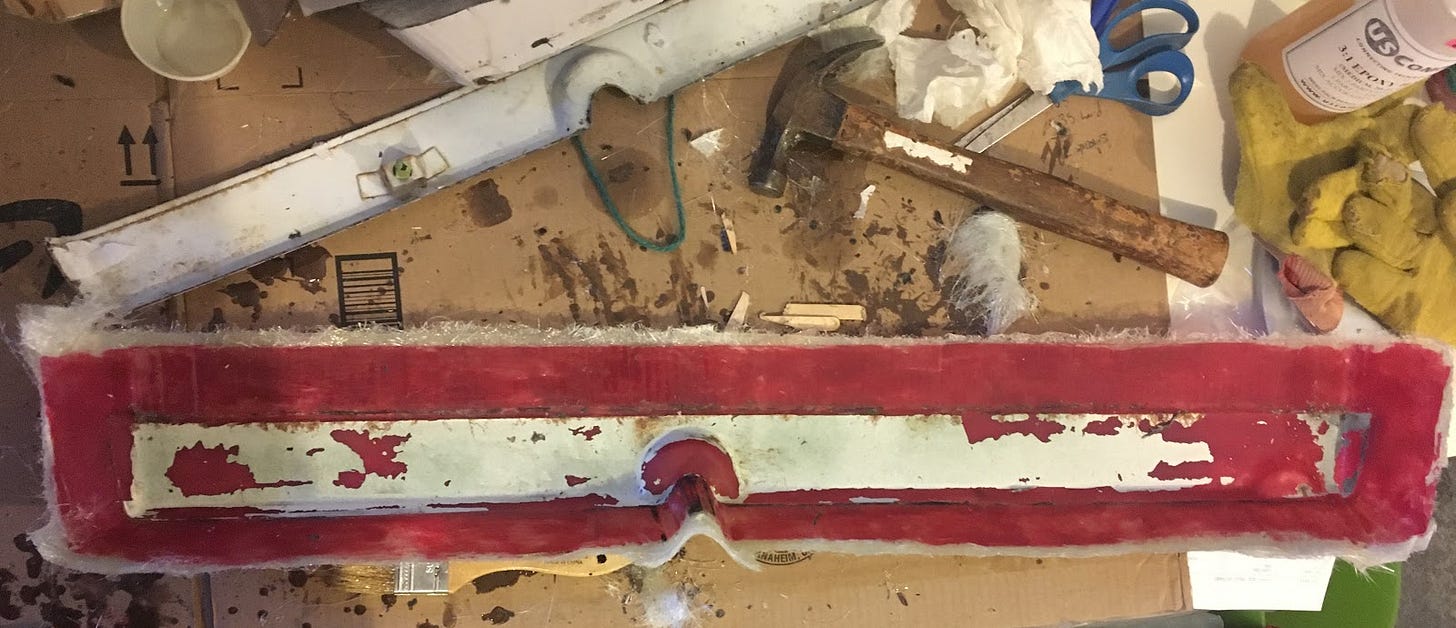
Fuuuuuuuuuuuuuuuuuuuuuuuuuuuuuuuuuuuuuuuuuuuudgemuffin.
If you can’t tell, that’s the paint from the Saab stuck to my mold. My plan - to protect the panel by adding enough slipperiness - failed miserably. I guess it’s a good thing I’m making a new panel. In my defense, there did look to be some rust forming under the paint. That probably helped the paint decide to stay with the mold rather than the panel. (Just let me have that one excuse.) Next time I might go back to the more usual wax + PVA release rather than wax + mineral oil. I think I could have polished the surface of the panel too. Instead, I had smoothed it out with 1500 grit sandpaper, which may have encouraged the surface to stick. Remember when I said I was a novice at building composites? Yeah, clearly that wasn’t false modesty.
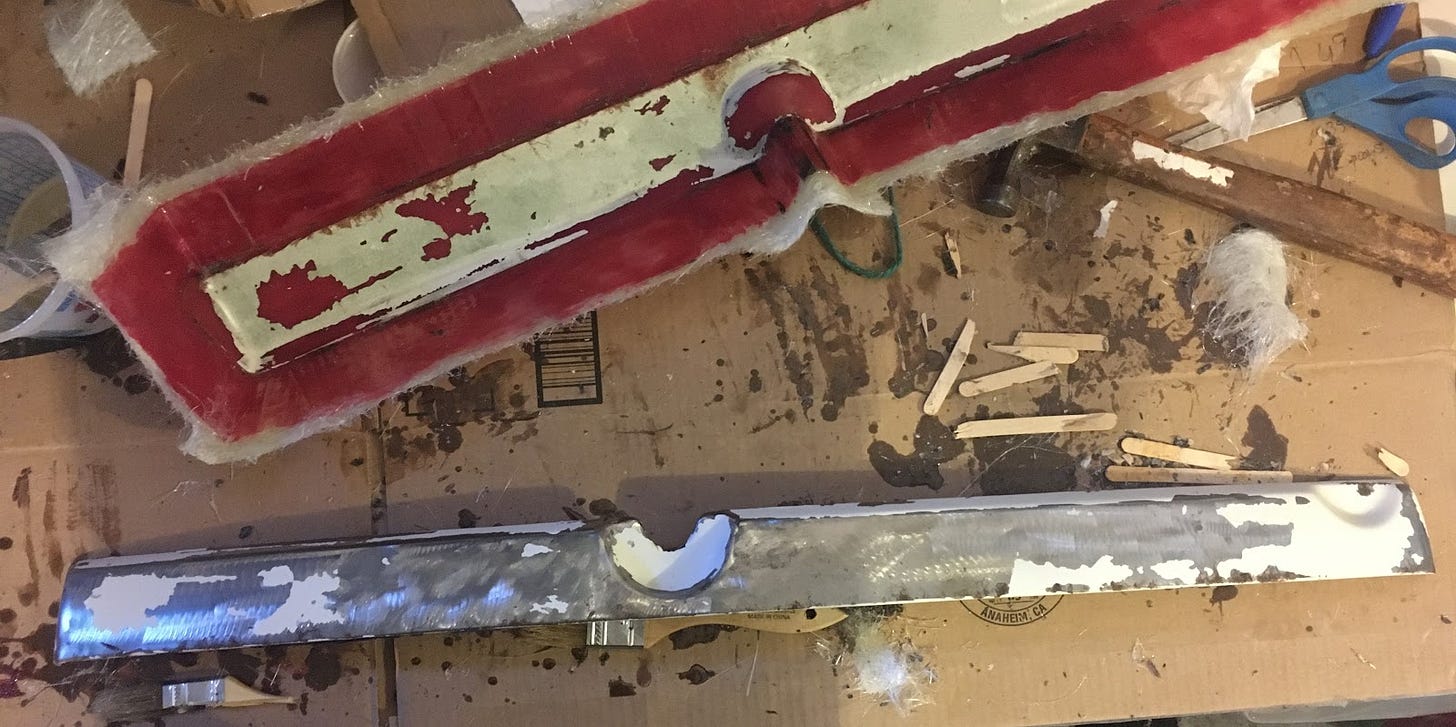
It does look like I have a usable mold under a layer of sadness. If you’ll excuse me, I have some paint to chip off.
Corrections? Questions? Comments? I’d love to have your input. If you want to get a hold of me individually, you can respond to this email or find me on LinkedIn.
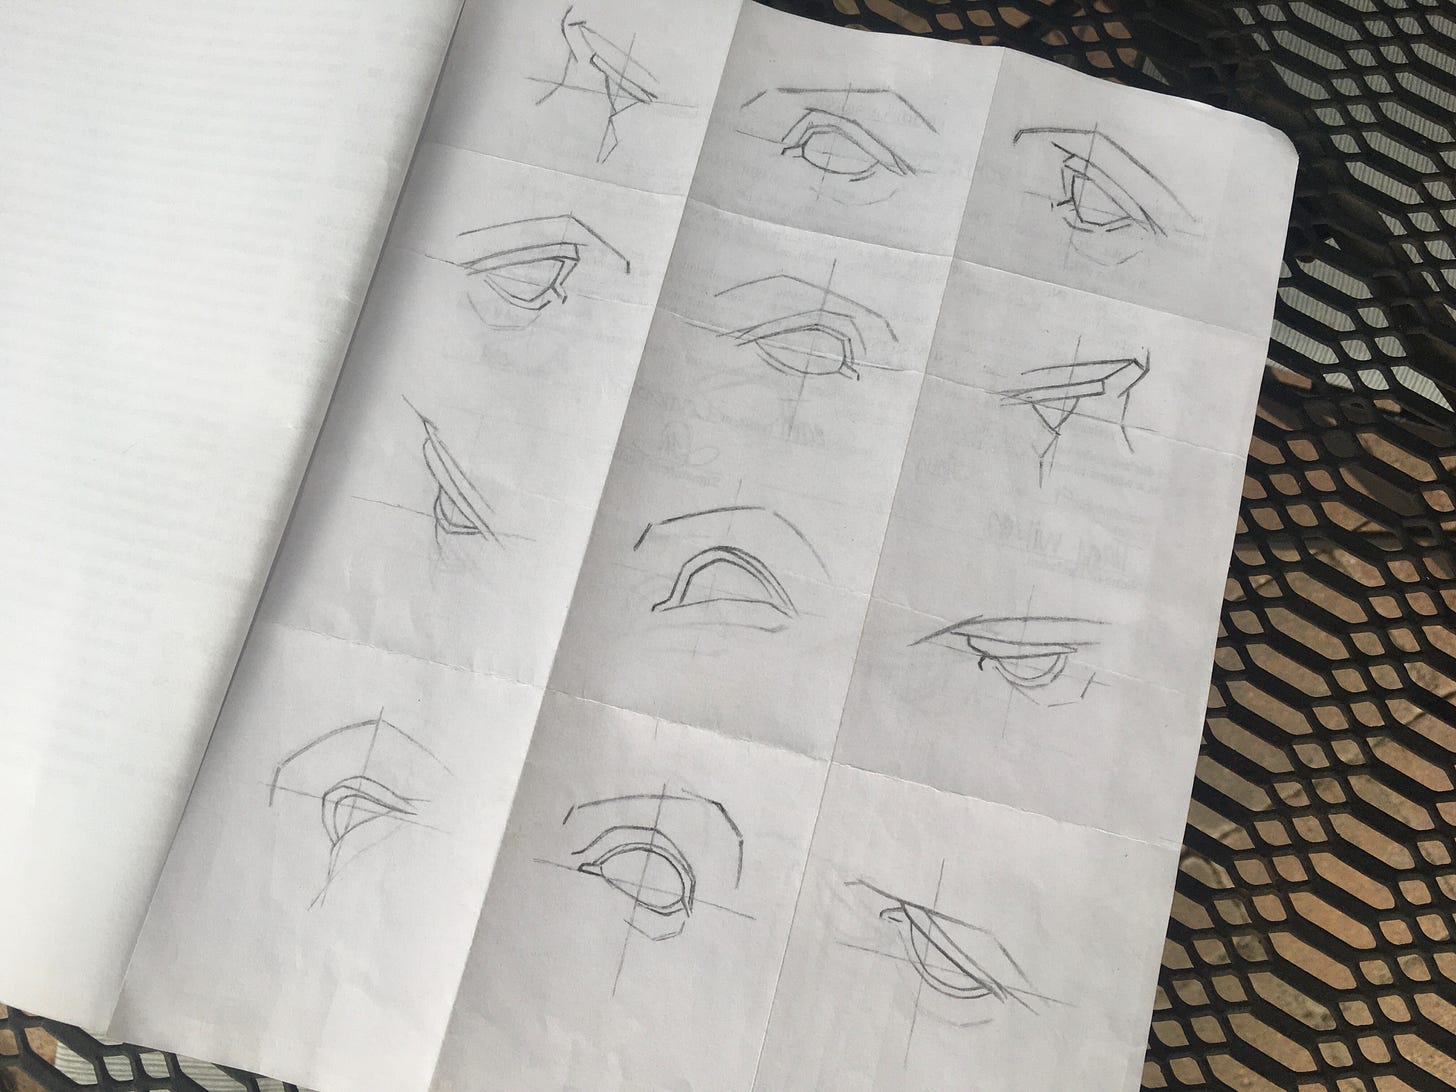
Drawing exercise #12. If you missed it, here’s why I’m learning to draw.

Done with one plate!



Oh, man, the paint left inside that mould! :S In your defence it looks like that is not the original paint job because I would not expect Saab to have used a flap disc on an angle grinder to clean up the metalwork, and it also appears as though no primer was used when painting it. But like you said: at least you're making a new panel :). We live and learn. I'm really enjoying this series, thanks for posting! Btw I'm writing this as a comment because I couldn't find an email address anywhere, perhaps you'd consider adding one to the About page?
James